
Has winter hit your neck of the woods? It definitely hit Montana and it’s snowy and beautiful outside. I don’t know about you, but cold weather always instills a craving for cozy foods like soup and pot roast, hot chocolate and gingersnaps, oatmeal or waffles.

Although working with yeast is rare for me, a few weeks ago I decided to make a batch of cinnamon rolls from scratch. Cinnamon rolls are one of my favorite decadent treats, and it’s a good thing they are such a time-consuming endeavor or I’d probably make them a lot more often. I am very particular about cinnamon rolls, and don’t often even buy them for this reason. They must be soft both inside and out, heavy on the cinnamon and light on the frosting; a thin glaze is even better. I am not one for heavy frosting on much of anything, but I absolutely feel a quality cinnamon roll doesn’t need to hide beneath cream cheese and butter.

A few years ago when my parents came to visit for Thanksgiving, my mom and I made this cinnamon roll recipe. It’s everything a cinnamon roll should be, with the light flavoring of oatmeal which I find to be a wonderful addition. Like most yeast recipes, this one takes a few hours from start to finish, although most of that is waiting around for the dough to rise.

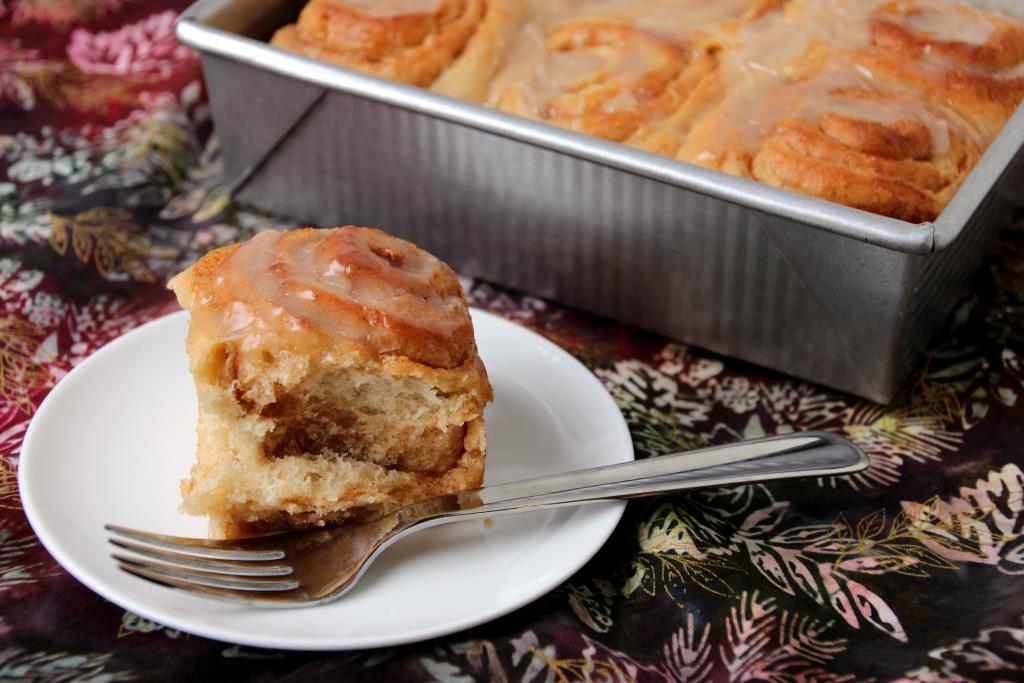
Nonetheless they result in pillowy rolls perfect for a cozy winter morning. Full of cinnamon and drizzled with a light glaze, they feel a little lighter than your average out-of-the-can variety, and the gentle oatmeal flavor is unique but delicious. Served with some savory options like scrambled eggs or sausage, these would be perfect for Christmas breakfast to treat the family this year.

If you’re appalled at the idea of waking up *even earlier* Christmas morning just to make cinnamon rolls, never fear. I am definitely not suggesting you make a hectic morning even more so, but encouraging you to make these ahead for a simple breakfast that can bake while you open presents.
Since it’s rare that I have a need for 12 large cinnamon rolls, I opted instead to cut my batch into 18 slightly smaller ones. I baked one set right away (because, yum) and put the remainder in the freezer. A couple of weeks later, I pulled them out, shoved them into a pan (with some difficulty; more on that later), and after letting them rise overnight, baked them up fresh in the morning with no more work than preheating the oven. All the delight with little of the work.
You could make these up anytime between now and Christmas and pop them in the freezer until you’re ready for them, which is great for anyone that feels the holidays get even more hectic as the actual day draws near. If you go the freezer route, I highly recommend using disposable pans and freezing the rolls in the pan. Although it’ll take a little bit more space in your freezer, it means less work once you’re ready to bake them. In their frozen state I had quite the time getting them squeezed into a pan, and this effort can be easily avoided by just freezing them that way. If, like me, you try to avoid using disposable things when possible, or just always forget to buy them, you can line the pan you’d normally use with plastic wrap, place your rolls inside, and freeze the whole thing till the rolls are hard. Then you can remove them from the pan, wrap tightly in the plastic and put in a Ziploc, and still have your dish available for using.

Splitting the batch into two pans of nine not only gives you a freezer batch ready for another day, but also results in slightly smaller rolls that are great for portion control or to be served alongside heartier additions. The next time you’re feeling up to a little kitchen challenge, make these rolls. I’m sure you and your family will love them. If you have leftovers, store them covered on the counter. The rolls are great reheated in the microwave for about 20 seconds, just enough to warm them up.
Oatmeal Cinnamon Roll
Adapted from SparkRecipes
Makes 12 or 18 rolls
Ingredients
Dough
1 packet yeast
1 cup warm water, 105 – 115 degrees
1 cup milk, warmed
1/2 cup butter, softened
1/2 cup sugar
1 egg, room temperature
3/4 tsp salt
3-4 cups white bread flour
1 cup whole wheat bread flour (or wheat all-purpose)
1 cup old-fashioned oats, ground fine in a blender
Filling
3 Tbsp butter, melted
1 cup brown sugar
1 Tbsp cinnamon
Glaze
1 cup powdered sugar, sifted
1 tsp vanilla
2 Tbsp milk
Directions
- Run the bowl of your stand mixer under hot water for one minute, or until the bowl feels warm.
- Add yeast to the bowl then gently pour in the warm water to dissolve. Let rest 10 minutes, or until foamed.
- Stir in milk, butter, sugar, egg, and salt (I do this by hand).
- Add wheat flour, oatmeal flour, and 3 cups of bread flour to the bowl. Using the dough hook, mix until well incorporated.
- If necessary, add more flour 1/4 cup at a time until the dough pulls away from the sides of the bowl. It will still be sticky. (I used a total of 3.75 cups of bread flour.)
- Cover bowl and let rise for one hour, or until doubled in size.1
- Mix together brown sugar and cinnamon, and set aside.
- Butter or spray one 9×13″ pan (for 12 large rolls) or two 8×8″ pans (for 18 medium rolls). Set aside.
- Preheat your oven to 350 degrees.
- On a floured surface, roll the dough into an 18×15″ rectangle. (I sometimes make mine slightly wider than 18″ so I can cut off the ends for more even rolls, but it’s not necessary.)
- Brush dough with melted butter, leaving one inch of a long edge clear.
- Spread sugar mixture evenly over the butter.
- As tightly as you can, roll up the long side so you end up with an 18″ cylinder.
- Reshape if necessary, then use unflavored dental floss or a very sharp knife to cut into 12 or 18 slices, then place in your pans. (Freezer option: see notes2)
- Bake for 20-25 minutes, or until golden brown and the center is 190 degrees Fahrenheit. (I highly recommend using an instant read thermometer for this!) If necessary, cover outer rolls with foil for the last 5 minutes, or until center rolls are done, to prevent excessive browning.
- Whisk together sugar, vanilla, and milk until smooth, then drizzle over hot rolls. Serve warm!
Notes
1 My favorite method for getting dough to rise consistently: Microwave a mug of water for 2.5 minutes. Move the mug to the corner of the microwave, add your bowl or pan of dough, shut the door, and let rise as usual. This keeps the dough warm and humid even if the rest of your house is cold or drafty. If you do this for both stages of rising, use new water each time to avoid super-heating it and having it explode.
2 Freezer option: Cut log into 18 slices. Either place 9 each into greased 8×8″ disposable pans (recommended) or set them onto a cookie sheet. Freeze until solid, then wrap tightly in plastic wrap and place into a Ziploc bag.
To bake: Remove rolls from freezer and unwrap completely. Place into a greased pan if they aren’t already, then cover with a thin dish towel and let rise overnight (at least 8 hours). Bake until center reaches 190 degrees Fahrenheit, about 30 minutes. You may need to cover the rolls for the last 10 minutes to prevent over-browning while the center cooks through.

Delicious delicious! Nice photos :)
Thank you!
These look just delicious Lindsey!
Thank you! I’m always a little amazed when my yeast stuff turns out well. :)
I know that feeling very well lol
My dinner rolls are a great beginner recipe! And these ones are not too bad either other than getting them tightly rolled can be a little challenging. :)