Lo Mein

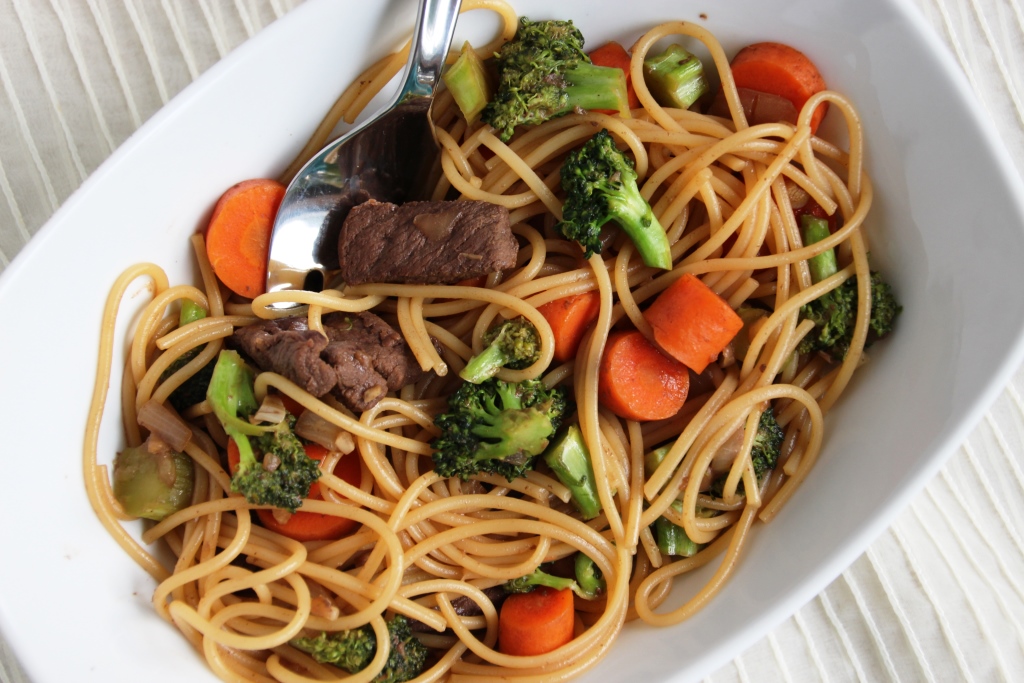
After last month’s ice cream bonanza, I thought I might make something a bit more savory. I came across this lo mein recipe on Pinterest and liked how easy it looked. I also liked that it doesn’t really require side dishes since it already includes veggies, grains, and meat. Timing different things to all finish at the same time is my least favorite part of cooking, and the main reason I prefer making desserts over dinner. Okay, that might be a stretch, but it is a pretty big reason nonetheless.

Lo Mein {{Baking Bytes}}

I prepped ahead of time by cutting all the veggies and the meat, and this saved a lot of time when I made it the following night. Putting it together took less than thirty minutes which makes it a great weeknight dinner if you have a little bit of time the night before to cut some veggies. It is still a pretty quick meal even without the prepping, especially if you’re better at cutting things than I am.

Lo Mein {{Baking Bytes}}

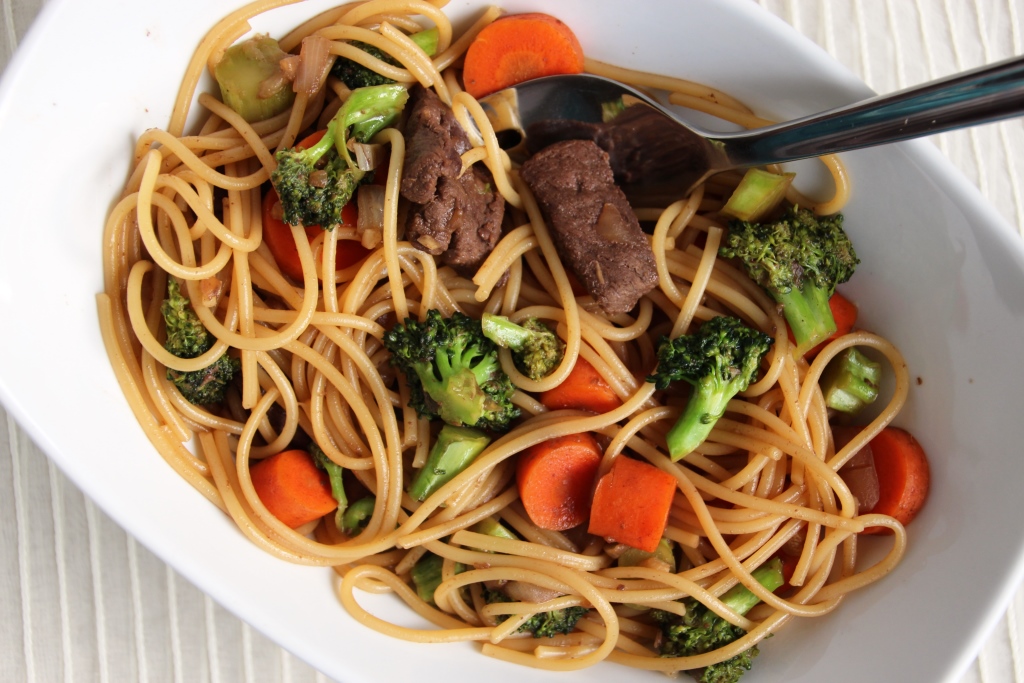
I used broccoli and carrots, but it would also be great with peas (frozen or snap), bell peppers, jalapeños, mushrooms (if you’re into that sort of thing), or whatever else you’d like to throw in there. Could also leave out the meat for a vegetarian option. It makes a bunch, so it’s great for a family dinner or as leftovers. It’s delicious, filling, covers several food groups, and reheats nicely. I’m a big fan of meals I can eat for several days, whether for lunch or dinner or occasionally both. (I told you I’m not a big fan of cooking.)

Lo Mein {{Baking Bytes}}

If you’re looking for an easy recipe to dip your toes into the waters of Asian entrées, this is a great one to start with.

Lo Mein

Adapted from Mom’s Dish
Serves 6-8

Ingredients

3 large carrots
3 cups broccoli
1 medium onion
4 cloves garlic

8 oz noodles (spaghetti, angel hair, rice noodles)

1/2 cups boiling water
2 beef bouillon cubes

1/4 cup soy sauce
1/4 cup brown sugar, loosely packed
2 tsp sesame oil

1 pound beef steak (I used elk)
oil, for frying

Directions

  1. Mince the garlic, and cut the meat and remaining veggies into bite-sized pieces. Slicing them thinner than I did will help everything to cook more evenly. Pro tip: meat is easier to slice when it is still slightly frozen. If prepping ahead of time, store in the fridge until ready to cook.
  2. Bring water to boiling (scoop out 1/4 cup for your sauce) and cook pasta as directed. Drain and set aside.
  3. Add bouillon cube to boiling water and stir until dissolved. Add soy sauce, sugar, and sesame oil and whisk to combine. Set aside.
  4. Meanwhile, in a large frying pan or wok, sauté oil, garlic, and onion for 2-3 minutes.
  5. Add meat and fry until it’s lightly browned.
  6. Add remaining veggies and fry for another few minutes until veggies are cooked but still crisp.
  7. Add sauce and noodles, mix thoroughly, and cook briefly to ensure all ingredients are warmed through.
  8. Serve immediately.

Peanut Butter Cheerio Treats

Peanut Butter Cheerio Treats {{Baking Bytes}}

When I was a kid (and to this day), I never cared much for Rice Krispies. They were better in the overly sweet, marshmallow form that graced many of my friends’ lunches, but I’d have preferred cookies or pudding any day. Instead, my mom often made what we called Cheerio treats: the peanut butter and Cheerios cousin of Rice Krispies Treats.

Peanut Butter Cheerio Treats {{Baking Bytes}}

As a household of peanut butter fanatics and Cheerio eaters, these were always a big hit. A bit crunchier than a normal Rice Krispies treat, but with the added flavor of peanut butter, these continue to be one of my favorite easy snacks. Since they are made in the microwave, they are perfect for hot days when you don’t want to heat up the oven. Even better, they only take about 15 minutes to come together, making them a great go-to recipe when you’re in need of a quick treat. Just make sure you always have marshmallows in the cupboard and you’ll be ready to go at a moment’s notice.

Peanut Butter Cheerio Treats {{Baking Bytes}}

I nearly always make them our traditional way, with creamy peanut butter and plain Cheerios, but feel free to mix it up however you like. I’ve given some suggestions after the recipe if you’re looking for inspiration. Whether you go with the original or kick it up a notch, these are a wonderful treat.

Peanut Butter Cheerio Treats

Adapted from Kraft
Makes an 8″ x 8″ pan

Ingredients

2 Tbsp butter
25 large marshmallows
3/4 cup peanut butter

3-5 cups plain Cheerios2

Directions

  1. Lightly butter an 8×8 baking dish.
  2. In a large, microwave safe bowl, heat the butter on high for 45 seconds, or until melted.
  3. Add  marshmallows and peanut butter and stir.
  4. Heat in microwave for 45 seconds, stir, heat again for 45 seconds, and stir until mixture comes together with little to no streaking.
  5. Add cereal, stirring until combined. Mixture will be stiff. After it cools slightly, you may want to use your hands to mix it further.
  6. Press into prepared baking dish and allow to cool. Cut into desired pieces (I usually do 12 or 16) and serve.
  7. Store on the counter in an airtight container.

Variations

  • Add 1/2 cup baking chips (e.g. chocolate chips, peanut butter chips) when you add the cereal
  • Press sprinkles or mini chocolate chips into the top after pressing into pan
  • Drizzle with melted chocolate chips
  • Use crunchy peanut butter instead of creamy
  • Use a different flavor of Cheerios (maybe chocolate?), or substitute Rice Krispies or Chex cereal

Notes

If, you prefer, you can heat the mixture on the stove over medium heat instead of using the microwave.
I like them gooey so I only use 3 cups of cereal; my mom uses 5 cups. The more you use the more important it is to make sure everything is combined really well so it all sticks together.