Nut Butter Trio

Last year I borrowed a food processor a few times because I had been concerned I wouldn’t use it enough to make the storage space worth it. After the third time in as many weeks that particular hesitation seemed downright silly and I promptly put it on my Christmas wish list (thanks Mom!)

Nut Butter Trio {{Baking Bytes}}

My initial interests were hummus and pesto, which I made regularly throughout the summer and fall. Thoroughly sold on food processors, I adventured into the world of nut butters. Starting with an amazing one from my favorite cookbook, Run Fast, Eat Slow, I quickly caught the bug and tried other types as well. The recipes here are all small batches so you can test them out, but I usually double them now. (If you have extra, I am pretty sure your friends will help you out – mine always do.)

nut_butters_4

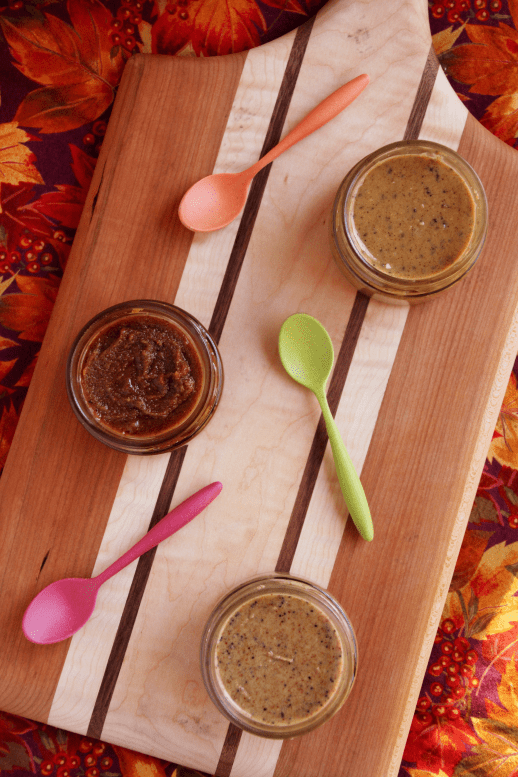
The first one (top/right, in my photos) is a minor adaptation from the RFES cookbook. Vanilla and espresso come together in a sweet and creamy peanut butter that is perfect for your morning toast or an afternoon pick-me-up. The espresso kick means it pairs perfectly with coffee and a hint of vanilla never goes wrong. I especially liked it on banana or pumpkin bread, but found I preferred the regular version with apples.

nut_butters_3

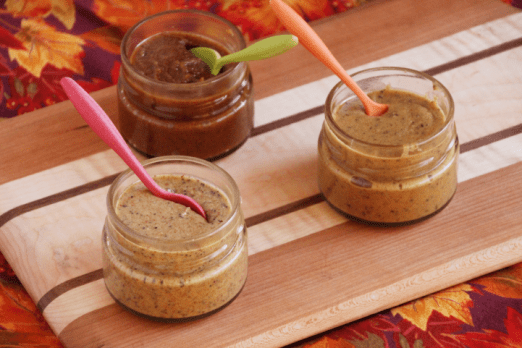
After peanuts I moved onto almonds (bottom/left). While I personally do not see the appeal of standard almond butter as a spread (unless you are allergic to peanuts), I do enjoy it in oatmeal and on yogurt parfaits on occasion. This iteration, however, is lovely on all your favorite morning carbs and especially so on oatmeal pancakes. Lightly sweetened and with plenty of poppyseed flavor, it’s a lovely twist on a peanut-free variety. For some springtime fun you could even add some lemon flavor via zest or infused olive oil to brighten the whole thing.

Nut Butter Trio {{Baking Bytes}}

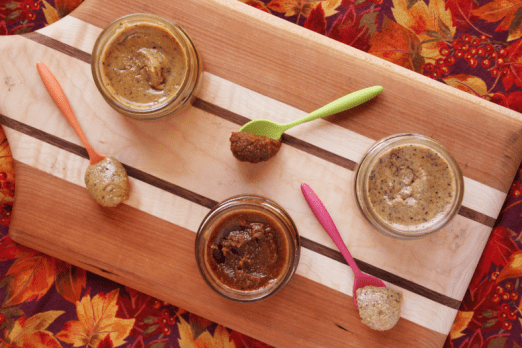
Lastly, I gave walnuts a try (the dark one, clearly). The texture of this butter turned out a little grainier (although perhaps they just weren’t roasted/processed long enough) but the flavor is possibly my favorite. Hearty walnut balanced with a chai spice blend is a match made in fall heaven and definitely needs to grace your table soon. I make my own chai spice, but it is easily tailored to fit your preferences. I enjoyed this one on toast (obviously) and waffles; a light drizzle of maple syrup only adds to the experience.

Nut Butter Trio {{Baking Bytes}}

Whichever nut butter speaks to you the most, I hope you find a new favorite in this collection. There’s something for everyone here and I hope you use it as a starting point for all sorts of experimenting in the future. These butters would also make amazing gifts for the holiday season, a small 4oz jar of each flavor would be both adorable and delicious. (If you’re wondering about the super cute jars in my photos, they are upcycled Olivelle sea salt containers, so I’m not sure where to purchase them – sorry!)

Vanilla Espresso Peanut Butter

Modified from Run Fast, Eat Slow
Makes about 1.5 cups

Ingredients

2 cups roasted, salted peanuts

1 Tbsp brown sugar, to taste
1/2 Tbsp espresso powder
1/2 tsp vanilla bean powder
1 tsp vanilla extract

1 Tbsp chia seeds, optional
avocado or olive oil, optional1

Directions

  1. Add peanuts to a food processor and process until smooth, scraping the sides as necessary. This can take several minutes but the mixture should go from grainy to clumpy to a ball and finally, to creamy.
  2. Add in sugar, espresso powder, vanilla bean powder, and vanilla extract and blend until combined.
  3. If desired, add in avocado oil (for extra creaminess) and/or chia seeds (for a protein boost) and process again until incorporated.
  4. Let cool to room temperature, then transfer to a glass jar and store in the refrigerator until ready to use. Should keep at least one month.

Poppyseed Almond Butter

Makes about 1.5 cups

Ingredients

2 cups almonds2

1 tsp almond extract
2 Tbsp sugar, to taste
2-4 tsp poppyseeds, to taste
1 tsp salt

avocado or olive oil, optional1

Directions

  1. Preheat oven to 350 degrees Fahrenheit.
  2. Spread nuts on a large rimmed baking sheet and toast about 10 minutes, or until fragrant. Do not burn!
  3. Let the nuts cool for about 10 minutes, then add to a food processor and process until smooth, scraping the sides as necessary. This can take several minutes but the mixture should go from grainy to clumpy to a ball and finally, to creamy.
  4. Add extract, sugar, poppyseeds, and salt, then blend again until completely incorporated.
  5. If a smoother texture is preferred, drizzle in avocado oil to taste.
  6. Let cool to room temperature, then transfer to a glass jar and store in the refrigerator until ready to use. Should keep at least one month.

Chai Walnut Butter

Makes about 1.5 cups

Ingredients

2 cups walnuts2

2 Tbsp brown sugar
1/2 Tbsp chai spice
1/2 Tbsp vanilla
1/2 tsp salt

avocado or olive oil, optional1

Directions

  1. Preheat oven to 350 degrees Fahrenheit.
  2. Spread nuts on a large rimmed baking sheet and toast about 10 minutes, or until fragrant. Do not burn!
  3. Let the nuts cool for about 10 minutes, then add to a food processor and process until smooth, scraping the sides as necessary. This can take several minutes but the mixture should go from grainy to clumpy to a ball and finally, to creamy.
  4. Add sugar, spice blend, vanilla, and salt, then blend again until completely incorporated.
  5. If a smoother texture is preferred, drizzle in avocado oil to taste.
  6. Let cool to room temperature, then transfer to a glass jar and store in the refrigerator until ready to use. Should keep at least one month.

Notes

Depending on how much fat/water is still in your nuts and how chunky you like your nut butters, you may not need any oil. I found I liked some of them (almond butter especially) with oil in it just to smooth it out, but it’s totally up to you! Also a great place to try an infused olive oil for a different punch of flavor.

You can certainly buy pre-roasted and salted nuts here, just skip the additional salt in the recipe. However, I found the ones I tried to be too heavily salted for my preferences. If you have access to roasted unsalted nuts then that’s even better!

Advertisement

Lavender Honey Chèvre Ice Cream

Happy July folks and welcome to round SIX of National Ice Cream Month! Crazy to think I’ve been doing this for so long but it’s honestly my favorite part of the blog year. I hope you’re ready for some new favorites because I’m pretty excited about this year’s lineup.

Honey Lavender Chevre Ice Cream {{Baking Bytes}}

Week one makes use of one of my favorite delicately sweet flavors: lavender. Since discovering lavender creme brûlée at a since-closed local restaurant, I’ve used it across many ice cream flavors. This year I was searching for something lighter and a bit more subtle, and the prevalence of lavender, honey, and goat cheese combinations inspired me to create my own version here.

Honey Lavender Chevre Ice Cream {{Baking Bytes}}

Subtly flavored with lavender (although you can pump that up to your heart’s content) gives this ice cream a light and summery feel. Partially sweetened with honey, it has that somewhat caramel-like note I personally think blends beautiful. I added a small amount of goat cheese for a little tang, reminiscent of cheesecake without feeling heavy.

Honey Lavender Chevre Ice Cream {{Baking Bytes}}

This ice cream is all that smooth and creamy goodness you’re craving with a light flavor that is fully capable on its own but I’m sure would also blend beautifully with your favorite blueberry dessert. I’ve yet to have both a blueberry pie and a batch of this ice cream ready at the same time, but one day I will test my hypothesis. If you get to it first, be sure to let me know your thoughts.

Honey Lavender Chevre Ice Cream {{Baking Bytes}}


Round out your holiday weekend with a slightly less traditional dessert, and get ready for more ice creams and salads headed your way.

Lavender Honey Chèvre Ice Cream 

Makes ~6 cups

Ingredients

1 cup whole milk
1-2 Tbsp culinary lavender1

2 1/4 cups heavy whipping cream (ish)
1/3 cup honey
1/4 cup sugar
1/4 cup chèvre (goat cheese)

1/2 cup egg substitute
1/2 tsp vanilla

Directions

  1. Gently crush the lavender buds with a spoon (or a mortar and pestle, if you’re fancier than I am).
  2. In a small saucepan, heat milk on medium until it just starts to simmer, then remove from heat. Add lavender to the milk and allow it to steep for at least 30 minutes. Taste and when it starts to seem too strong, proceed to next step.
  3. Pour milk through a fine mesh strainer into a measuring cup to remove the lavender buds, pressing gently on the buds to release the most flavorful milk.
  4. Return to lavender milk to saucepan over medium heat and add enough heavy cream to bring the total to 3 cups.
  5. Add honey, sugar, and chèvre and whisk until smooth. (You can steep in some extra lavender at this point if it tastes too subtle.)
  6. Remove from the heat and whisk in egg and vanilla. Chill thoroughly, or overnight.
  7. Freeze according to your ice cream maker’s directions, then place in a cold freezer-safe bowl to freeze for an additional four hours, or overnight.
  8. A sprinkling of lavender buds makes a beautiful topping.

Notes

1 My lavender is losing its potency so I ended up at 5 tsp and should’ve used 6, but I would start with 4 tsp and see how you feel.

Mini Chocolate Chip Bundt Cake (& Vanilla Bean Ice Cream)

Several years ago I bought a fancy Pampered Chef stoneware mini fluted pan at a garage sale for like ten dollars. I promptly put it in a cupboard and mostly forgot about it because I have a standard bundt pan as well and if I’m honest, I simply don’t make many bundt cakes other than the delightful lemon one from a few years ago. If I’m more honest, the exhausting trial and error of finding that lemon bundt cake kinda turned me off to the entire style of cake for a while.

In any case, I eventually came across an amazing looking chocolate chip cookie double-bundt cake creation from Sprinkle Bakes and her description of the flavor was basically “yes please”. Chocolate chip cookies in pretty cake form? Please put that in my mouth.

On the other hand I certainly don’t need to make the double-layer version because if I have that much cake around I will just eat it. (M would probably not consider this a problem, to be fair.) I have fantastic willpower when it comes to not buying food that is terrible for me, but I have almost no willpower for anything in my line of vision at home. Things I have learned about myself over the years are summed up by “it’s easier to avoid temptation than it is to resist it.”

But I don’t want to avoid it completely, obviously, which is why I made the “mini” version. I put the mini in quotes because six of these mini cakes is the same amount as one standard bundt, which means each cake really serves two people. A fantastic way to test out my “new” pan and a new recipe all the while being fairly confident it’ll be delightful because both Pampered Chef and Sprinkle Bakes are extremely reliable. Fortunately, my hypothesis was correct.

All the comforting flavor of a chocolate chip cookie baked into a pretty fluted bundt. It is just the kind of cake to pair beautifully with ice cream, and I opted for vanilla bean for the pretty speckles and traditional flavor pairing. I shared my recipe below, but feel free to pair with your favorite store-bought variety instead. If vanilla seems too plain, chocolate is always a good bet, or you could pair with strawberry for a summer flavor and some fun color. One cake and a large scoop is a perfect dessert for two, and is a wonderful way to end a celebratory day.

Since there is no leveling, frosting, or really any extra presentation required, this is a fantastic option for those times you need to need a less time-consuming but still impressive dessert. It also travels well since there’s no frosting to fall off or glaze to slide around, and is quick to assemble once you arrive at your destination. You could even scoop the ice cream ahead of time to save on required utensils and remove the need to let your ice cream soften beforehand. Plop on a scoop, drizzle on some chocolate sauce, and you are all set for a flawless and decadent experience. It would also be a super cute addition to a couples’ dinner party, if you’re in to the host(ess) gig.

As you may have noticed, I molded my ice cream into heart shapes. Since I made this for our anniversary dessert, I like to do a little something extra to make it special. If you’re interested in this, just line mini cake pans of your choice with plastic wrap, then spread softened ice cream (if you’re using homemade, just do this right after churning) into the pans and freeze until firm. They melt quick once they’re out and near the hot fudge sauce, so only assemble right before you’re ready to serve.

Next time you’re in the market for a cake, I highly recommend you give this one a try (whether you invest in the fancy mini-bundt pans or not.)

Chocolate Chip Bundt Cake

Gleefully borrowed from Sprinkle Bakes
Makes six 4.5″ mini bundt cakes (or one standard bundt cake)

Ingredients

Cake
3 cups all-purpose flour
2 tsp baking powder
3/4 tsp salt
1/2 tsp + 1/8 tsp baking soda

1 cup unsalted butter, softened
1 1/2 cups brown sugar, lightly packed

3 eggs, room temperature
1 1/4 cups sour cream (full fat)
2 tsp vanilla

1 1/2 cups mini chocolate chips

Toppings
Hot fudge sauce
Vanilla bean ice cream (recipe below)

Directions

  1. Preheat oven to 350 degrees Fahrenheit.
  2. Grease and flour one standard bundt pan, or a 6-well mini fluted pan.
  3. In a medium-large bowl, whisk together flour, baking powder, salt, and baking soda until completely combined.
  4. In the bowl of your electric mixer, beat butter and brown sugar on medium speed until light and fluffy.
  5. Add eggs one at a time, mixing between each addition.
  6. Add sour cream and vanilla and mix until completely combined, scraping the bowl as necessary.
  7. Add the flow mixture, mixing on low speed just until combined, then stir in the chocolate chips. Batter should be thick.
  8. Spoon batter into prepared pan and bake 30-35 minutes for mini bundt cakes (or 40-50 minutes for a standard bundt), or until tops are golden brown and a toothpick comes out mostly but not completely clean. Don’t over-bake or cakes will be a bit dry.
  9. Cool in the pan for at least 10 minutes, then invert onto a cooling rack to cool completely.
  10. When ready to serve, top one mini bundt or slice (I like to warm mine briefly in the microwave) with a drizzle of hot fudge sauce and a scoop or two of your favorite ice cream. Share with a friend (or eat it all yourself, I won’t judge.)

Vanilla Bean Ice Cream 

Makes ~6 cups

Ingredients

2 cups heavy whipping cream
1 cup half and half
3/4 cup sugar
1/2 cup egg substitute
2 tsp vanilla
1/2 tsp vanilla bean powder

Directions

  1. In a large bowl, whisk together all ingredients until completely combined.
  2. Cover bowl and chill in the refrigerator until thoroughly cold, or overnight. (Overnight is better as it will allow the vanilla bean flavor to really permeate the mixture.)
  3. Freeze according to your ice cream maker’s directions, then place in a cold freezer-safe bowl (or cake tins lined with plastic wrap) to freeze for an additional three hours, or overnight.

Lavender Vanilla Bean Ice Cream {National Ice Cream Month}

[Welcome! In case you missed it, July is National Ice Cream month. Each Wednesday in July I have shared a new ice cream recipe. If you missed the other recipes, they can be found hereherehere, and here.]

Several years ago, at a local restaurant called Over the Tapas, I tried a lovely dessert: lavender crème brûlée. Before this I’d never had lavender as a flavor, only a scent, but I was immediately a big fan. After debating attempting to copy the dessert, I decided I should probably start with standard crème brûlée before moving on to something that seemed a bit more complex.

Lavender Vanilla Bean Ice Cream {{Baking Bytes}}

Four years later I still haven’t made any sort of crème brûlée, but it still remains on the to do list. I’ll get to it some day. Maybe. In any case, I still love the idea of lavender in baked goods, so when Kristin from Pastry Affair posted her Lavender Vanilla Bean Cake, I knew I needed to try it.

However, it turns out I’m incredibly lazy about making cakes so I still haven’t done that either. It did, however, inspire a new ice cream flavor for me to work out. Surprisingly, it only took me one try to find a recipe I am perfectly happy with, so I’m sharing it with you all today.

Lavender Vanilla Bean Ice Cream {{Baking Bytes}}

Delicate (but not subtle) lavender combined with the familiar flavor of vanilla bean, this ice cream is the usual smooth and creamy concoction with the somewhat unusual twist of lavender. As mentioned, it is not a subtle lavender but it’s not overwhelmingly strong either. I even got several opinions on this just to make sure I didn’t need to tone it down. It pairs beautifully with vanilla bean, as expected, and the black specs add a little bit of interest.

Lavender Vanilla Bean Ice Cream {{Baking Bytes}}

I strained the buds from the ice cream but a few sprinkled atop each serving is pretty without making the texture strange.

Lavender Vanilla Bean Ice Cream {{Baking Bytes}}

This lovely addition to my repertoire finishes up National Ice Cream Month. I hope you found a new favorite, or at least some ideas to think about. Thanks for joining me and I’m sure it’ll be back next year with a brand new round of flavors.

Lavender Vanilla Bean Ice Cream {{Baking Bytes}}

(And if you’re overwhelmed with all the sugar this month, check back in a couple of weeks for a healthy entrée.)

Lavender Vanilla Bean Ice Cream 

Makes ~6 cups

Ingredients

1 cup whole milk (not half and half; 2% is okay if you must)
4 tsp culinary lavender

1 cup sugar
2 cups heavy whipping cream
1/2 cup egg substitute
2 tsp vanilla
1/2 tsp vanilla bean powder

Directions

  1. Gently crush the lavender buds with a spoon (or a mortar and pestle, if you’re fancier than I am).
  2. In a small saucepan, heat milk on medium until it just starts to boil, then remove from heat. Add lavender to the milk and allow it to steep for about 30 minutes. Pour milk through a fine mesh strainer to remove the lavender buds, pressing gently on the buds to release the most flavorful milk.
  3. In a large bowl, whisk together remaining ingredients with lavender milk until completely combined.
  4. Cover bowl and chill in the refrigerator at least 8 hours, or overnight.
  5. Freeze according to your ice cream maker’s directions, then place in a cold freezer-safe bowl to freeze for an additional three hours, or overnight.
  6. A sprinkling of lavender buds makes a beautiful topping.

Notes

1 I found that with the reduced fat from my usual recipe the ice cream froze a lot harder. I attempted adding a little vodka to rectify this, but I didn’t care for the added flavor. Instead, just let the ice cream rest on the counter for 5-10 minutes before you intend to eat it to make it easier to dish.

Vanilla Bean Cupcakes and Buttercream Frosting

Vanilla Bean Cupcakes {{Baking Bytes}}

Happy belated Mother’s Day to all the moms out there, but especially to mine for being my proofreader (and just generally awesome). Thanks Mom!

Treadwell Ditch Trail 2013

This month my best friend finished her Master’s degree in Computer Science, which is super exciting! To celebrate the occasion I offered to make cupcakes for the party. The first time I made these cupcakes, a year ago, they turned out delightful so I decided to revisit the recipe.

Vanilla Bean Cupcakes {{Baking Bytes}}

Some of you may be thinking, “Vanilla? How boring.” but I assure you these cupcakes are amazing. Unless you are just completely anti-vanilla, in which case I think you might want to get that checked out. These cupcakes are light and summery with a full vanilla flavor and pretty specks of vanilla bean throughout. They are quite delicious on their own, but of course make a great base for almost any frosting. For this occasion I used the vanilla buttercream from the original recipe, as well as a blackberry buttercream I sort of made up as I went. Although it was delicious, it’s not quite ready to share. But don’t worry, it’ll definitely be up here soon.

Vanilla Bean Cupcakes {{Baking Bytes}}

This is a very beginner friendly recipe as well as an excellent staple for the experienced baker. The original recipe calls for a vanilla bean, but I substituted vanilla bean powder which you can buy off Amazon. I love vanilla bean powder because it’s far less hassle (and cheaper!) than whole beans but has a much stronger flavor and the lovely specs that extract doesn’t. You can also use it in place of vanilla extract (or in addition to) in pretty much any baked recipe. I hear it’s also great to add a little to your coffee grounds before you brew it, but I haven’t personally tried this (yet).

Vanilla Bean Cupcakes {{Baking Bytes}}

These cupcakes are great for any occasion, but they are best for decently large parties as the recipe makes over three dozen. You could try shrinking the recipe, of course, but I suspect your friends would prefer you had extras to give away.

Pair with the vanilla bean buttercream frosting below, or your favorite frosting recipe. It would go great with a whipped cream frosting if you want to keep the whole concoction extra light. Maybe even Bailey’s whipped cream.

Vanilla Bean Cupcakes

Adapted from Bella’s Bistro
Makes so many cupcakes (~40)

Ingredients

3 cups cake flour (or all-purpose)
1 Tbsp baking powder
1/2 tsp salt

1 cup unsalted butter, room temp
2 tsp vanilla bean powder

2 cups sugar
4 large eggs, room temp

1 1/4 cup buttermilk
1 tsp vanilla extract

Directions

  1. Preheat oven to 350 degrees Fahrenheit and line muffin tins with cupcakes liners.
  2. In a small bowl, whisk together flour, baking powder, and salt; set aside. Use an electric mixer on medium speed to beat butter and vanilla powder together until light and fluffy, 3-4 minutes.
  3. Add sugar and beat until completely combined.
  4. Add eggs one at a time, mixing until just combined after each one. You may need to scrape down the sides of the bowl.
  5. In a small cup, mix together buttermilk and vanilla extract; set aside.
  6. Beginning and ending with the flour mixture, add in alternating additions with the buttermilk, mixing on low speed just until incorporated between each addition.
  7. Scrape the sides of the bowl if necessary, and mix an additional 15 seconds.
  8. Using a 3 Tbsp scoop, fill the cupcake liners and bake for 18-20 minutes (a toothpick should come out clean).
  9. Let rest at least 5 minutes in the pan, then remove cupcakes to a wire rack to cool completely.
  10. Frost and decorate as desired.

Vanilla Bean Cupcakes {{Baking Bytes}}

Vanilla Bean Buttercream Frosting

Adapted from Bella’s Bistro
Makes enough for ~20 cupcakes

Ingredients

1 1/4 cups unsalted butter, room temp

2 1/2 cups powdered sugar

2 Tbsp heavy cream
2 tsp vanilla extract

Directions

  1. Using an electric mixer, beat butter on medium-high speed until smooth.
  2. Add sugar and beat on low speed until incorporated completely.
  3. Stir in vanilla and cream, then beat on medium-high speed for a few minutes until light and fluffy.
  4. Pipe or spread on completely cooled cupcakes as desired.