Meatloaf Grilled Cheese

I’m baaaaack.

Wow.

The world is a vastly different place than when I made my sabbatical announcement a few short ridiculous months ago. I hope all of you are staying safe, healthy, and socially distanced in this unprecedented time. Like many of you, I’m sure, I am focusing some of my energy into the kitchen, treating myself to nice breakfasts and lunches I wouldn’t normally have time for when working in the office. I haven’t yet jumped on the sourdough bandwagon…but there’s still time. So much time.

Elkhorn Mountains, Montana

Amongst the creative endeavors I find myself craving soul comforts: long runs, blueberry pancakes, quiet mornings with coffee, ice cream for dessert, and post-dinner walks with M. Comfort food is an easy way to feel more grounded in times of turmoil and no better time than now to really cozy up your lunches and dinners. In light of that, in addition to it being National Grilled Cheese Month, I’m sharing one of my favorites.

Meatloaf Grilled Cheese {{Baking Bytes}}

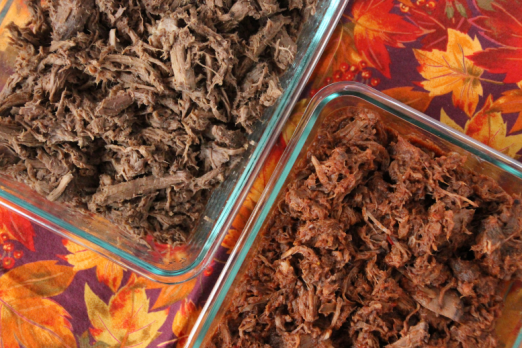
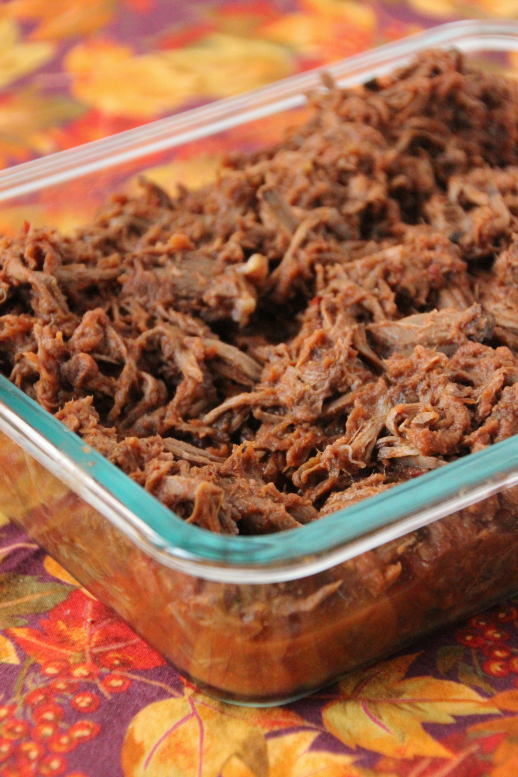
Meatloaf is a staple entree in our household and the reason I don’t have a recipe on here is because M is nearly always the one that makes it! Also, honestly, because it’s not that photogenic. If you don’t have a go-to recipe, I’ve put ours in the notes.2 In any case, this is an excellent way to use up leftovers but it’s also a sure-fire excuse for making one in the first place. Treat yourself to a delightful cozy experience and make one tonight.

meatloaf_gc_4

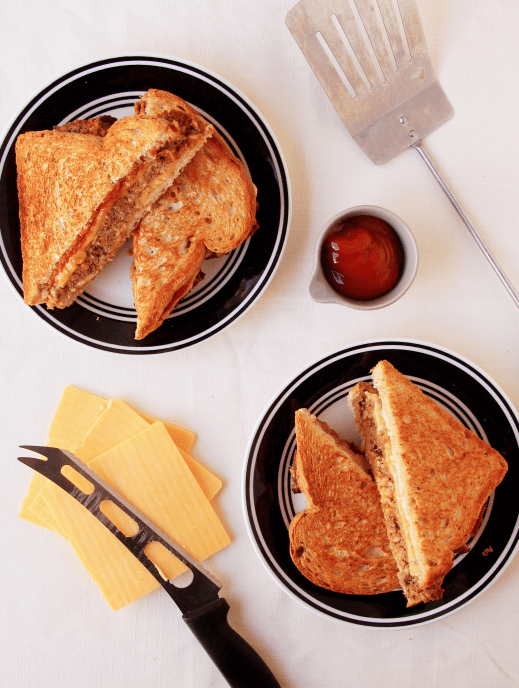
Crispy bread and melty cheese envelope comforting meatloaf, lightly accented by your favorite condiments. I like to use a fancy mustard and a little mayo, but if you are a ketchup person I don’t judge. Switch it up by going fusion with different condiments and cheeses and you can make this meal as low-key or extravagant as you need right now. Sunday is National Grilled Cheese Day, in case you want to start a new Easter tradition. Either way, I promise it’ll make a cozy addition to your evening.

Meatloaf Grilled Cheese

Makes 1 sandwich

Ingredients

1 Tbsp olive oil (garlic infused, if you have it!)

2 slices bread (I like to use sourdough)
condiments, to taste
thinly sliced cheddar, enough for both bread slices
1-2 slices leftover meatloaf, thickness to taste

condiment ideas, optional but recommended
mayo
mustard
ketchup
bbq sauce
smoked balsamic
chimichurri

Directions

  1. Add olive oil to a medium-large pan (big enough to fit bread side-by-side, and heat over medium-low.
  2. Spread bread slices with condiments of choice.1
  3. Arrange cheese atop your condiment-laden bread.
  4. If you don’t have a microwave, add your meatloaf to one slice.
  5. When the oil is hot, add both slices of bread to your pan and cover with a lid, then cook until cheese is melty and bread is golden. Reduce heat if bread is browning too fast.
  6. If you do have a microwave, heat your meatloaf separately now, then add to one slice.
  7. Top with the other slice, cheese side down (duh) then flip and cook for an additional 30-seconds.
  8. Enjoy immediately, sliced in half and served with a side of veggies, if you like.

Notes

1 I like to do mayo on one side and a fancy mustard on the other; M prefers a mayo/spicy mustard mix + ketchup. Also a great spot for a dash of chimichurri sauce, teriyaki sauce, or whatever fusion situation you can dream up.

2 In a medium bowl, combine: 1-1.5lbs ground venison (or beef), 1 egg, 3/4 cup oats, 1 cup canned tomato sauce, 1/4 cup finely diced onion, and herbs to taste. Coat a glass loaf pan with nonstick spray and bake at 350 degrees Fahrenheit for 55 minutes. Carefully pour off excess liquid and allow to cool 5-10 minutes before slicing.

Advertisement

Pulled Venison (or Elk)

(Fair warning, this is somewhat of a novel-length post.)

In case you are overwhelmed with posts for cookies, fudge, egg nog, hot chocolate, and gingerbread houses, here’s a nice healthy entrée to get you through the season. Better yet, it’s made in the slow cooker so you can continue your holiday baking extravaganzas knowing there’ll be a savory dinner at the end of the day.

With M’s prolific hunting seasons, our freezers (yes, plural) are not often empty. Even in light years he harvests an ample amount to last the next year, and more often than not we are eating meat from a couple of seasons prior. Last to go are always the roasts. Although I do enjoy pot roast, it is something I tire of relatively quickly and as a result, the occasions M makes it for dinner are plenty for me. As a result, we typically have more deer and elk roasts on hand than I really know what to do with.

Pulled Venison {{Baking Bytes}}

Pulled pork is possibly one of my favorite meals, and I’m thrilled every time it shows up at a barbecue or on a menu. However, as many of you can probably guess, I never make it myself because we really don’t buy meat beyond bacon and the occasional sausage (although with this year’s experiments and an extremely fun class from Chef Nic of Grotto Meats, sausage will likely become our own too.) As such, when a potluck this summer had pulled elk as an option, I made a point to seek out the cook for some tips and tricks. Even better, he was more than willing to share his methods with me.

Having previously tried pulled elk once or twice, it just never quite got to the “pulling” stage as well I’d have liked it. Given how much less fat is in an elk or venison roast, I was pretty sure there was something extra required to get it to work. Potluck guy shared that he slow cooks it in “a lot of lime juice, and some water, but really a lot of lime juice” and that acidic component helps to break down the meat. He then pours out that liquid, shreds the meat, and carries on with a sauce as normal. With my mind officially blown, I set off to try my own version.

pulled_deer1

I mixed “a lot of lime juice”, some apple cider vinegar, and water into the slow cooker and then added my roast. Slicing the roast into 2-3″ chunks gives it more surface area to cook, and I think results in a more even texture. After letting that go for eight or ten hours, I poured it out and added my own chipotle concoction. A short simmer later, and my Mexican-inspired pulled elk was delightful atop salad, tacos, or scrambled eggs.

While this method does require an extra step compared to your standard pork options, it is a wonderful way to use game meat and requires less than twenty minutes of active cooking time. Even better, you can easily double it and make more than one sauce (transfer one flavor to a saucepan to simmer together) giving you multiple options in the same amount of time.

pulled_deer3

As a side note: I also discovered that, for me, slow cooking during the day is too long because I’m often gone for 12 hours on weekdays, especially in the summer. Instead, I do the first cook overnight, let the sauce simmer while I’m getting ready for the day, and then store it in the fridge. That way it just needs to be heated for dinner since it’s all cooked and ready to enjoy.

This method works equally well with either venison or elk roasts, and as mentioned it’s easy to increase the amounts for extras. Either make multiple flavors (as shown from my pictures) or just shred one of them and store it in the freezer. Then you can simply pop the shredded meat into some sauce and you’re ready to go once it’s warmed through.

pulled_deer2

This would be a great holiday dinner, either for the big day or for one of the days after when the excitement wears off and the exhaustion sets in and everyone is like “holy crap where did 2018 go?” I don’t know where it went, but I do know I can enjoy some tasty dinners while I try to figure it out.

Pulled Venison/Elk

Makes one 3-4lb roast1

Ingredients

3-4 lbs venison or elk roast
1/2 cup apple cider vinegar
1/4 cup lime juice (or lemon, but I prefer lime)
1 – 1 1/2 cups water

Chipotle sauce (great for tacos!)
1/2 cup tomato sauce
1/2 cup water
2-4 Tbsp lime juice
2 Tbsp olive oil
1-2 chipotle peppers in adobo
2 cloves garlic
2-3 tsp chili powder
1-2 tsp oregano
1/2 tsp red pepper flakes

Apple cider sauce (great for winter salads!)
1 bottle hard apple cider
1 tsp cinnamon
1/2 tsp cumin
1/2 tsp cayenne (for a little kick)

Directions

  1. Turn slow cooker to low and mix together vinegar, lime juice, and 1 cup of water.
  2. Slice roast (the short way) into 2-3″ wide chunks, and gently place into the liquid mixture.
  3. If necessary, add additional water. The meat does not need to be completely submerged but it should be mostly covered.
  4. Cook on low for 8-10 hours, or until it shreds easily.
  5. Remove meat from crock, and pour out the liquid. Be sure the outside of the crock is wiped clean then return it to the heating element.
  6. Shred the meat and put it back in the crock.
  7. Mix the sauce ingredients (use a blender for the chipotle sauce) and then stir into the meat. (Or use 8-12oz of your favorite sauce.) If it’s too thick, stir in additional water; mixture should be loose but not super watery.
  8. Continue to cook (can bump it to high if you are in a hurry) until the sauce is heated through and most of the liquid is heated through, at least 30 minutes.
  9. Meat is great for sandwiches, tacos, salads, toast, scrambled eggs, or just straight out of the pot. Freeze or refrigerate leftovers.

Notes

You can easily double the recipe to feed a crowd or put some in the freezer for later. Start with one recipe of liquid and twice the meat first as you may not need fully double the amount of the initial cooking liquids.

Teriyaki Meatballs

Like many teenagers, I rarely packed a lunch for school. Possibly unlike many teenagers, this was mostly because my objectively large lunch group was typically so annoyed at my exceedingly slight build they would just hand me food to eat. Albeit a little annoying in its intent, my laziness won out over my dignity and I happily accepted nearly anything people were willing to share. At some point during my high school career, a place next door started a lunch business serving bowls of Asian-inspired cuisine, like General Tso’s chicken and sweet & sour pork. They were all $5 per bowl and came with white rice, so my favorite teriyaki chicken bowl became somewhat of a staple food in my life. I was much too cheap to fork over my own money very often, but would delightedly finish off other’s leftovers or graciously accept a gift if one of my extremely generous friends felt so inclined.

These days I nearly always pack my own lunch and try to aim for healthier options, but my love of teriyaki has not waned. I rarely eat it, for reasons unknown, but when I saw these teriyaki meatballs on Damn Delicious I knew I had to give them a try. With a freezer full of venison, antelope, and elk, I did not opt to buy the ground pork advised in her original, but I thought my all venison version was exceptional. With this in mind I believe nearly any species of ground meat would suffice, but if you prefer the mixed meat combinations then by all means please do so.

Moist and flavorful, the meatballs are pretty excellent all on their own but also obviously improved by a delicious teriyaki sauce. I made the original version as directed the first time, but found it far too sweet for my personal taste. Although it was delicious, it was more along the lines of a sweet & sour profile than a savory and tangy teriyaki. As such, I’ve made some alterations, mostly cutting the sugar in half, which resulted in just the right amount of sweetness for me. If you like a sweet teriyaki sauce, you can certainly increase the sugar along the way.

I paired mine with my favorite wild rice mix and a side of roasted broccoli, which rounded out into a lovely dinner. The meatballs and sauce would also be excellent as an appetizer (don’t forget the toothpicks!) or as a fun twist on a meatball sandwich or wrap (I’d garnish mine with sprouts.) I like lots of sauce so I made a large batch; if you have leftovers, it’ll be great drizzle over veggies or salad, mixed with scrambled eggs, or paired with grilled chicken or salmon. I never worry about extra sauce, but if you’re not a big sauce person or are serving these as an appetizer, you could likely cut the recipe in half.


This is a great summertime meal, and to cut down on prep time just roll the meatballs ahead of time and store in the fridge till you’re ready to bake. If you have a second baking sheet you can roast your veggies at the same time while you make your sauce and cook the rice, and within 30 minutes dinner will be ready. The whole shebang also reheats great so look forward to those leftovers tomorrow.

Teriyaki Meatballs

Adapted from Damn Delicious
Makes about 2 dozen meatballs

Ingredients

Meatballs
2 lbs ground meat of choice (or combination; I used venison)
1/2 cup Panko (bread crumbs)
2 large egg yolks
2 green onions, sliced thinly
2 cloves garlic, minced
1 Tbsp soy sauce
1 Tablespoon freshly grated ginger (or 1/8 tsp ground ginger)
1 tsp pepper

Sauce1
1 cup soy sauce
1/2 cup brown sugar (not packed)
1/2 cup honey
2 tsp ground ginger
1 tsp garlic powder

1/4 cup cornstarch
1/2 cup cold water

Optional toppings: green onion, sesame seeds, parsley

Directions

  1. Preheat oven to 400 degrees Fahrenheit. Line a baking sheet with aluminum foil and coat lightly with olive oil or cooking spray. Set aside.
  2. In a large bowl, add all meatball ingredients. Use your hands (yes it’s messy) to mix together until completely combined.
  3. Roll 2 Tbsp into a ball and set on prepared baking sheet; repeat with remaining meat mixture, leaving at least 1″ between meatballs.
  4. Bake for 20-25 minutes, or until nicely browned and cooked through (165*F on an instant-read thermometer).
  5. While the meatballs are baking, add soy sauce, brown sugar, honey, ginger, and garlic powder to a small saucepan.
  6. Heat over medium until sauce reaches a simmer, then taste carefully (don’t burn your tongue!). For a sweeter sauce, add additional brown sugar and return to simmer.
  7. Whisk together cornstarch and water and slowly stream into the pan, whisking constantly.
  8. Continue to heat over medium, whisking often, until mixture thickens to desired consistency (for me this was 5-10 minutes, I like it thick).
  9. For an appetizer: pour some sauce into a shallow bowl or serving dish and arrange meatballs inside. Drizzle additional sauce over the meatballs and sprinkle with sesame seeds or other garnish.
  10. For an entrée: serve atop your favorite rice or grain; roasted broccoli or Brussels sprouts make an excellent side.

Notes

If you’re serving these as an appetizer, you can probably make half the amount of sauce, but I don’t consider extra teriyaki sauce to be a burden so really it’s up to you.

Secret Veggie Spaghetti Sauce & Italian Meatballs (and Roasted Spaghetti Squash)

Shortly after I got my snazzy immersion blender I came across a recipe for veggie-packed spaghetti sauce. It was made in the crock pot, which sounded awesome, but as someone who doesn’t like crazy chunky sauce I wasn’t super psyched about the amount of diced vegetables packed into it, mainly for textural reasons. Immersion blender to the rescue!

Secret Veggie Spaghetti Sauce & Italian Meatballs {{Baking Bytes}}

I tweaked the recipe to use vegetables I actually like (not a fan of mushrooms or eggplant, sorry) and made it on the stove so I could puree some of it before adding the things I wanted to stay whole. You can easily add or remove items to suit your preferences, next time I will definitely add sliced olives. M has such a strong hatred of them I forget I can add them when he’s not around. I think a couple handfuls of spinach added to the pureed mixture would be great also.

Secret Veggie Spaghetti Sauce & Italian Meatballs {{Baking Bytes}}

With veggies secretly packed into what a appears to be a normal spaghetti sauce, this is a great way to trick your kids (or yourself) into eating some extras at dinner time. I will perhaps use a slightly smaller head of cauliflower in the future (mine was more medium than small) but overall it turned out fantastic. Tomatoes and spices galore, with some diced red bell peppers for variety. If you leave the sauce meatless it’s a great vegan option, but if you’re of a more carnivorous persuasion, read on.

Because I was feeling particularly ambitious that weekend, I also made Italian meatballs. Extra juicy and perfectly spiced, they were wonderful with ground elk but I’m sure ground beef would be delicious also. This was a super easy recipe that would pair well with any sauce, even a jarred version, just make sure they have time to simmer in the sauce for about 15 minutes to ensure they are cooked through. Or if you are making them to freeze, turn the heat down on your frying pan, add a lid, and steam them for several minutes. For an easier meat option, skip the meatballs and add a pound or two (it makes a lot of sauce) of your favorite ground meat, already browned, during the final simmering step. You should have enough to feed the whole family and probably still put some in the freeze for later.

Secret Veggie Spaghetti Sauce & Italian Meatballs {{Baking Bytes}}While pureeing it can be quite thick so have patience during this step; other than that it’s just a matter of chopping vegetables and opening some cans – super easy. Make a batch for dinner, put half in the freezer, and you’ll have homemade sauce ready to go on a day you don’t feel much like cooking. Serve with roasted spaghetti squash (directions below) or your favorite pasta, with freshly grated Parmesan and pepper, for a delicious and healthy meal.

Secret Veggie Spaghetti Sauce

Inspired by Smile Sandwich
Makes a lot

Ingredients

2 Tbsp olive oil
1 medium onion, finely diced
1 small head cauliflower, finely diced
1 large zucchini, finely diced
2 cloves garlic, minced

29 oz can + 15 oz can tomato sauce
14.5 oz can Italian stewed tomatoes
2, 6oz cans tomato paste

2 bell peppers, diced
14.5 oz can Italian diced tomatoes
2-3 Tbsp Italian seasoning
salt and pepper, to taste

Directions

  1. Pour oil into a large pot (8 quarts or more) and heat over medium heat until hot.
  2. Add onion, cauliflower, zucchini, and garlic, and saute until onion is softened and translucent.
  3. (If you’re serving this with spaghetti squash, start it roasting now.)
  4. Add tomato sauce, tomato paste, and stewed tomatoes. Increase heat slightly, and simmer until vegetables are softened.
  5. Optional but recommended: puree sauce using an immersion blender until reasonably smooth.
  6. Add diced tomatoes, bell pepper, spices, (and browned meat or meatballs, if using) and simmer on low heat for about 15 minutes. Do a taste test after about 5 minutes, and add more spices if necessary. I added around 3 tablespoons of seasoning but depending on your veggies and your taste preferences, more or less might be appropriate.
  7. Serve with your favorite pasta or spaghetti squash.

Italian Meatballs

Adapted from Recipe Tin Eats
Makes about 2 dozen

Ingredients

2 slices white bread, crusts removed
1 medium onion, grated

1.5 lbs ground elk (or beef)
1 egg
1 Tbsp Italian seasonings
1/4 cup Parmesan, freshly grated
1 tsp salt
1/4 tsp pepper

2 Tbsp olive oil

Directions

  1. Tear bread into small pieces and place in a large bowl. Add onion and stir until well mixed and bread is completely wet.
  2. Add remaining ingredients and mix by hand until completely combined.
  3. Scoop 2 tablespoons at a time on to a plate or cutting board, then roll each dollop into a ball.
  4. Heat olive oil in a large non-stick frying pan over medium heat.
  5. Gently add meatballs and fry, turning gently, until nicely browned on all sides (pro tip: this is easier in two batches).
  6. Add meatballs (and drippings, if desired) to your spaghetti sauce and simmer gently for about 15 minutes, until meatballs are heated through.
  7. Serve with sauce atop your favorite pasta or spaghetti squash, with extra freshly grated pepper and Parmesan.

Roasted Spaghetti Squash

Ingredients

Spaghetti squash
Olive oil

Directions

  1. Preheat oven to 450 degrees Fahrenheit.
  2. Halve squash and remove seeds. Coat flesh lightly with olive oil.
  3. Bake for about 40 minutes, or until squash can be easily pierced with a fork.
  4. Let cool for a few minutes, then scoop from skins, fluff with a fork, and serve hot.
  5. Top with additional olive oil, butter, or your favorite pasta sauce.

Lasagna Roll-ups

It seems that fall may be on the way here, just in time for me to leave. Heading out this Friday for over two weeks of traveling and running three half marathons. If I can’t walk when I get home, you’ll know why.

Traditionally October is full of pumpkin delicacies prancing across the internet in overwhelming numbers, so I thought this year I’d start off with something a little less obvious. I saw this recipe on Pinterest (as usual) and thought it looked like a fantastic idea. Pre-portioned and easy to serve, it’s a great recipe for a family dinner as well as a potluck scenario. Even better, it can be prepared ahead and baked the next day to cut down on prep time for busy weeknights.

Lasagna Roll-ups {{Baking Bytes}}

For my first attempt I followed the original recipe as written; although it was good, it was a bit too “skinny” tasting for our preferences. M requested at least “twice as much meat and probably four times the cheese” so I made some adjustments for my next round. With cheesy goodness abound it went over much better. If you’re looking for a bit healthier option, maybe you want to head over to the original linked below, but if you like gooey and cheesy you’re definitely in the right place. It’s easily made vegetarian by just not adding meat or by subbing zucchini or mushrooms or whatever you like.

Preparing them is a bit time-consuming but I expect not more so than regular lasagna and possibly less. Having never made lasagna from scratch I can’t actually confirm this, but it seems plausible. And the hassle you save serving it (especially to a crowd) is easily worth a few extra minutes of prep time.

Lasagna Roll-ups {{Baking Bytes}}

Melty mozzarella, parmesan, and ricotta meld with the spinach and meat for a melt-in-your-mouth experience. Serve with a side salad and/or a vegetable for a well-rounded meal. Or don’t. I’m not your mother.

Lasagna Roll-ups

Adapted from The Girl Who Ate Everything
Makes 12 roll-ups

Ingredients

12 lasagna noodles
12 oz ground or diced meat (optional; I used hot Italian sausage)

10 oz chopped spinach (see note)
15 oz ricotta cheese
2 cups + 1/2 cup grated mozzarella cheese, divided
1/2 cup + 1/2 cup grated parmesan cheese, divided
1 egg
1 clove garlic, minced
1 tsp dried Italian seasoning
salt and pepper, to taste

32 oz spaghetti or other tomato sauce

Directions

  1. Pour about 1/2 cup of spaghetti sauce in the bottom of a 9×13″ baking dish.
  2. Cook lasagna noodles according to package directions.
  3. If using meat, sauté it with a little olive oil over medium heat until browned. You can add the garlic here too if you want.
  4. In a large bowl, mix spinach, ricotta, 2 cups mozzarella, 1/2 parmesan, egg, garlic, seasonings, and meat until well combined.
  5. Put several paper towels on the counter and gently lay cooked noodles on top. Gently pat the tops dry with an additional towel.
  6. Divide cheese mixture between noodles (about 3/4 cup per noodle) and gently spread it evenly across the entire noodle.
  7. Drizzle a couple of tablespoons of sauce on top of the cheese mixture.
  8. Gently roll up a noodle, not too tightly, and place seam-side down in the pan.  The paper towel might stick a little but it pulled off easily with no reside for me. Repeat with remaining noodles.
  9. Pour remaining sauce over lasagna rolls and sprinkle with remaining cheese.
  10. Cover loosely with foil. (You can refrigerate it at this point if you want to bake it the next day.)
  11. Bake at 350 degrees Fahrenheit for about 1 hour (no need to preheat the oven), removing foil for about the last 10 minutes so the cheese will brown a little.
  12. Let rest a few minutes, then serve hot.

Notes

I used frozen spinach both times. If you do, make sure it’s completely thawed and you squeeze as much water out as possible. Fresh spinach should also work fine so I will likely use that in the future. I also accidentally added 16 oz the second time and it was still yummy, although perhaps a bit more spinach-y than I personally prefer.