Rhubarbamom Crisp Ice Cream

Week four already! Is it just me or did the month fly by? For our last ice cream adventure in National Ice Cream Month, I’ve saved my favorite of this year’s collection.

Rhubarbamom Crisp Ice Cream {{Baking Bytes}}

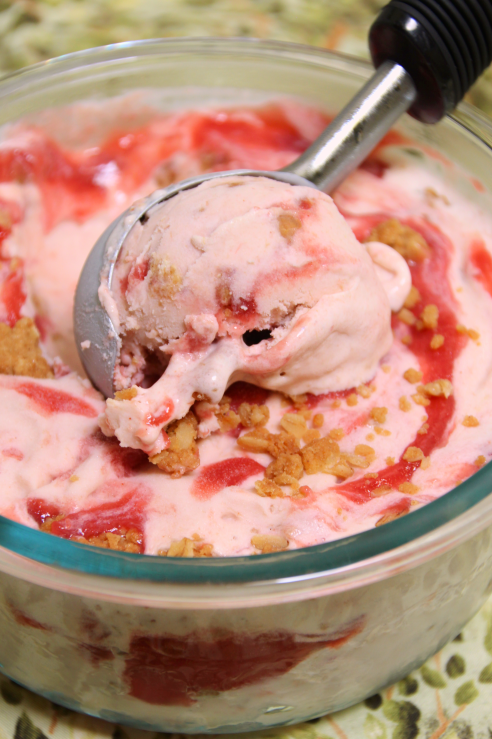
I had actually set out to make another recipe (which I may still revisit another time), but lost motivation with that one after coming across the pairing of rhubarb and cardamom. I am a huge cardamom fan (second only to cinnamon) and I love the twist it brings to otherwise classic desserts. Rhubarb pie and crisp are two of my favorite things, and I personally prefer the filling unadulterated by an accompanying fruit. Tart rhubarb and a side of ice cream are a match made in delicious heaven, so I decided to roll the whole thing into one. Inspired in name by the Rhubarbian cocktail at Nordic Brewworks, rhubarbamom crisp ice cream was born.

Rhubarbamom Crisp Ice Cream {{Baking Bytes}}

An easy rhubarb cardamom compote is the major component of this particular ice cream. Smooth, tart, and just a little spicy, it would be just as great on toast or pancakes as it is swirled into this creamy dessert. It’s also an excellent way to use up last year’s rhubarb to make room for this year’s new crop.

I mixed my standard ice cream base with a generous amount of compote, choosing not to add additional sugar. This results in a lovely tart finish, but does have the side effect of the ice cream freezing rather harder than usual. You can definitely increase the sugar if you prefer a sweeter dessert or simply want to be able to enjoy the finished product straight out of the freezer.

Rhubarbamom Crisp Ice Cream {{Baking Bytes}}

To accompany the creamy ice cream and tart compote, I baked a small batch of oatmeal crisp topping. Baked slightly crispier than you might prefer solo, it softens slightly amidst the ice cream into the perfect crunchy and creamy combination. It’s addicting on its own so do your best not to eat all straight off the pan while it cools.

rhubarbamo_crisp_ice_cream_4

After the ice cream churns, you’ll layer it into the container with extra compote and the crumbled topping before freezing. The pretty swirl and crispy oatmeal found in every bite are not only visually pleasing, but superbly delicious. If desired, top with a dollop of addition compote and crisp, and enjoy as the perfect end to a hot summer day.

Rhubarbamom Crisp Ice Cream

Makes about 6 cups

Ingredients

2 cups heavy whipping cream
2 cups rhubarb cardamom compote, divided (below)
1 cup half and half
1/2 cup egg beaters
1/4 cup sugar, optional1
1 cup oatmeal crisp topping (below)

Directions

  1. In a medium bowl, whisk together cream, half and half, egg beaters, and 1 1/2 cups rhubarb cardamom compote. Taste, and add sugar if desired.
  2. Chill until completely cooled, at least four fours. Place a freezer-safe bowl into your freezer.
  3. Freeze mixture according to your ice cream maker’s directions.
  4. Spoon 1/4 of the mixture into your chilled container. Drizzle with a spoonful of additional rhubarb cardamom compote and 1/4 cup oatmeal crisp topping.
  5. Repeat layers with remaining ice cream, then freeze until firm.
  6. Soften on the counter for about 20 minutes prior to serving.

Notes

I personally did not add more sugar because I like my rhubarb desserts to be quite tart. If you prefer a sweeter experience or don’t want the ice cream to freeze quite so hard, add the extra amount.

Rhubarb Cardamom Compote

Makes about 2 cups

Ingredients

4 cups frozen rhubarb, thawed and drained
1 cup sugar
1 tsp lemon juice
6-10 cardamom pods, seeded
1/2 tsp cinnamon

Directions

  1. In a medium saucepan, combine all ingredients.
  2. Heat over medium, stirring often, until rhubarb is softened and breaks apart.
  3. Use an immersion blender to puree the compote until smooth.
  4. Let cool on the counter briefly, then store in the refrigerator until ready to use.

Notes

Words

Oatmeal Crisp Topping

Makes about 2 cups

Ingredients

1/2 cup flour
1/2 cup old-fashioned oats (not quick oats)
1/2 cup brown sugar (not packed)
1/2 tsp cinnamon
1/4 tsp baking powder

1/2 cup butter, cold

Directions

  1. Preheat oven to 350 degrees Fahrenheit and line a baking sheet with a silicon mat or parchment paper.
  2. In a large bowl, whisk together all the dry ingredients.
  3. Use a box grater to grate cold butter directly into the bowl (or dice it by hand and add it).
  4. Mix together with your hands, mashing the butter into the flour mixture until well combined.
  5. Crumble onto prepared baking sheet, then bake 10-15 minutes or until lightly browned.
  6. Let cool completely, then crumble into an airtight container and store on the counter until ready to use.

Advertisement

Pineapple Habanero “Ice Cream”

“Ice cream” looks a bit ominous but I promise this is just as delicious. I’ve made more than 30 ice cream recipes over the years on this blog and had yet to try a dairy-free version. As one of my best friends is both exorbitantly lactose-intolerant one of the most generous people I know, I decided this year to try a recipe she can enjoy too. Since sweet and spicy is definitely her jam (and mine too) I set off with that flavor profile in mind.

Pineapple Habanero "Ice Cream" {{Baking Bytes}}

I knew I wanted to use a coconut base because other non-dairy substitutes require some kind of thickener and I prefer my frozen desserts to be as unadulterated as possible. Pondering what goes well with coconut so it would complement rather than fight the base flavor, piña colada original came to mind. Switched up for the spicy aspect, pineapple habanero was clearly the answer.

Pineapple Habanero "Ice Cream" {{Baking Bytes}}

Amusingly I’d never bought a habanero before and 100% texted another friend to make sure I was buying the correct thing. As someone with a Scandinavian spice tolerance (is butter a spice?) even cutting these peppers was quite the ordeal for me. Friendship and stubbornness pulled me through and the end result was so, so worth it.

Pineapple Habanero "Ice Cream" {{Baking Bytes}}

Although slightly less creamy than you know, cream, this frozen dessert is wonderful in its own right. Smooth with a light coconut background, the first flavor you get is a strong presence of pineapple. The habanero follows more slowly, the heat building in your mouth and encouraging you to reach for another bite. This one is almost as addicting last year’s chocolate chili and can be happily enjoyed by your dairy-free friends.

Pineapple Habanero "Ice Cream" {{Baking Bytes}}

The syrup recipe results in more than you need for the ice cream, so you can use it as a topping elsewhere. Extra on the ice cream itself, atop waffles and pancakes, stirred into a margarita, the opportunities are endless. Customize the heat level to your own preference but remember it will be much more mild once mixed with the coconut cream.

If this dessert can appease me, someone who can definitely tell the difference in ice cream made with “diet” 30% heavy whipping cream instead of “proper” 40% heavy whipping cream, I promise it will please anyone. Top off your Taco Tuesday with this sweet and spicy concoction for a perfect summertime meal.

Pineapple Habanero “Ice Cream”

Makes about 6 cups

Ingredients

2 (~14oz) cans unsweetened coconut cream
1/2 cup sugar
1/2 cup egg beaters

2 – 2 1/2 cups pineapple habanero syrup, divided (below)
spoonful of compote, optional

Directions

  1. In a medium saucepan, combine coconut cream, sugar, and egg beaters. Heat over medium, whisking often, until well combined and beginning to thicken.
  2. Stir in one and a half cups pineapple habanero syrup, and a spoonful of reserved compote if you like a little texture.
  3. Chill in refrigerator until completely cooled. (Put a 7-cup freezer-safe bowl in the freezer now too.)
  4. Freeze mixture according to your ice cream maker’s directions.
  5. Retrieve bowl from the freezer and add 1/4 of the ice cream to the bowl. Swirl a spoonful of the pineapple habanero syrup on top and repeat until all the ice cream is in the bowl, finishing with a little more syrup.
  6. Freeze overnight until firm (it takes longer than normal!)

Notes

I’ve not tested it but you should be able to make this recipe vegan by leaving out the egg. This will, however, change the texture as egg lends a smoothness and fullness that is difficult to get without some kind of emulsifier.

Roasted Pineapple Habanero Syrup

Makes about 3 cups

Ingredients

1 ripe pineapple, sliced

2 habanero peppers, to taste
1 1/2 cups sugar

Directions

  1. Preheat oven to 400 degrees.
  2. In a large baking dish, arrange pineapple in a single layer.
  3. Roast until warmed and started to brown, 15-20 minutes.
  4. Meanwhile, slice the habanero peppers, removing as many seeds as you want depending on your desired heat level. I removed about half the seeds for a medium heat.
  5. Use a blender or food processor to completely puree the roasted pineapple (you should have about 3 cups puree.)
  6. In a medium saucepan, combine puree, sugar, and peppers.
  7. Bring to a boil over medium heat then simmer gently until thickened and spicy. Let it go till it’s quite a bit spicier than you want your finished product as it will be greatly mellowed by the cream base.
  8. Strain through a fine mesh sieve, using a whisk to get as much syrup as possible. Set aside to cool (reserve the chunky compote too if you like a little texture!) then store in the fridge until ready to use.

Maple Latte Ice Cream

Week two has arrived and a twist on my favorite treat beverage is on the docket. My go-to coffee shop refreshment is a maple latte and when a coworker talked about a local maple-roasted coffee in near his home in Canada, I knew I needed to try it. He was kind enough to hand-deliver me a package of Spring Maple Blend from St. Joseph Island Coffee Roasters and it is some of the best coffee I’ve ever had. Not only did it make a phenomenal cold brew, but it resulted in one of my new favorite ice creams.

Maple Latte Ice Cream {{Baking Bytes}}

A creamy coffee base sweetened with maple makes for a beautiful flavor profile despite its simplicity. The maple coffee certainly adds a little something, but if you don’t have access to that use your favorite light or medium roast instead. This recipe is similar to an iced latte in flavor but with all the robustness of a proper dessert, and certainly one I will make again and again.

Maple Latte Ice Cream {{Baking Bytes}}

It does take some extra time with the infusing process, but straining is easy peasy if you use a reusable coffee filter. I use one designed for cold brewing, but any similar one should do just fine. (You can also use a paper filter but it’s much more annoying since it’s prone to splitting once wet.) Either way, I promise the finished product is worth it.

Maple Latte Ice Cream {{Baking Bytes}}

Lovely coffee flavor complemented by sweet maple, this is a perfect ice cream all year round. It’s perfect on its own but would be a wonderful addition to a chocolate cake if that’s more your style. It does freeze a bit harder than a traditional recipe, so leave it to soften on the counter for a few minutes before digging in.

Maple Latte Ice Cream 

Makes ~6 cups

Ingredients

3/4 cup half and half
1/4 cup almond or cow milk
1/4 cup ground (maple roasted) coffee1

2 1/4 cups heavy whipping cream
1/2 cup egg substitute
3/4 cup maple syrup

Directions

  1. In a small saucepan, heat half and half and milk on medium until it just starts to simmer, then remove from heat. Place coffee (in a filter, I use a reusable one) in the mixture and allow to steep for about one hour. Remove coffee (and any escaped grounds), squeezing grounds gently to release the most flavorful milk.
  2. In a large bowl, whisk infused mixture with all remaining ingredients until completely combined.
  3. Cover chill completely in the refrigerator at least 4 hours, or overnight.
  4. Freeze according to your ice cream maker’s directions, then place in a freezer-safe bowl to freeze for an additional three hours, or overnight.

Notes

1 You can certainly use decaf if you’re concerned about the caffeine content. Any coffee where you like the flavor is great! If you’re not using a maple coffee, you can pump up the maple flavor with a little maple extract, should you desire.

Lavender Honey Chèvre Ice Cream

Happy July folks and welcome to round SIX of National Ice Cream Month! Crazy to think I’ve been doing this for so long but it’s honestly my favorite part of the blog year. I hope you’re ready for some new favorites because I’m pretty excited about this year’s lineup.

Honey Lavender Chevre Ice Cream {{Baking Bytes}}

Week one makes use of one of my favorite delicately sweet flavors: lavender. Since discovering lavender creme brûlée at a since-closed local restaurant, I’ve used it across many ice cream flavors. This year I was searching for something lighter and a bit more subtle, and the prevalence of lavender, honey, and goat cheese combinations inspired me to create my own version here.

Honey Lavender Chevre Ice Cream {{Baking Bytes}}

Subtly flavored with lavender (although you can pump that up to your heart’s content) gives this ice cream a light and summery feel. Partially sweetened with honey, it has that somewhat caramel-like note I personally think blends beautiful. I added a small amount of goat cheese for a little tang, reminiscent of cheesecake without feeling heavy.

Honey Lavender Chevre Ice Cream {{Baking Bytes}}

This ice cream is all that smooth and creamy goodness you’re craving with a light flavor that is fully capable on its own but I’m sure would also blend beautifully with your favorite blueberry dessert. I’ve yet to have both a blueberry pie and a batch of this ice cream ready at the same time, but one day I will test my hypothesis. If you get to it first, be sure to let me know your thoughts.

Honey Lavender Chevre Ice Cream {{Baking Bytes}}


Round out your holiday weekend with a slightly less traditional dessert, and get ready for more ice creams and salads headed your way.

Lavender Honey Chèvre Ice Cream 

Makes ~6 cups

Ingredients

1 cup whole milk
1-2 Tbsp culinary lavender1

2 1/4 cups heavy whipping cream (ish)
1/3 cup honey
1/4 cup sugar
1/4 cup chèvre (goat cheese)

1/2 cup egg substitute
1/2 tsp vanilla

Directions

  1. Gently crush the lavender buds with a spoon (or a mortar and pestle, if you’re fancier than I am).
  2. In a small saucepan, heat milk on medium until it just starts to simmer, then remove from heat. Add lavender to the milk and allow it to steep for at least 30 minutes. Taste and when it starts to seem too strong, proceed to next step.
  3. Pour milk through a fine mesh strainer into a measuring cup to remove the lavender buds, pressing gently on the buds to release the most flavorful milk.
  4. Return to lavender milk to saucepan over medium heat and add enough heavy cream to bring the total to 3 cups.
  5. Add honey, sugar, and chèvre and whisk until smooth. (You can steep in some extra lavender at this point if it tastes too subtle.)
  6. Remove from the heat and whisk in egg and vanilla. Chill thoroughly, or overnight.
  7. Freeze according to your ice cream maker’s directions, then place in a cold freezer-safe bowl to freeze for an additional four hours, or overnight.
  8. A sprinkling of lavender buds makes a beautiful topping.

Notes

1 My lavender is losing its potency so I ended up at 5 tsp and should’ve used 6, but I would start with 4 tsp and see how you feel.

Blackberry Chévre Ice Cream with Chocolate Balsamic Swirl

Well folks we’ve yet again reached the last week of National Ice Cream Month. So far we’ve played with whiskey, chili peppers, and mint, and this week we venture further off the beaten path with some thoroughly nontraditional ice cream flavors.

If you’re even a vaguely consistent reader, you’ll be well aware of my love affairs with goat cheese and Olivelle products. I use both liberally in my salads, scrambles, and various entrees, sneaking them in whenever possible. M and I go through copious amounts of chévre, so fingers crossed Costco never stops carrying it. The Kirkland brand goat cheese is not only delicious but also extremely affordable. If you have a Costco nearby, definitely give it a try.

Blackberry Chèvre Ice Cream with Chocolate Balsamic Swirl {{Baking Bytes}}For this week, the pièce de résistance if you will, I combined several of my favorite savory items into a brand new dessert adventure. This is one of those thoughts I had where I wasn’t sure if the end result would be spectacular or just strange. Fortunately for me, and subsequently all of you, spectacular was the general consensus.

Blackberry Chèvre Ice Cream with Chocolate Balsamic Swirl {{Baking Bytes}}
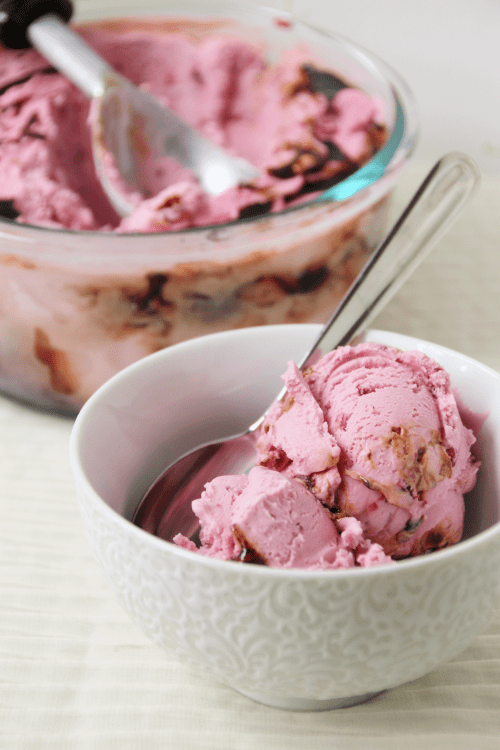
Step one: blackberry. Starting with a tried-and-true recipe from my trusty ice cream cookbook, I borrowed the blackberry sauce from a recipe by Molly Moon. It’s just a typical blackberry compote but I trusted her to know how much of everything to use. I liked that she suggested straining out only half the pulp, which leaves the lovely texture without overwhelming you with seeds.

Blackberry Chèvre Ice Cream with Chocolate Balsamic Swirl {{Baking Bytes}}
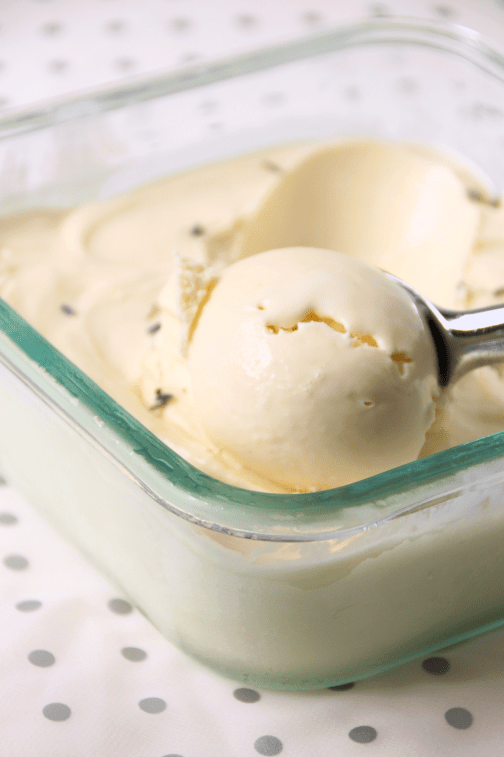
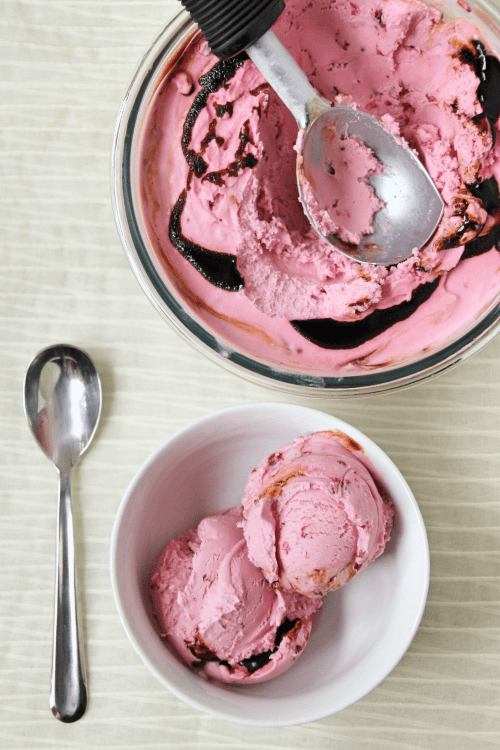
Step two: chévre ice cream. Inspired by the delicious blueberry cheesecake ice cream from a couple of years ago, goat cheese ice cream seemed like the obvious 2018 twist. The recipes online varied greatly in the amount used, but I took a gamble on throwing a full eight ounces in the batch and was duly rewarded.

Combined into one delightful concoction, the tart but sweet blackberries blend perfectly with the tangy goat cheese. Somehow neither flavor overpowers the other but instead becomes one glorious experience: creamy, fruity, and tangy in every mouthful.

Blackberry Chèvre Ice Cream with Chocolate Balsamic Swirl {{Baking Bytes}}
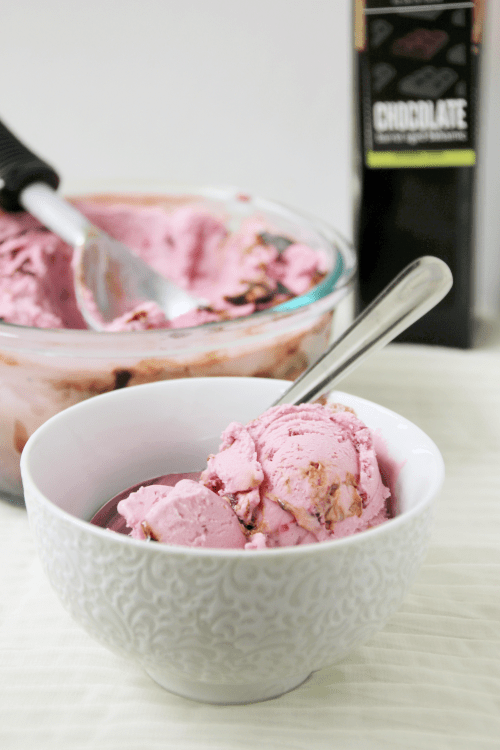
The last addition was a bit of risk, honestly, but oh so worth it. Olivelle carries several dessert vinegars, the chocolate balsamic being one of my favorites. I often drizzle it over a sliced banana or vanilla ice cream for dessert, and it’s also a delightful addition to brownies or chocolate cake. With the idea that it would be a slightly more sophisticated mix-in than standard chocolate sauce, I decided to give it a chance.

Best. Idea. Ever.

Blackberry Chèvre Ice Cream with Chocolate Balsamic Swirl {{Baking Bytes}}
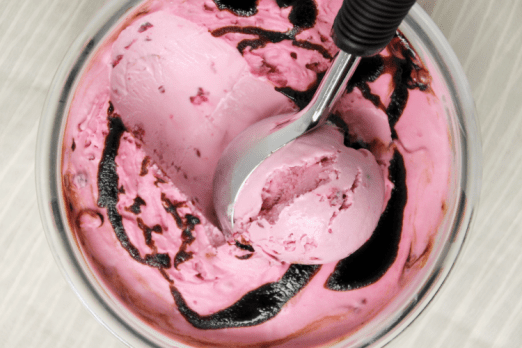
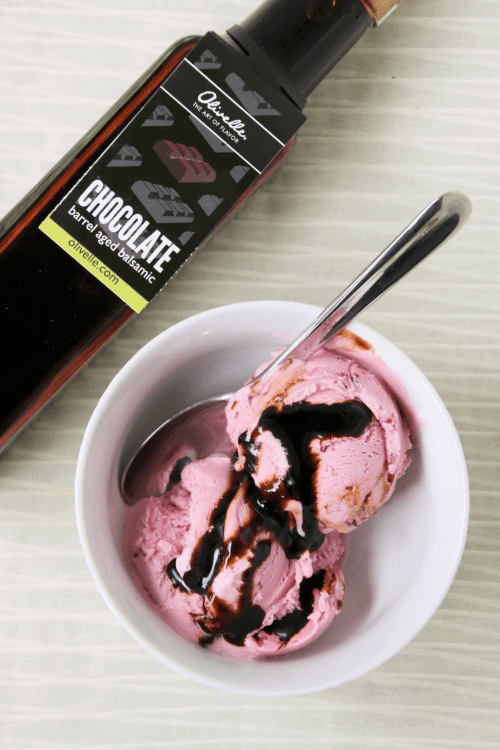
Although M didn’t completely agree1, my other taste testers thought it was one of the most phenomenal ice creams they’ve ever had, and I think it’s easily one of the top five flavors I’ve ever made (not that I’m biased.) The blackberry goat cheese ice cream is truly fantastic on its own, but the balsamic addition adds a depth of flavor and a hint of chocolate without overwhelming anything else.

A swirl or a drizzle (or both) of balsamic vinegar takes this ice cream up several levels in both uniqueness and amazingness, and if you’re feeling a bit adventurous I truly hope you give it a try! It’s admittedly a bit more time-consuming with the various steps, and you might have to wait for an order of chocolate balsamic vinegar to arrive (although definitely check if any of your local stores are a sister of Olivelle – they are all over the nation), but I promise it is oh so worth it.

Blackberry Chèvre Ice Cream with Chocolate Balsamic Swirl {{Baking Bytes}}I hope you enjoyed the serious and found at least one new flavor to add to your repertoire. If you give one a try, be sure and share how it went!

Blackberry Chévre Ice Cream with Chocolate Balsamic Swirl

Adapted from Molly Moon‘s Blackberry Sage Ice Cream
Makes 6+ cups

Ingredients

Blackberry Sauce
12 oz blackberries (about 3 cups)
1 cup sugar
1/4 cup lemon juice

Blackberry Chévre Ice Cream
2 cups heavy whipping cream
1 cup half and half
1/3 – 1/2 cup sugar2

8 oz chévre (goat cheese)3

1 recipe blackberry sauce (above)
1/2 cup egg substitute

1/4 – 1/2 cup Olivelle chocolate balsamic vinegar

Directions

  1. In a small saucepan, combine the blackberries, 1 cup sugar, and lemon juice.
  2. Simmer over medium heat, stirring regularly. Mash the berries and bring to a light boil. Remove from heat and let cool about 10 minutes.
  3. Strain through a fine mesh sieve, pressing on the berry pulp to retrieve as much of the juice as possible. Scoop about half of the pulp back into the juice, and stir to combine. (The remaining pulp can be tossed, but it is delicious stirred into plain Greek yogurt! Keeps well in the fridge for at least a couple of weeks.)
  4. Chill the blackberry sauce completely, or until ready to use.
  5. Place the goat cheese  in medium a heatproof bowl.
  6. Meanwhile, in a medium saucepan over medium heat, bring the cream, half and half, and remaining sugar to a light simmer.
  7. When the sugar is completely dissolved, pour the mixture over the goat cheese and whisk vigorously until mixture is smooth – it will be somewhat thick.
  8. Chill the cream mixture completely, or until ready to use. Place a lidded freezer-safe bowl in the freezer to chill.
  9. When everything is completely chilled, whisk the blackberry sauce and 1/2 cup egg substitute into the cream – mixture will be fairly thick.
  10. Churn according to your ice cream maker’s directions.
  11. Retrieve your bowl from the freezer and drizzle with 1-2 tablespoons chocolate balsamic vinegar.
  12. Gently add about 1/4 of the ice cream mixture, and drizzle with another 1-2 tablespoons of the vinegar. Repeat with remaining ice cream (you may not use all the vinegar).
  13. Return to the freezer until completely firm, or overnight.
  14. Serve solo, with a fudgy chocolate brownie, or an extra drizzle of balsamic vinegar.

Notes

He thought the ice cream itself was “pretty good”, he just didn’t care for the vinegar aspect. He suggested regular chocolate sauce, which is definitely an option you can utilize too.

I used a half cup, but I think with all the mix-ins 1/3 cup or even 1/4 cup might be plenty, and I intend to reduce it next time. Adjust according to how sweet you like your ice cream and how much you love goat cheese. Alternatively, I think honey would make a great substitute here!

If you are not a huge goat cheese lover, you can reduce this amount to six or even four ounces, but I personally loved the tanginess of having all eight ounces in there. Anti-chévre completely? Feel free to sub cream cheese for a more cheesecake like experience.

If you are skeptical but typically like balsamic vinegars, I highly encourage you to try it! Error on the side of too little; you can always drizzle more on top later. If you think this is the grossest sounding thing you have ever heard, either you’ve never tasted Olivelle’s balsamic vinegars or you just aren’t a vinegar person. It’s okay, we can still be friends. Feel free to substitute regular chocolate sauce instead (as M suggested), but know that the vinegar adds a truly unique flavor that will definitely be lost.