Thanksgiving Slaw

Coleslaw is something I’ve never enjoyed; it took me until my late twenties to realize I really just didn’t enjoy the mayo-based versions. Shredded cabbage or other veggies in a lighter dressing is just a salad that’s easier to eat, but in my opinion mayo is not intended to be the focal flavor of a dish. (Cue Midwest outcry.) If you disagree, that’s just fine, but I hope you’ll still give this non-mayo coleslaw a try.

Thanksgiving Slaw {{Baking Bytes}}

A few months ago when my mom visited, we took a cooking class from Olivelle. The one that happened to fit with our schedule was a paleo menu, and even though neither of us are paleo I figured the menu sounded great and Olivelle has yet to disappoint me, so we gave it a whirl. As it turned out, it was one of my favorite classes to date (I’ve done…several…) and I loved every single recipe on the menu.

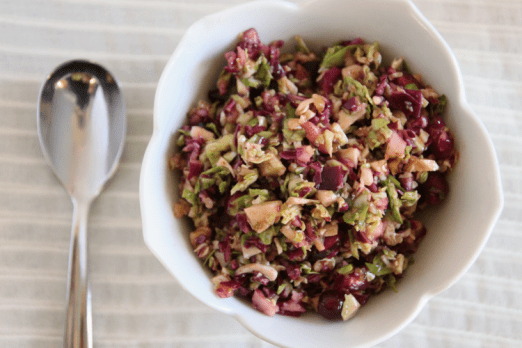
One of those recipes was a Brussels sprouts slaw. I don’t usually care for cruciferous vegetables in their raw state, but somehow after being shredded with cabbage and toasted pecans, folded with blueberries, and lightly coated in a fruity balsamic dressing, I was in love. Not only is this one of the few class recipes I’ve gotten around to making on my own, but I’ve made it three times since August despite having to borrow a food processor eat time.

IMG_7084_Fotor

Since it’s vegan, paleo, gluten-free and pretty much every-diet-ever friendly, this is a wonderful dish to take to potlucks and gatherings. Even better, it’s great chilled but just fine at room temperature, and best when made ahead, giving you all the time to relax and actually enjoy the party. It also makes a great lunch alongside your protein of choice if you’re fortunate enough to have leftovers. As a bonus, the green sprouts contrast nicely with the purple of the cabbage and the red pomegranate seeds, making it aesthetically pleasing in addition to its fantastic flavors.

I made a few tweaks for an autumn version, resulting in a perfect Thanksgiving side that doesn’t need oven space, and/or a healthy addition to Christmas that maybe even the kids will enjoy. (No guarantees, this recipe was not tested on children.) The Brussels and cabbage base remains, but I opted for walnuts since I prefer them over pecans, and pomegranate seeds for their color and tartness. I 100% cheated and bought a container of seeds, but if you want to get in your work out and seed a pomegranate then by all means, please do so.

Thanksgiving Slaw {{Baking Bytes}}

The dressing is a lovely mix of Olivelle products, so if you’ve not jumped on their bandwagon for some reason then now (or actually, Black Friday) is the time to make the leap. If you’re still not ready, a substitution of regular olive oil and white balsamic vinegar with some splashes of blood orange and pomegranate juices might work out, but I have not tested it. (If you go this route and you like the result, share your recipe in the comments!)

Thanksgiving Slaw {{Baking Bytes}}

If you’re in the market for a healthy but different addition to your holiday table, and cannot stomach the thought of putting yet another dish in the oven, this is the recipe for you.

Thanksgiving Slaw

Adapted from Olivelle
Serves 6

Ingredients

1 lbs Brussels sprouts
1/2 small head red cabbage
1 cup walnuts (or nut of choice)
1 cup pomegranate seeds

dressing
1/3 cup Olivelle Harvest Fig or Vanilla Pomegranate Balsamic Vinegar(Or a mix of both!)
1/3 cup Olivelle Blood Orange Olive Oil1
1 Tbsp lime juice
1 tsp Olivelle Vanilla Bean Sea Salt (or regular salt)

Directions

  1. Use a food processor (or a grater and a lot of patience) to shred the sprouts and cabbage. (If you’re a novice at food processing, this works best if you do it in relatively small batches.) Add both to a large mixing bowl.
  2. Coarsely chop walnuts (by hand, or with the food processor). Add to a dry pan and toast lightly over medium heat until fragrant. (Or skip this step if you’re lazy or in a hurry – it’ll still be good just a slightly different nuttiness flavor.)
  3. Combine all dressing ingredients in a jar and shake vigorously until well mixed. Taste for flavor preferences, and adjust if necessary.
  4. Pour over the sprouts and cabbage and stir with a rubber scraper until well coated.
  5. Fold in toasted nuts and pomegranate seeds.
  6. Store in the fridge until ready to serve – overnight is better – then enjoy chilled or at room temperature. Will keep for at least five days in the fridge.

Notes

If you have not purchased the entire Olivelle store, a substitution of 1/4 cup olive oil, 1/4 cup white balsamic vinegar, and pomegranate + blood orange juice to taste might work. This is an untested substitution so let me know if you try it!

Advertisement

Peppermint Crunch Ice Cream

Despite the (hopefully) chiller temperatures, December is just as good a time for ice cream as the more traditional summer months. There are some flavors that just scream winter, and although I don’t have too many qualms eating them in June, it’s nice to have them during their so-called proper time. Eggnog, for example, is just not something one typically enjoys in mid-summer, but it’s just as delightful in ice cream form.

This year I went after another Christmas classic – peppermint. I drink copious amounts of peppermint tea all year round, but typically save the more decadent uses of the flavor for winter. Peppermint is found in everything from candies and hot chocolate to brownies and truffles, and everything in between. Admittedly I feel a little goes a long way, but during the right season peppermint certainly has its place.

I opted for the white chocolate and peppermint pairing, a favorite as a hot beverage that I figured would play just as well in a chillier twist. Melted white chocolate paired with crushed peppermint candy for flavor, color, and a tiny bit of crunch. The smooth vanilla flavor is nicely complemented by the sharper flavor of peppermint, and should be reminiscent of your favorite peppermint truffles.

Crushed peppermint candy gives us our flavor profile, and a little pink color as a side effect. I cheated and bought pre-crushed peppermint candy, but crushing your own candy canes is a fun way to get the kids involved. The peppermint flavor is given some extra punch with a little extract, but be careful not to go overboard as it’s very easy to venture closer to toothpaste than candy. I recommend starting with half a teaspoon and letting it all chill overnight, then tasting right before you churn. If you feel it’s not quite strong enough, add that extra quarter teaspoon and churn away. You can also add a few drops of red food dye if you want to deepen the pink hue.

Creamy, cold, and chalk full of a favorite winter flavor, this ice cream is delightful on its own or an excellent match for a gooey chocolate brownie. Top it with a sprinkle of candy for extra flair.

Peppermint Crunch Ice Cream 

Makes ~6 cups

Ingredients

1 cup half and half
1/2 cup white chocolate chips

2 cups heavy whipping cream
1/2 cup egg substitute
1/4 cup sugar
1/4 cup plus 1-2 T crushed peppermint candy, divided1

1/2 – 3/4 tsp peppermint extract
1 tsp vanilla

optional: a few drops red food dye

Directions

  1. In a medium bowl, combine cream, egg substitute and sugar. Set aside.
  2. In a small saucepan over medium heat, combine half and half and white chocolate chips. Heat, whisking often, until chips are melted and mixture is smooth.
  3. Let cool about 10 minutes, then slowly stream into the heavy cream, whisking constantly.
  4. Whisk in vanilla, 1/2 tsp peppermint extract, and 1/4 cup peppermint candy1, then chill completely in fridge, or overnight. (The peppermint candy will likely have completely dissolved.
  5. Taste briefly, and add additional peppermint extract if desired. You can also add the red food dye now.
  6. Freeze according to your ice cream maker’s directions, adding remaining candy during the last 5 minutes of churning.
  7. Transfer to a freezer-safe bowl to freeze for at least four hours, or overnight.
  8. Serve garnished with a sprinkle of crush candy canes, solo or atop a warm chocolate brownie.

Notes

If you don’t want the crunchy aspect, you can either nix the extra 2 tablespoons, or add them at the beginning.

Grandma’s Chocolate Fudge

Grandma's Chocolate Fudge {{Baking Bytes}}

As we carry on through December, I imagine many people are working on finding holiday gifts. Food is a great gift, especially for people you don’t know very well or just want to give a small token of appreciation (teachers, coworkers, etc). My mom and I often prepared small bags of almond roca or other goodies for my teachers all through middle school, and she still prepares platters of almond roca, spritz, clothespin cookies, or other treats for family friends and business associates.

Grandma's Chocolate Fudge {{Baking Bytes}}

My grandma always made this fudge every Christmas, although she also always put walnuts in it. Delicious chocolatey fudge surrounding silly crunchy walnuts. Clearly I don’t care for nuts in fudge (or really much of anything besides almond roca) and so I have omitted them from this recipe. Feel free to add them back in if that’s your style.

Grandma's Chocolate Fudge {{Baking Bytes}}

Fudge seems to go over well with most people and so is routinely included in our line-up. This recipe is based off my grandmother’s recipe, as is probably obvious by the name. It has taken a little bit of research to get it right as the her recipe specified two packages of this and a package of that, and the size of “packages” have changed quite drastically over the last few decades. Nonetheless, we prevailed and have come up with the one below.

Grandma's Chocolate Fudge {{Baking Bytes}}

Last year we hand-stirred the recipe, as is tradition, and not only was it an immense amount of work but we had to enlist my dad to finish the job. We have changed the proportions a bit so it might be manageable for one of less than Herculean arm strength, but in spite of that I still opted to use my stand mixer. It worked beautifully and is much, much less effort to get that velvety chocolate experience you’re looking for. But if you’re looking for a workout while you make piles of decadent treats this season, feel free to stir by hand.

Grandma's Chocolate Fudge {{Baking Bytes}}

Grandma also used margarine instead of butter, I imagine largely because it was cheaper. I’ve made it both ways and honestly I can’t much tell the difference with regards to flavor, but the batch made with margarine turned out a decent amount softer. I imagine this is mostly because margarine has a lower melting temperature, but beating in an extra couple minutes could help too. I personally don’t like a sticky fudge so I put that batch in the freezer, which makes it perfect in my mind. Choose your own adventure here, or just use whatever you have on hand – it’ll be delicious regardless.

Grandma’s Chocolate Fudge

Adapted from my grandmother’s recipe
Makes a lot

Ingredients

2 cups chocolate chips
2 sticks (1 cup total) salted butter, each cut into fourths
20 large marshmallows
2 T vanilla

4 cups sugar
12 oz can evaporated milk

Directions

  1. Line a baking dish or lipped cookie sheet with aluminum foil. Set aside.2
  2. In the bowl of a stand mixer, add chocolate chips, margarine or butter, marshmallows, and vanilla1. Set aside. You must do this before boiling the milk otherwise it’ll cool down too much and won’t mix completely.
  3. In a medium-large saucepan, whisk together sugar and evaporated milk (make sure you have a fair amount of extra space, it’ll grow).
  4. Over medium-high heat, bring milk mixture to full rolling boil, stirring often.
  5. Continue to boil for 6 minutes (I recommend setting a timer), stirring constantly.
  6. Add hot milk mixture to remaining ingredients (don’t scrape the pot too vigorously or you will end up with sugar crystals in your fudge), and beat on low with the normal beater attachment (or by hand) for at least 5 minutes (again, set a timer), until marshmallows are completely dissolved. Scrape sides every minute or two during this time to ensure an even mix.
  7. Pour into foil-lined pan, smooth out the top, and let cool completely. An unheated garage or porch if you don’t have fridge space is great for speeding up this process.
  8. Remove from foil and cut into cubes. I suggest moving it to a cutting board or you will have many small squares of foil to peel off later.
  9. Package as desired and give as much of it away as possible so you don’t eat it all.

Notes

If you like, you can add up to two cups chopped nuts or hard candy. Personally I do not like uneven texture in fudge or baked goods, but it’s certainly an option if you’re into it.

I like to use a cookie sheet so the fudge is a little thinner, but either will work. It may not fill a whole sheet so line it with foil and make a new edge about halfway, making sure you have extra foil sticking up. After you pour it in and start to spread it, you can adjust the edge to hold more or less fudge as necessary to keep it the right thickness.

Eggnog Ice Cream

Welcome to December! Hope everyone had a wonderful Thanksgiving; I certainly enjoyed my four days of freedom. Lots of baking and craft projects, running and hiking, and maybe a couple of chores off the never-ending list.

Eggnog Ice Cream {{Baking Bytes}}

I decided to start off the month with a delightfully seasonal item: eggnog ice cream. I actually “invented” this recipe last year but never got a chance to post it, so I’m sharing it with you now. It tastes exactly as you’d expect, like extra thick and creamy eggnog. Even by ice cream recipe standards it’s a super easy one with a super delicious outcome.

Eggnog Ice Cream {{Baking Bytes}}

Smooth texture and the eggnog flavor we all know and love (I’m assuming, otherwise you’d probably have stopped reading by now) join together in a slightly non-traditional dessert for the cold months. Personally I eat ice cream all year round, so if you’re like me this is a fantastic option to get your eggnog fix.

Eggnog Ice Cream {{Baking Bytes}}

If you’re a fan of alcoholic eggnog (I’m not, but to each their own) this recipe can easily incorporate that preference by adding a little White Christmas liqueur (or whatever you like) to the mix. Top with freshly grated nutmeg (or a sprinkle of the ground stuff) for a little extra flair.

Eggnog Ice Cream {{Baking Bytes}}

Eggnog Ice Cream
Makes about 1.5 quarts

Ingredients

2 cups full-fat eggnog (it’s the holidays, live it up!)
1 cup heavy cream
1/2 cup sugar
1/2 tsp nutmeg
1-2 oz White Christmas liqueur (optional)

Directions

  1. Whisk together all ingredients until completely combined; refrigerate overnight.
  2. Place a glass, lidded bowl in the freezer.
  3. Freeze eggnog mixture according to your ice cream maker’s directions.
  4. Pour directly into chilled bowl, then return to freezer to chill at least another 4 hours, or overnight.
  5. Serve with a dash of freshly grated nutmeg, if desired.

Overnight Baked French Toast & Blueberry Sauce

Hello hello! It’s 2015! Fun fact, the year 2030 is now closer than the year 1999. Crazy.

I was originally intending to start off the year with a savory dish to contrast the sugar overload that is December, but I changed my mind. If you want savory, I suggest you look at last year’s post.

Overnight Baked French Toast & Blueberry Sauce {{Baking Bytes}}

I was lucky enough to be able to take two weeks off work over the holidays, so I spent Christmas at home in Alaska. Unfortunately, Alaska forgot it was winter and didn’t have any snow, so no skiing for me, but I did run over 20 miles that week, my highest mileage week of the year. And I’ve got lots of skiing in since returning to Montana.

Prior to this trip, I’d been eyeing this recipe for well over a month but never had a good reason to make it. I sneakily offered to make breakfast for Christmas Day, and I don’t think anyone minded. I made a substantially less sweet version than the original and I thought it was the perfect amount of sweetness, especially if you’re planning to serve it with regular pancake syrup. I made a quick blueberry sauce as a topping and I’m pretty sure I’ll never eat it any other way. Well, maybe a different fruit. I bet blackberry would be awesome too.

Overnight Baked French Toast & Blueberry Sauce {{Baking Bytes}}

In any case, this is a great meal for the holidays as it doesn’t require much time in the morning, but it would be equally great any time of the year. Just make sure you leave enough time in the morning for it to bake to your desired consistency. and you’re good to go. (You can always put it in the oven and go back to bed for an hour, I won’t judge.) We had it with a side of scrambled eggs and bacon for a well-rounded meal.

Oh yeah: Blueberry sauce. This stuff is super easy and super delicious, so you should definitely make a batch while the French toast is baking.

Overnight Baked French Toast & Blueberry Sauce {{Baking Bytes}}

Also: The French toast reheats decently well, but if you don’t have enough people to eat a 9×13 baking dish you can certainly halve the recipe. Or you can split the full recipe between two 8×8 pans and put one of them in the freezer after they’ve refrigerated overnight. Just let it thaw in the fridge the night before and bake as normal (although perhaps a little bit longer depending on how cold your fridge is.) The 8×8 pans bake for roughly the same amount of time as the 9×13 pans.

If you’re looking to please a crowd with very minimal effort, this is definitely the recipe for you! Or if you’re just looking to please yourself, even better. Just try not to eat the whole pan at once.

Overnight Baked French Toast

Adapted from The Pioneer Woman
Serves 8-12

Ingredients

1.5 lbs sourdough bread
8 eggs, lightly beaten
2 cups milk
1/2 cup heavy cream
1/2 cup sugar
2 Tbsp vanilla extract
2 tsp cinnamon

Directions

  1. Grease a 9×13 baking dish.
  2. Tear or cut bread into bite-sized pieces and spread evenly into the pan.
  3. In a large bowl, whisk remaining ingredients until completely combined. Pour liquid gently and evenly over the bread.
  4. Cover dish tightly with plastic wrap and store in the fridge overnight.
  5. Preheat oven to 350 degrees Fahrenheit.
  6. Retrieve dish from the fridge and use a large spoon to gently stir the mixture, so as to put the wetter pieces on top and the drier ones toward the bottom.2
  7. Bake 45-75 minutes (shorter time for closer to the texture of bread pudding, longer for a crispier texture.)3
  8. Serve immediately with toppings of choice.

Notes

You must use sourdough or some other kind of very dense bread.
This is not strictly necessary, but I found the texture to be more even throughout the dish after stirring.
I baked mine for just over an hour to avoid it being wet in the middle, although it was still quite soft. I will likely plan for 70 minutes in the future. If you think it’s getting too crispy on top, you can cover the pan with tinfoil for the last 20 minutes or so, but I haven’t found this necessary.

Blueberry Sauce {{Baking Bytes}}

Blueberry Sauce

Borrowed from My Baking Addiction
Makes about 2 cups

Ingredients

2 cups blueberries (fresh or frozen)
1/2 cup water
1/2 cup sugar
2 Tbsp fresh lemon juice

2 Tbsp cornstarch
2 Tbsp cold water

1/2 tsp vanilla
zest of 1 lemon

Directions

  1. Combine blueberries, 1/2 cup water, sugar, and lemon juice in a saucepan. Cook over medium heat, stirring often, until mixture comes to a low boil.
  2. Mix cornstarch and 2 Tbsp cold water until completely combined. Slowly stream into the blueberries, stirring constantly but gently, and simmer until mixture thickens, about 5 minutes. (Cook less if you prefer a thinner sauce).
  3. Remove from the heat and stir in vanilla and zest.
  4. Serve on your favorite French toast, pancakes, waffles, ice cream, or whatever needs some blueberry-fication.
  5. Store leftovers in the fridge and reheat leftovers as necessary.