Pear & Pomegranate Protein Waffles

With just a couple of weeks left in the year and the holidays quickly approaching, I personal find December to be an easily overwhelming month: considering all the things that didn’t happen this year, planning for next year, panicking about what to get my father and brother for Christmas, getting increasingly irritated every time “Santa Baby” comes on the radio, and still attempting to maintain some sense of productivity at work. It can be so easy to forget to take quiet reflection time to rest and recharge but the fullest times of year are those during which we should make the most effort to do so.

Pear & Pomegranate Protein Waffle {{Baking Bytes}}

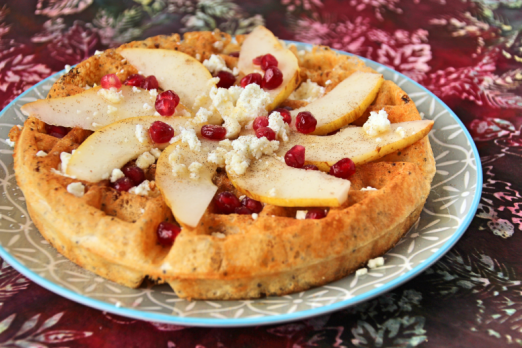
Make any morning special with these gorgeous and delicious waffles. Waffles are particularly nostalgic for me, having grown up eating copious amount of Belgian waffles on holidays and birthdays and the occasional breakfast for dinner. It’s a common Christmas morning breakfast at my parents’ house and something I always wish I made time for more often.

pear_pom_waffle_4

After a trip to Norway where a traditional Sunday morning means a hike and a waffle hut,  complete with jam and lightly sweetened whipped cream, I started to think I may have more Scandinavian traits than I thought. (Reading The Year of Living Danishly served only to validate this hypothesis.) While every week isn’t something I’ve managed to work into regular life, a morning run and a waffle never fails to feel like the perfect start to the day. (Full disclosure: actual Norwegians use substantially less cream and jam than I did here; it seems I have at least some ‘Merica in me too.)

Knutehytta Waffle {{Baking Bytes}}

The one things that has changed throughout the years is my preference on toppings. Instead of a flood of maple syrup or copious amounts of whipped cream and berries, I typically reach for a spoonful of peanut butter and a banana. After boosting the protein in the waffle itself with Kodiak Cakes Flapjack & Waffle Mix, protein powder and chia seeds, I dressed up this version with a colorful and festive combination that trends much more towards sophistication rather than cloying in its sweetness. (Although banana and peanut butter remains my go-to year round.)

Pear & Pomegranate Protein Waffle {{Baking Bytes}}

Creamy goat cheese is one thing I never tire of and it works beautifully all day long in sweet and savory dishes alike. Paired with sweet pears and tart pomegranate, a small drizzle of maple syrup pulls the whole thing together into a breakfast fit for a queen. A touch of sweetness keeps it from being an overwhelming start to the day, but I have certainly enjoyed this for brinner instead. Whichever time of day you choose to indulge, I’m confident this will not disappoint. (For a more reasonably sized meal when serving these with sides like eggs or breakfast meat, I personally find half of a waffle to be plenty. But you do you.)

Pear & Pomegranate Protein Waffle {{Baking Bytes}}

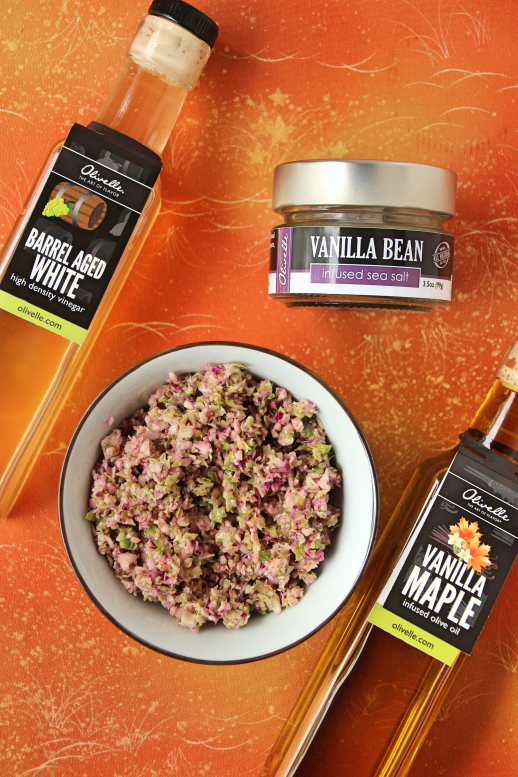
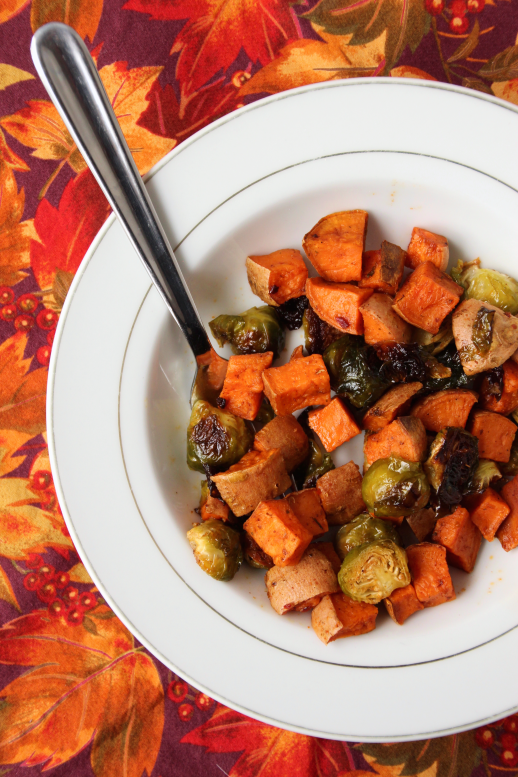
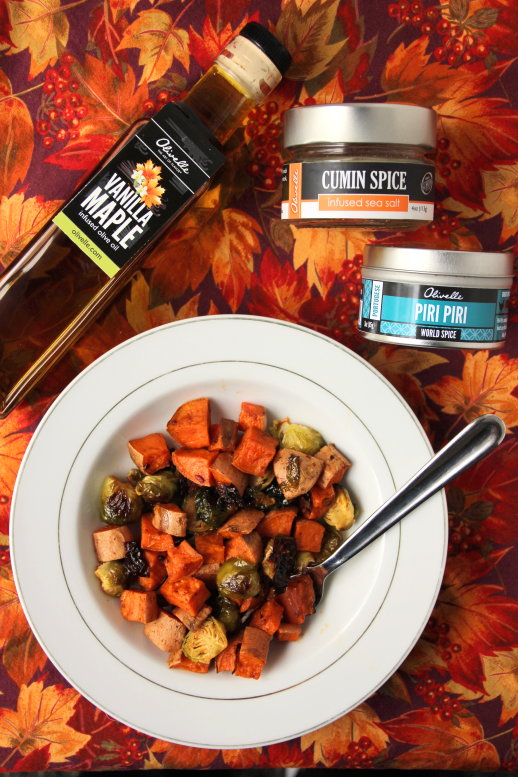
As a note, you do taste the protein powder a bit so make sure it’s a brand you like! Alternatively, you can skip it and substitute more flour instead. Either way you’ll have a delicious and freezer-friendly adventure ahead of you. However, if waffles are not your thing, check out these flavors in salad form instead.

Pear & Pomegranate Chèvre Protein Waffle

Makes about 6 waffles

Ingredients

Protein Waffles
1 3/4 cups Kodiak Cakes Flapjack and Waffle Mix1
1/2 cup plain or vanilla protein powder (or all-purpose flour)2
1/4 cup chia seeds
1/4 tsp salt
1/4 tsp cardamom, optional
1/8 tsp vanilla bean powder, optional

2 cups milk (almond, skim, whatever)
1/4 cup oil
1/2 tsp vanilla extract

2 eggs, separated

Toppings
8 oz goat cheese, crumbled
4-6 oz pomegranate seeds
1 ripe pear, thinly sliced
pure maple syrup, to taste
cinnamon or cardamom, optional

Directions

  1. In a large bowl, whisk together flour, protein powder, baking powder, chia seeds, and salt.
  2. In a separate small bowl, whisk together egg yolk, milk, oil, and vanilla.
  3. Gently fold wet ingredients into the dry ingredients until just combined. Set aside.
  4. In a small bowl or jar, beat egg whites until soft peaks form. (I like to use the whisk attachment on my immersion blender for this.)
  5. Carefully fold in egg white until almost no streaks remain, trying to keep as much volume as possible in the mixture. Let rest for about 5 minutes.
  6. Spray your waffle iron with nonstick spray and heat according to its manufacturer’s directions.
  7. Add about 2/3 cup of batter to the waffle iron and cook to desired darkness.
  8. Top each waffle with 1-2 oz goat cheese, pear slices, 1-2 Tbsp pomegranate seeds, and 1-2 Tbsp maple syrup. Sprinkle with cinnamon or cardamom, if desired, and enjoy immediately.3

Notes

1 If you don’t have this flour mix, you can substitute 1 3/4 cup whole wheat flour plus 1 Tbsp of baking powder, but the resulting protein content will be substantially lower.

2 You definitely get a little of the flavor of protein powder here, so make sure it’s not a flavor you hate. Or just substitute more flour in its place.

3 You can also freeze the cooked waffles! Wrap each serving carefully in plastic wrap and freeze until ready to use. Defrost on the counter or in the microwave, then lightly toast for a crispier texture.

Advertisement

BBQ Jackfruit Sandwiches & Maple Walnut Brussels Slaw

(Long post incoming, but I promise the recipes are worth it!)

Week four already! Is October going by crazy fast for anyone else? After spending the first half of month in Europe I am now in Iowa for work and boy is my body confused. Here’s hoping my sleep and my stomach get back on track soon.

This week is entree week. Pulled pork is one of my absolute favorite meals and Pinterest piqued my curiosity of substituting jackfruit for the meat. I’ve seen it multiple times over the last few years but never actually got around to trying it. This menu was the perfect opportunity to give it a shot since it nicely fits the theme and is inherently vegetarian and lactose-free.

BBQ Jackfruit Sandwiches {{Baking Bytes}}

I vaguely considered using fresh jackfruit until I saw the size of one and realized I didn’t want enough to feed the entire Mongol army. Feel free to go fresh if you like, or stick to canned if you want a slightly less exhausting adventure. Ensure you rinse your canned stuff thoroughly in order to remove as much of the “can” flavor as possible. I will fully admit canned jackfruit is not widely stocked nor cheap in my area, but it was definitely a fun recipe nonetheless.

Is it pork? No. Is it delicious? Yes. While it definitely won’t fool any meat eaters since the texture and flavor are both quite different, it’s still an awesome addition to your repertoire and a fun way to add a vegan option to a barbecue spread. And either way it was a perfect vessel for the most amazing barbecue sauce I’ve ever made.

Smoky Sweet BBQ Sauce {{Baking Bytes}}

Smoky, sweet, and just enough spice, this barbecue sauce is definitely my go-to recipe. My mom actually sent me this recipe like six months ago and I completely forgot about it until I was considering the menu for this series. I am so glad I finally gave it a try because I personally think my slightly adapted version is just perfect. Easy, smooth, and a perfect balance of smoke and spice without the overload of sugar store-bought varieties typically employ. It comes together in about five minutes and keeps in the fridge for quite a while, so if you try nothing else about this recipe, definitely give the sauce a go! I’ll definitely be using it on everything from burgers to meatloaf to actual pulled pork going forward.

The last piece in this delightful sandwich is the slaw. Pulled pork sandwiches are nearly always accompanied by some kind of coleslaw and I wanted to include that element here as well. Inspired by an existing Olivelle recipe of which I’ve already posted another version, this one is simple but a perfect sweet and crunchy  addition to the barbecue flavor. An equal mix of barrel aged white balsamic and their new vanilla maple olive oil blend into a light and sweet dressing that compliments the crisp sprouts and cabbage without competing with the barbecue sauce. I added some walnuts for extra crunch and that slight nutty flavor adds just a little interest to the whole experience.

Maple Walnut Brussels Sprouts Slaw {{Baking Bytes}}

Sandwiched between your favorite lightly toasted bun with a spread of (mayo), the jackfruit and slaw combine into a sweet and spicy experience that’s not only delicious, but also pretty healthy. It’s inherently vegetarian and can be easily made vegan by subbing or ditching the mayo, making it appropriate for a wide variety of diet preferences. It’s a lovely cozy fall meal but would also be awesome for those summer potlucks, so keep it handy all year long.

BBQ Jackfruit Sandwiches {{Baking Bytes}}

Whether you try one piece or the whole shebang, I hope you find a new go-to somewhere in the set!

BBQ Jackfruit Sandwiches

Serves 4-6

Ingredients

Smoky Sweet BBQ Sauce
6oz can tomato paste
1/2 cup unsweetened applesauce
1/4 cup tomato sauce
1/4 cup Smoked Balsamic Vinegar
1/2 tsp liquid smoke, optional
2 Tbsp Sweet Smoked Chili Rub
1 Tbsp Applewood Smoked Sea Salt1
15 twists Bourbon Barrel Smoked Black Peppercorns1
1/4 tsp ground chipotle or cayenne pepper, optional

Maple Walnut Brussels Sprouts Slaw
1/2 lb Brussels sprouts, trimmed and shredded (about 3 cups)
1 cup shredded red cabbage
1/2 cup walnuts, chopped

3 Tbsp Barrel Aged White Balsamic Vinegar
3 Tbsp Vanilla Maple Olive Oil
1/2 tsp Vanilla Bean Sea Salt

BBQ Jackfruit
2 Tbsp Caramelized Garlic Olive Oil
3 (14oz) cans young jackfruit in water2
2 Tbsp Sweet Smoked Chili Rub
1 cup smoky sweet barbecue sauce
3/4 cup water

for each sandwich
1 burger bun, toasted
1/2 cup bbq jackfruit
1/4 vanilla maple slaw
mayo (or your favorite vegan substitute), to taste
additional barbecue sauce, to taste

Directions

  1. For the sauce: Blend all sauce ingredients until well combined; store in a pint jar and refrigerate until ready to use, up to 6 weeks.
  2. For the slaw: In a medium bowl, mix together Brussels sprouts, cabbage, and walnuts.
  3. In a pint glass or mason jar, whisk together Barrel Aged White Balsamic, Vanilla Maple Olive Oil, and Vanilla Bean Sea Salt until completely combined.
  4. Stir dressing into Brussels mixture until well mixed. Cover and refrigerate until ready to use, up to 5 days.
  5. For the bbq sandwiches: Drain and thoroughly rinse jackfruit, then pat dry. Set aside.
  6. In a large frying pan or wok, heat the olive oil until shimmering.
  7. Stir in jackfruit and Sweet Smoked Chili Rub and toss until well coated.
  8. Stir in barbecue sauce and water, then reduce heat to medium and simmer until jackfruit is tender and most of the liquid is absorbed.
  9. Spread mayo on bottom half of a toasted bun; top with 1/2 cup jackfruit, 1/4 cup slaw, and additional barbecue sauce, to taste.
  10. Cover with the other half of the bun and enjoy immediately.

Notes

You can substitute plain salt and pepper with minimal taste difference, but the smoky versions add a lovely depth of flavor.

If you prefer meat, I harbor no judgement for substituting normal pulled pork!

Spicy Maple Roasted Root Vegetables

Welcome to week two, friends. Continuing with the sweet and spicy theme, this time we’re pairing maple with a snazzy piri piri spice blend on some lovely roasted root vegetables perfect for cozy evenings.

Roasted Spicy Maple Veggies {{Baking Bytes}}

Sweet and spicy is my favorite combination and in my opinion nothing works quite so well on the sweet side as maple syrup. With its own robust flavor, maple is nicely complemented by a number of spicy additions, my own favorite being chipotle. I ventured slightly off my beaten path in favor of using Olivelle’s Piri Piri World Spice blend, featuring a number of different chili peppers and a hint of lemon. It packs quite a bit of heat which means the tin will last other wusses like me quite a long time.

Roasted Spicy Maple Veggies {{Baking Bytes}}

I actually made this recipe a bit differently the first time, and then promptly re-made it after the release of their Vanilla Maple Olive Oil at the end of September. I knew immediately it was perfect for this recipe and round two was even better than the first iteration. (I originally used Caramelized Garlic, which you can see in the round one pictures.)

Roasted Spicy Maple Veggies {{Baking Bytes}}

You can use any firm vegetables here, but I chose a mixture of my favorite fall options. Acorn (or butternut) squash are prolific this time of year, and go well with both sweet and savory flavors. Sweet potatoes are a staple in my world and I rounded out the festive orange ensemble with carrot. Pumpkin would also work nicely to keep monochromatic medley, or for some contrasting color add Brussels sprouts as I did in my second batch.

Roasted Spicy Maple Veggies {{Baking Bytes}}

The maple flavor of the olive oil is not sweet, but has an amazing savory profile that works perfectly with the heat of the spice blend. I rounded mine out with a bit of Cumin Spice Sea Salt, to add just a bit more depth to the whole shebang.

For that hint of sweet and a boost of maple flavor, the roasted veggies are lightly drizzled with pure maple syrup and then popped in the oven for a few more minutes to let it caramelize a bit. I kept mine more on the spicy side than the sweet side, but for a more standard glazed carrot experience just up the maple syrup to two or more tablespoons. Sweet, spicy, and cozy, this recipe is definitely going to become a go-to on cold days.

spicy_maple_veggies_4

A perfect complement to any fall dinner, the sweet and spicy combination brings some warmth and fun to any meal. It’s perfect for Thanksgiving too, going beyond those traditional sugar-filled recipes and adding a little something extra to the table. On the off chance you have any leftovers, it’s also perfect atop a spinach salad or underneath a fried egg.

Spicy Maple Roasted Root Vegetables

Serves 4

Ingredients

4 large carrots, peeled and diced1
1 small butternut or acorn squash, peeled and diced
1 medium sweet potato, diced

2 Tbsp Vanilla Maple (or Caramelized Garlic) Olive Oil
3/4 tsp Piri Piri World Spice, to taste2
1/4 tsp Cumin Spice Sea Salt

1-2 Tbsp pure maple syrup, to taste

Directions

  1. Preheat oven to 400 degrees Fahrenheit. Lightly spray a baking sheet with oil or non-stick spray.
  2. Combine all veggies in a medium bowl, and add olive oil and spice blend. Use a rubber scraper to toss until well coated.
  3. Spread veggies evenly on prepared baking sheet (save your bowl), and roast for 15-20 minutes, until just before done.
  4. Return veggies to the bowl and toss with maple syrup. Spread back onto the baking sheet and roast another 3-5 minutes to allow syrup to lightly caramelize.
  5. Serve promptly.

Notes

About 4-6 cups total veggies, so mix and match to your heart’s content.

For a mild experience, use 1/2 teaspoon, or if you like more heat, increase to 1 or 1 1/2 teaspoons.

Maple Latte Ice Cream

Week two has arrived and a twist on my favorite treat beverage is on the docket. My go-to coffee shop refreshment is a maple latte and when a coworker talked about a local maple-roasted coffee in near his home in Canada, I knew I needed to try it. He was kind enough to hand-deliver me a package of Spring Maple Blend from St. Joseph Island Coffee Roasters and it is some of the best coffee I’ve ever had. Not only did it make a phenomenal cold brew, but it resulted in one of my new favorite ice creams.

Maple Latte Ice Cream {{Baking Bytes}}

A creamy coffee base sweetened with maple makes for a beautiful flavor profile despite its simplicity. The maple coffee certainly adds a little something, but if you don’t have access to that use your favorite light or medium roast instead. This recipe is similar to an iced latte in flavor but with all the robustness of a proper dessert, and certainly one I will make again and again.

Maple Latte Ice Cream {{Baking Bytes}}

It does take some extra time with the infusing process, but straining is easy peasy if you use a reusable coffee filter. I use one designed for cold brewing, but any similar one should do just fine. (You can also use a paper filter but it’s much more annoying since it’s prone to splitting once wet.) Either way, I promise the finished product is worth it.

Maple Latte Ice Cream {{Baking Bytes}}

Lovely coffee flavor complemented by sweet maple, this is a perfect ice cream all year round. It’s perfect on its own but would be a wonderful addition to a chocolate cake if that’s more your style. It does freeze a bit harder than a traditional recipe, so leave it to soften on the counter for a few minutes before digging in.

Maple Latte Ice Cream 

Makes ~6 cups

Ingredients

3/4 cup half and half
1/4 cup almond or cow milk
1/4 cup ground (maple roasted) coffee1

2 1/4 cups heavy whipping cream
1/2 cup egg substitute
3/4 cup maple syrup

Directions

  1. In a small saucepan, heat half and half and milk on medium until it just starts to simmer, then remove from heat. Place coffee (in a filter, I use a reusable one) in the mixture and allow to steep for about one hour. Remove coffee (and any escaped grounds), squeezing grounds gently to release the most flavorful milk.
  2. In a large bowl, whisk infused mixture with all remaining ingredients until completely combined.
  3. Cover chill completely in the refrigerator at least 4 hours, or overnight.
  4. Freeze according to your ice cream maker’s directions, then place in a freezer-safe bowl to freeze for an additional three hours, or overnight.

Notes

1 You can certainly use decaf if you’re concerned about the caffeine content. Any coffee where you like the flavor is great! If you’re not using a maple coffee, you can pump up the maple flavor with a little maple extract, should you desire.

Pumpkin Pie Chia Pudding

Sometimes during the hectic holiday season, we forget to take care of ourselves. We forget to make time for the things that are important to us, and get wrapped up in balancing holiday preparations, year-end work projects, and the usual plague of household chores. The past few weeks have been a bit more difficult to balance as Michael focused on defending his thesis (success!) and I had a number of work projects dividing my time unevenly. Last week I opted to postpone this blog post in favor of a little self care; working late always makes me want a relaxed evening by the time I make it home.

Pumpkin Chia Pudding {{Baking Bytes}}

One thing that always helps me during these periods is to ensure I’m eating well even when life is full. I always prep my lunches over the weekend and I try to prepare a couple breakfasts for my weight-lifting days as well. This makes my mornings a little more relaxed and provides a healthy and filling lunch even if I only take a fifteen-minute break to eat it.

pumpkin_chia5


If you are also feeling a bit rushed in the mornings, this is a great option to prepare for the week ahead. Make enough jars for the week all in one go and they will be ready to eat as soon as you need them. I typically enjoy mine with a cup of hot cold-brewed coffee, a quick and healthy breakfast that is just the right amount before a weight-lifting session. I sometimes add a scoop (or half of one) of protein powder, but just as often I don’t. Know that it will change the texture slightly (and the taste, depending on your powder of choice) but it’s a great way to bump up your morning protein intake.

Pumpkin Chia Pudding {{Baking Bytes}}


Enjoy those fall flavors and give yourself an extra couple of minutes in the morning to enjoy a ready-to-eat meal. As an added bonus, making these in a jar gives them portability for those of you that don’t eat until you get to work, or want to wait until after your gym session. I like to make two on Sundays so my Monday and Wednesday breakfasts are all set. (One of these days I’ll share my Tuesday/Thursday recovery meal with you guys too.) If you’re making several servings, it works great to mix it all at once and then portion it into jars, but I don’t usually bother dirtying an extra bowl when I’m just making two at a time.

pumpkin_chia4

PS – Not a pumpkin fan? I haven’t personally tried it but I’m pretty confident sweet potato puree would work just as well. Just make sure it’s blended smooth before you mix it into your pudding.


Pumpkin Pie Chia Pudding

Makes one serving

Ingredients

1/2 cup almond milk (or any milk)
2 Tbsp chia seeds
2 Tbsp hemp hearts
1/2 – 1 scoop protein powder (optional)
1/2 tsp pumpkin pie spice mix
1/2 tsp maple syrup, to taste

1/2 cup 100% pumpkin puree (I buy Libby’s)

optional toppings
1-2 Tbsp toasted, chopped walnuts
extra drizzle of maple syrup
cinnamon

Directions

  1. In 12oz jar, whisk together milk, chia, protein powder (if using), spices, and syrup until completely combined.
  2. Gently stir in pumpkin until well mixed.
  3. Seal jar and place in the fridge overnight, or until ready to eat (up to one week).
  4. Enjoy plain or top with hemp hearts and/or toasted walnuts.