Mini Chocolate Chip Bundt Cake (& Vanilla Bean Ice Cream)

Several years ago I bought a fancy Pampered Chef stoneware mini fluted pan at a garage sale for like ten dollars. I promptly put it in a cupboard and mostly forgot about it because I have a standard bundt pan as well and if I’m honest, I simply don’t make many bundt cakes other than the delightful lemon one from a few years ago. If I’m more honest, the exhausting trial and error of finding that lemon bundt cake kinda turned me off to the entire style of cake for a while.

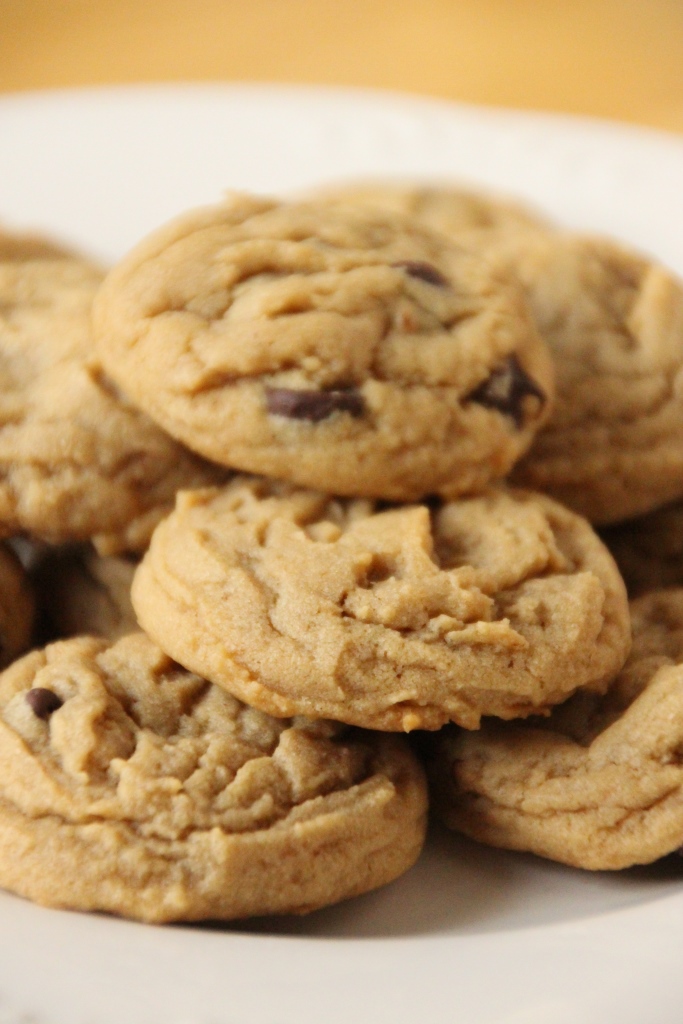
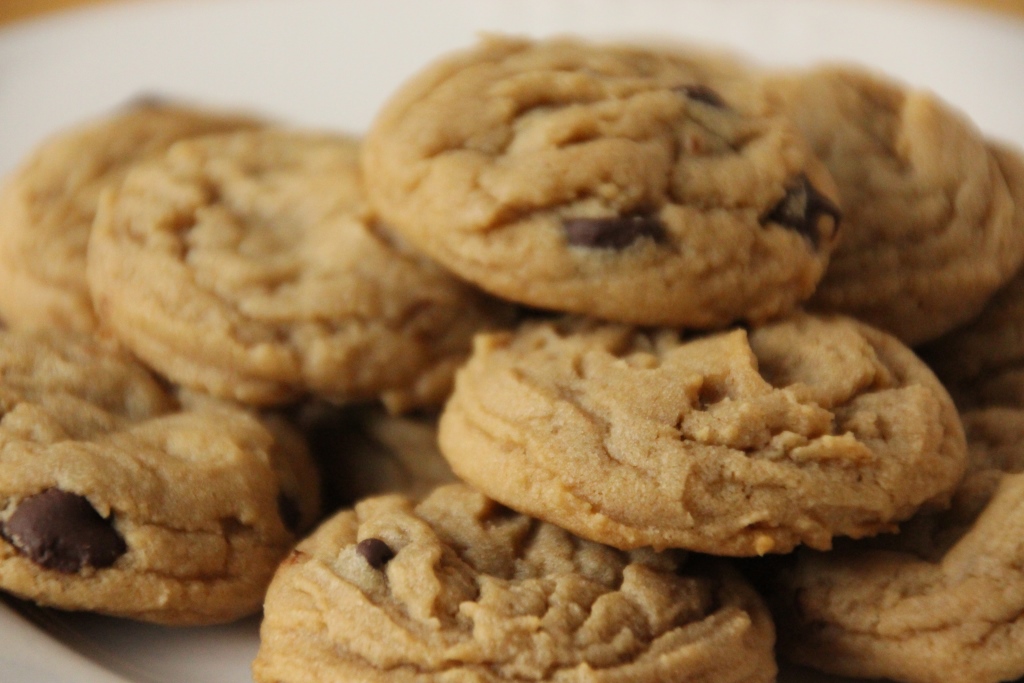
In any case, I eventually came across an amazing looking chocolate chip cookie double-bundt cake creation from Sprinkle Bakes and her description of the flavor was basically “yes please”. Chocolate chip cookies in pretty cake form? Please put that in my mouth.

On the other hand I certainly don’t need to make the double-layer version because if I have that much cake around I will just eat it. (M would probably not consider this a problem, to be fair.) I have fantastic willpower when it comes to not buying food that is terrible for me, but I have almost no willpower for anything in my line of vision at home. Things I have learned about myself over the years are summed up by “it’s easier to avoid temptation than it is to resist it.”

But I don’t want to avoid it completely, obviously, which is why I made the “mini” version. I put the mini in quotes because six of these mini cakes is the same amount as one standard bundt, which means each cake really serves two people. A fantastic way to test out my “new” pan and a new recipe all the while being fairly confident it’ll be delightful because both Pampered Chef and Sprinkle Bakes are extremely reliable. Fortunately, my hypothesis was correct.

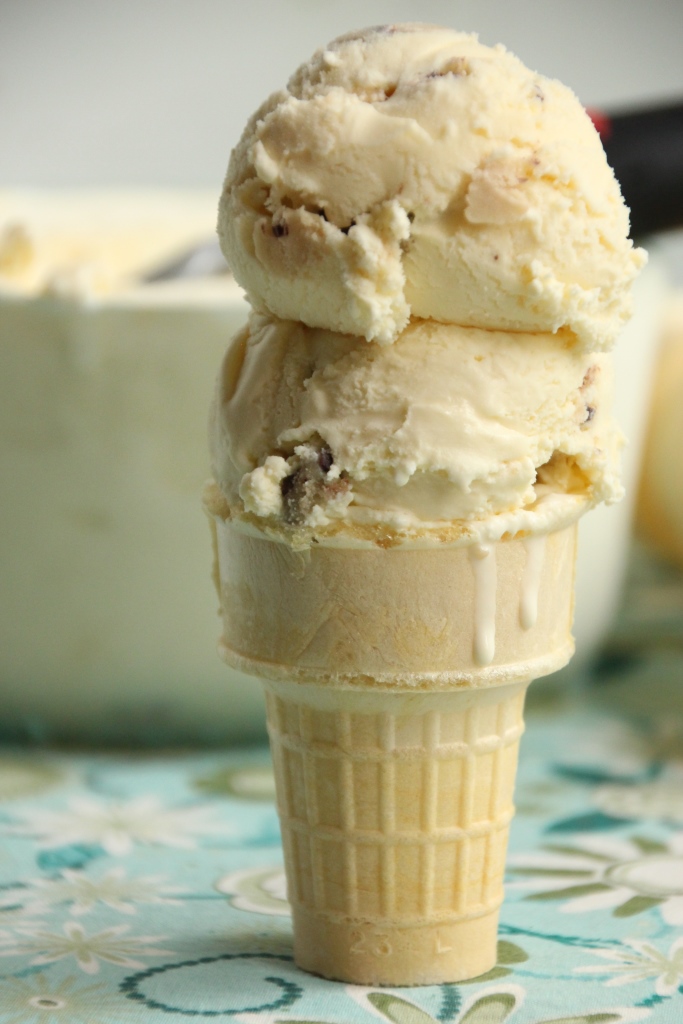
All the comforting flavor of a chocolate chip cookie baked into a pretty fluted bundt. It is just the kind of cake to pair beautifully with ice cream, and I opted for vanilla bean for the pretty speckles and traditional flavor pairing. I shared my recipe below, but feel free to pair with your favorite store-bought variety instead. If vanilla seems too plain, chocolate is always a good bet, or you could pair with strawberry for a summer flavor and some fun color. One cake and a large scoop is a perfect dessert for two, and is a wonderful way to end a celebratory day.

Since there is no leveling, frosting, or really any extra presentation required, this is a fantastic option for those times you need to need a less time-consuming but still impressive dessert. It also travels well since there’s no frosting to fall off or glaze to slide around, and is quick to assemble once you arrive at your destination. You could even scoop the ice cream ahead of time to save on required utensils and remove the need to let your ice cream soften beforehand. Plop on a scoop, drizzle on some chocolate sauce, and you are all set for a flawless and decadent experience. It would also be a super cute addition to a couples’ dinner party, if you’re in to the host(ess) gig.

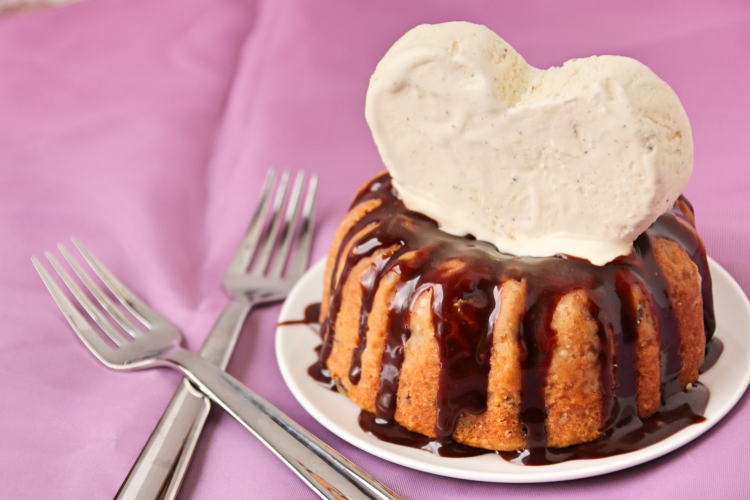
As you may have noticed, I molded my ice cream into heart shapes. Since I made this for our anniversary dessert, I like to do a little something extra to make it special. If you’re interested in this, just line mini cake pans of your choice with plastic wrap, then spread softened ice cream (if you’re using homemade, just do this right after churning) into the pans and freeze until firm. They melt quick once they’re out and near the hot fudge sauce, so only assemble right before you’re ready to serve.

Next time you’re in the market for a cake, I highly recommend you give this one a try (whether you invest in the fancy mini-bundt pans or not.)

Chocolate Chip Bundt Cake

Gleefully borrowed from Sprinkle Bakes
Makes six 4.5″ mini bundt cakes (or one standard bundt cake)

Ingredients

Cake
3 cups all-purpose flour
2 tsp baking powder
3/4 tsp salt
1/2 tsp + 1/8 tsp baking soda

1 cup unsalted butter, softened
1 1/2 cups brown sugar, lightly packed

3 eggs, room temperature
1 1/4 cups sour cream (full fat)
2 tsp vanilla

1 1/2 cups mini chocolate chips

Toppings
Hot fudge sauce
Vanilla bean ice cream (recipe below)

Directions

  1. Preheat oven to 350 degrees Fahrenheit.
  2. Grease and flour one standard bundt pan, or a 6-well mini fluted pan.
  3. In a medium-large bowl, whisk together flour, baking powder, salt, and baking soda until completely combined.
  4. In the bowl of your electric mixer, beat butter and brown sugar on medium speed until light and fluffy.
  5. Add eggs one at a time, mixing between each addition.
  6. Add sour cream and vanilla and mix until completely combined, scraping the bowl as necessary.
  7. Add the flow mixture, mixing on low speed just until combined, then stir in the chocolate chips. Batter should be thick.
  8. Spoon batter into prepared pan and bake 30-35 minutes for mini bundt cakes (or 40-50 minutes for a standard bundt), or until tops are golden brown and a toothpick comes out mostly but not completely clean. Don’t over-bake or cakes will be a bit dry.
  9. Cool in the pan for at least 10 minutes, then invert onto a cooling rack to cool completely.
  10. When ready to serve, top one mini bundt or slice (I like to warm mine briefly in the microwave) with a drizzle of hot fudge sauce and a scoop or two of your favorite ice cream. Share with a friend (or eat it all yourself, I won’t judge.)

Vanilla Bean Ice Cream 

Makes ~6 cups

Ingredients

2 cups heavy whipping cream
1 cup half and half
3/4 cup sugar
1/2 cup egg substitute
2 tsp vanilla
1/2 tsp vanilla bean powder

Directions

  1. In a large bowl, whisk together all ingredients until completely combined.
  2. Cover bowl and chill in the refrigerator until thoroughly cold, or overnight. (Overnight is better as it will allow the vanilla bean flavor to really permeate the mixture.)
  3. Freeze according to your ice cream maker’s directions, then place in a cold freezer-safe bowl (or cake tins lined with plastic wrap) to freeze for an additional three hours, or overnight.
Advertisement

Chocolate Chip Zucchini Bread

With summer coming to a close tomorrow, perhaps your garden is overflowing with things to use or store. Although we only have a small garden, I did get an excitingly abundant harvest given its size. The raspberries were proliferous for several weeks (some are in the freezer to bake with this winter), green beans galore, a few delicious broccoli heads, a decent amount of potatoes, giant zucchini (hopefully still some more in the coming weeks), and for the first time ever, carrots!

This is the third year in a row I’ve tried growing fingerling carrots, and the first year they grew bigger than my baby thumbnails. Planting them on the very edge so they weren’t overgrown by the beans seemed to be the key, and I’m excited to eat them. I planted two rows so likely will chop some up for the freezer. Roasted vegetables are my favorite and I’m sure we’ll be eating many panfuls in the coming weeks.

Chocolate Chip Zucchini Bread {{Baking Bytes}}

My zucchini plant was not as abundant as some, likely due to the lack of sunlight my garden gets, but it still produced quite a few and there should be some more to pick if the weather doesn’t turn super cold right away. If, like many people, you have more zucchini than you know what to do with, then this is definitely the recipe for you.

Chocolate Chip Zucchini Bread {{Baking Bytes}}

I see recipes for zucchini bread, muffins, scones, pancakes, waffles, etc, all over the place, but many of them are heavy on the sugar and chocolate. Although this is delicious, it somewhat ruins the health factor of the zucchini if you’re basically eating dessert bread.

Chocolate Chip Zucchini Bread {{Baking Bytes}}

I recently came across this recipe on Pinterest (as usual) and loved that the chocolate was only in chip form, and the sugar content relatively low. I made some modifications like I always do, and it resulted in a very tasty but much less sweet variation.The zucchini flavor is mild but the bread is warm and inviting with cinnamon and nutmeg throughout. It’s sweetened with honey and a few chocolate chips, but maintains a much less decadent flavoring than your typical sugary quickbreads. You can obviously increase the chocolate chips if you want, but I felt this amount was plenty. Even with 30% less sugar than the original recipe, it still functions just as well as a dessert as it does for breakfast or an afternoon snack.

Chocolate Chip Zucchini Bread {{Baking Bytes}}

Krista’s recipe called for walnuts, but I never put nuts in baked goods as I don’t care for the textural juxtaposition of soft bread and crunchy nuts if I’m not emotionally prepared for it. However, this time I chopped a few walnuts and sprinkled them on top, and it was a wonderful, crunchy addition to the bread. It’s a method I may use in the future for banana or pumpkin bread to give it a little something extra. If you don’t like walnuts, pecans or sliced almonds would work great too, or you can leave them off entirely, of course.

Chocolate Chip Zucchini Bread

Adapted from Joyful Healthy Eats
Makes 1 loaf (12 slices)

Ingredients

1 3/4 cups whole wheat flour
2 tsp cinnamon
1 tsp baking powder
1/2 tsp baking soda
1/2 tsp salt
1/2 tsp ground nutmeg

1/3 cup raw honey
1/3 cup coconut oil

1/2 cup applesauce
1 egg
2 tsp vanilla

1 1/4 cup grated zucchini
1/3 cup + 2 Tbsp chocolate chips, divided

1/4 cup chopped walnuts (optional)

Directions

  1. Preheat oven to 350 degrees Fahrenheit. Grease (butter, coconut oil, PAM, whatever) and flour a loaf pan, shaking out excess flour. Set aside.
  2. If you haven’t already, use a cloth or paper towels to squeeze as much excess water from your zucchini as possible. Get your upper body workout here, if your zucchini is drier your bread is less likely to have wet spots in the middle. Set aside.
  3. In a medium bowl, whisk together flour, cinnamon, baking powder, baking soda, salt, and nutmeg. Set aside.
  4. In a separate microwave-safe bowl, combine honey and coconut oil. If they are not already liquid, heat 20-30 seconds and whisk until smooth. It’s okay if there are some small bits of coconut oil still solid.
  5. Add applesauce, egg, and vanilla, and whisk until completely combined.
  6. Slowly pour wet ingredients into dry ingredients, stirring (I used a rubbed scraper) until completely combined.
  7. Fold in zucchini and 1/3 cup chocolate chips, then pour into prepared loaf pan.
  8. Sprinkle with remaining chocolate chips and walnuts, if using.
  9. Bake 50 minutes, or until a toothpick comes out clean.
  10. Let cool most of the way in baking pan, then run a knife along the edge and turn out onto a cooling rack to cool completely, or slice and serve pronto because it smells way too delicious to wait.
  11. Store completely cooled leftovers in an airtight container on the counter.

Chocolate Chip Cookie Dough Ice Cream {National Ice Cream Month}

[Welcome! In case you missed it, July is National Ice Cream Month. Each Wednesday I’ll be posting a new flavor, so be sure to check back and find your new favorite. if you missed the first two, they can be found here and here.]

Last week we did tea, this week we’re going a bit more traditional and bringing an all-American classic to the repertoire: cookie dough! Despite my adventures in ice cream recipes, M rarely eats anything besides the vanilla and maybe the peanut butter if he’s feeling fancy. I inquired as to what flavors he might deem worthy of veering away from his precious vanilla, and cookie dough was mentioned in the (rather short) list. Since this also sounded delicious to me, I figured I’d give it a shot.

Chocolate Chip Cookie Dough Ice Cream {{Baking Bytes}}

This is a newly classic flavor (oxymoron, much?) that can be found basically anywhere, but not one I’d really considered making. It seemed a bit tame so it didn’t quite pique my interest in the same way some of the more complex flavors have. But be that as it may, it’s definitely delicious and worth your time.

Chocolate Chip Cookie Dough Ice Cream {{Baking Bytes}}

I used my go-to vanilla recipe mixed with cookie dough balls from a modified version of the standard Nestle recipe. A creamy base and bites of raw dough make for a more textural experience in addition to being yummy. Great for kids and adults alike, especially served in a cone on a hot day.

Chocolate Chip Cookie Dough Ice Cream {{Baking Bytes}}

When I made mine, I used approximately 1/2 tsp sized dough balls, but I would make them even smaller next time. This would make them more evenly dispersed as well as be easier to dish, since the cookie dough isn’t quite as scoopable as the ice cream itself. In any case, use whatever size dough balls that suits you, but bear in mind that smaller might be better, just this once.

Chocolate Chip Cookie Dough Ice Cream {{Baking Bytes}}

Chocolate Chip Cookie Dough Ice Cream 

Makes ~6 cups

Ingredients

1 recipe cookie dough (below)

3/4 cup sugar
2 cups heavy whipping cream
1 cup half and half (or milk)
1/2 cup egg substitute
1.5 tsp vanilla

Directions

  1. In a large bowl, whisk together all ingredients except the cookie dough. Cover bowl and chill in the refrigerator at least 4 hours, or overnight.
  2. Freeze according to your ice cream maker’s directions, gently fold in cookie dough balls, then place in a freezer-safe bowl to freeze for an additional three hours, or overnight.

Chocolate Chip Cookie Dough 

Ingredients

1/2 cup brown sugar
1/4 cup white sugar
1/2 cup butter, softened

1/2 tsp vanilla

1 cup all-purpose flour
1/4 tsp salt

1/2 cup mini chocolate chips

Directions

  1. In the bowl of stand mixer, beat butter and sugars until well mixed and fluffy. Stir in vanilla.
  2. Add flour and salt, and mix until just combined.
  3. Stir in chocolate chips until well distributed.
  4. Roll entire recipe into small balls (less than 1/2 tsp each) and place in the freezer for at least 30 minutes, or until ready to use.

Choose Your Own Adventure Scones

Blackberry Dark Chocolate Chip Scones {{Baking Bytes}}Welcome to May, my lovely readers. Apologies for the April hiatus, I got busy and blah blah all the usual excuses. However, I’ve been working on some new recipes for the summer and I’m excited to share them with you over the coming months.

Raspberry White Chocolate Chip Scones {{Baking Bytes}}

In the meantime, I’ve been craving scones lately and wanted to get some berry action given the unseasonably warm weather we’ve been having here in Montana. I hopped over to Pastry Affair since I was pretty sure she’d have a great recipe, and boy was I right. Incredibly moist, bursting with berries, and boasting the added delight of white chocolate chips, these scones were exactly what I was looking for. Perfect for dessert, breakfast, or snack, they’re delicious at any time of day. Serve them solo with coffee as the main event, or in conjunction with eggs and sausage for a fuller breakfast.

Blackberry Dark Chocolate Chip Scones {{Baking Bytes}}

As fragile as raspberries are, even my frozen ones became somewhat muddled in the dough, but I think this only adds to the aesthetic as well as resulting in a perfect raspberry flavor in every bite. (The lovely pink color would make them extra adorable for Valentine’s Day, if you’re in to that sort of thing.) The dough was annoyingly sticky, I’ll admit, but an extra hand washing is well worth it in the end. In fact, I enjoyed them so much that the next day I made another batch with blackberries and dark chocolate chips. I think they’d be awesome with many combinations of berries and baking chips, so play around with the flavors and report back with your favorites.

Blackberry Dark Chocolate Chip Scones {{Baking Bytes}}

Scones are something I never much enjoyed until I went to Scotland in 2009, and it was shortly after that when I found my go to recipe for cinnamon sugar scones. I love that recipe because it’s simple and super quick, but this one will definitely be added to the repertoire for a “berrylicious” alternative.

Raspberry White Chocolate Chip Scones {{Baking Bytes}}

As you are likely aware, Mother’s Day is this coming Sunday. As I eat these scones, and write this post, I think about my mom and how much she has molded me and helped me throughout my life. Even now, she graciously proofreads all my posts and offers her own opinions and tweaks when she tries the recipes. I am so grateful for her being such an amazing person in my life and I wish I could bring her some of these scones to start off a day of celebrating her. But since we’ll be about a thousand miles apart this weekend, I guess a phone call will have to do.

Blackberry Dark Chocolate Chip Scones {{Baking Bytes}}

Thanks Mom. =)

Raspberry White Chocolate Chip Scones {{Baking Bytes}}

Choose Your Own Adventure Scones

Borrowed from Pastry Affair
Makes 8 scones

Ingredients

2 cups all-purpose flour
2 Tbsp sugar
1 Tbsp baking powder
1/2 tsp salt

6 Tbsp butter, softened

1 rounded cup frozen berries (do not thaw)1
1/2 cup baking chips (white chocolate, chocolate, etc)2

1/3 cup heavy cream
1 tsp vanilla
1 large egg

raw or granulated sugar for topping

Directions

  1. Preheat oven to 350 degrees Fahrenheit. Line a baking sheet with a silicon mat and lightly dust with flour. Set aside.
  2. Whisk together flour, sugar, baking powder, and salt in a large bowl.
  3. Use your fingers to mix in butter until well distributed and texture is like fluffy but damp sand.
  4. Gently stir in berries and chips. Set aside.
  5. Whisk together remaining ingredients in a small bowl. Pour over dry mixture and gently mix until combined. You will likely need to use your hands and it will be very sticky – this is annoying, but normal and oh so worth it.
  6. On your lightly floured silicon mat, flatten dough into a circle about one inch thick. If you like, sprinkle on some raw sugar.
  7. Cut into eight wedges (I like to use a pizza cutter) and gently spread to at least one inch apart on the baking sheet using a spatula dipped in flour. Wipe up extraneous flour if there’s a lot of extra.
  8. Bake 25-30 minutes. Scones should no longer look wet and the bottoms will be lightly browned. Cool at least a few minutes before serving; they are also delightful at room temperature.
  9. Store covered but unsealed at room temperature. (If you seal them they will get sticky. I promise they will stay moist overnight. If you have pets or bugs you can cover them with a cloth or lid – just not anything airtight.)

Notes

Raspberries and blackberries have both been awesome. I cut some of the larger blackberries in half but that’s not strictly necessary. Blueberries or cranberries would also be great.

The full half cup makes the scones quite sweet, so feel free to use a smaller amount (or leave them out entirely) if you don’t want quite as much sugar.

Peanut Butter Chocolate Chip Cookies

Hope you’re having a delightful Monday! If you aren’t, maybe these cookies will help to improve it. This is probably the recipe I use most often as it’s one of M’s favorites. It’s also very consistent in baking and pops out lovely round cookies every time. Although we’ve been buying Skippy peanut butter ever since Costco stopped selling Jif (jerks), I still prefer my adaptation of the Jif recipe. It makes perfect and soft cookies every time and doesn’t require softened butter, making it a good go-to recipe for any time of the year. It also freezes well, so feel free to make a double batch and save half for later. Geared more toward a peanut butter fan than a chocolate lover, these cookies are the antithesis to the chocolate peanut butter chip cookies I’ve posted previously.

Peanut Butter Chocolate Chip Cookies {{Baking Bytes}}

Spectacularly peanut buttery with a smattering of chocolate chips, I like to make these cookies small for a bite-sized treat. They are chewy and sweet and practically require an accompanying glass of milk, so I like to have the option of eating one or five, depending on how big of a sugar rush I’m looking for. If you prefer larger cookies, have no fear. Use two tablespoons of dough instead of one, flatten slightly, and bake for an extra two minutes or so. I like to bake a test cookie if I’m not using my usual method just to make sure I don’t ruin a whole tray.

Peanut Butter Chocolate Chip Cookies {{Baking Bytes}}

Personally, I think these cookies speak for themselves so I’ll stop here. If you’re in the mood for a peanut butter experience, whip up a batch and have a few warm from the oven; your Monday can only get better from here.

Peanut Butter Chocolate Chip Cookies {{Baking Bytes}}

Peanut Butter Chocolate Chip Cookies 

Adapted from Jif’s Irresistible Peanut Butter Cookies
Makes about 5 dozen small cookies

Ingredients

1 1/4 cups lightly packed brown sugar
3/4 cup peanut butter1
1/2 cup Crisco shortening
3 Tbsp milk
1 Tbsp vanilla extract

1 large egg

2 cups all-purpose flour
3/4 tsp baking soda
3/4 tsp salt

1 cup chocolate chips

Directions

  1. Preheat oven to 375 degrees Fahrenheit and line cookie sheet(s) with parchment paper or silicon baking mats.
  2. In the bowl of your stand mixer, beat sugar, peanut butter, shortening, milk, and vanilla on medium speed until completely blended and fluffy.
  3. Add egg, beating until just combined
  4. Add flour, baking soda, and salt, mixing on low until just incorporated. Dough should not stick to your finger. If it does, stir in extra flour in very small amounts until it’s no longer sticky.
  5. Stir in chocolate chips.
  6. Using a 1 Tbsp cookie scoop, place two inches apart on prepared cookie sheets and bake for 7-9 minutes.2 They will look slightly under done, but should be matte, not shiny.
  7. Cool briefly on cookie sheet, then place on a wire rack to cool completely.
  8. Store in an air-tight container on the counter for up to 1 week (or maybe longer, they are always gone by this time), or in the freezer for several months.

Notes

1 I always use creamy, but crunchy peanut butter will definitely work. Both Skippy and Jif work great, but I have not tried a natural peanut butter in this recipe, so use caution if you do. You may need to add a little extra flour at the end, so check the dough before you add chocolate chips.

2 If you’re using dark pans, they will likely be closer to the 7-minute time, if you’re using light pans (or a silicon mat) they will probably need closer to 9 minutes. I use light aluminum pans and silicon mats and 9 minutes is correct for me.

[Psst. Don’t forget to tune in tomorrow morning for a new ice cream recipe! Hint: alcohol ahead. If you missed last week’s ice cream recipe, it can be found here.]