Guinness & Baileys Cheesecake Swirl Brownies

Brownies are one of the few things I almost never make from scratch. Costco sells 6-packs of Ghirardelli Triple Chocolate Brownie Mix which is what I nearly always use. Super chocolately, even more super easy, and the perfect fudgy texture that I love. Honestly, most homemade brownies are not as consistently good as this mix.

However I have been known to doctor up the mix a bit, swirling in peanut butter or folding in additional mix-ins. Brownies are one of my go-to desserts for potlucks because we always have them on hand and they are always well received; the fact that they only require five minutes of active cooking time is also a huge bonus.

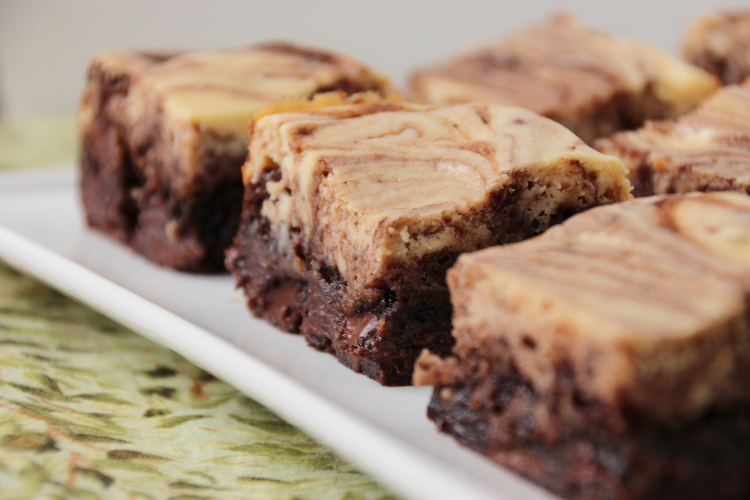
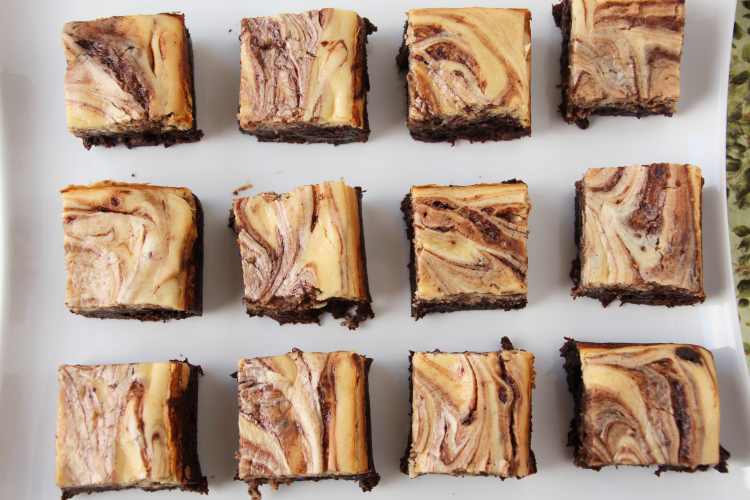
A few weeks ago I decided to try out a cheesecake swirl, blending up the standard cream cheese and sugar combination that is beloved by many. It was, expectedly, a huge hit. Given the upcoming holiday, this gave me the idea to blend in typical St. Patrick’s Day flavors as another option to add to my repertoire.

Admittedly, this makes the recipe a tad more time consuming as reducing the Guinness is not a quick process. Fortunately you can do this ahead of time and just store it in the fridge until you’re ready to use it. This makes the day-of process much quicker and allows you to do the reduction while you’re already minding something on the stove. It’s relatively low-maintenance so plopping it on a back burner while you make dinner would work just swell.

Despite having an entire bottle of Guinness, the change is subtle. Rather than smacking you in the face with beer, it simply enhances the chocolate and adds a nice robustness to the flavor profile. If you didn’t know it was in there, it might be challenging to put your finger on the mystery addition. It blends perfectly with the Baileys cream cheese for a supremely decadent but not extravagant dessert experience. And honestly, if you want to skip the Guinness part and just swirl in the Baileys cream cheese to regular ‘ole brownies, I would not judge you one bit. You could also skip the reduction step and just measure out standard beer, but I expect the flavor would be even less pronounced. (I also had the idea that Kahlúa in lieu of Guinness would be an excellent flavor pairing, and this may be my next brownie adventure.)

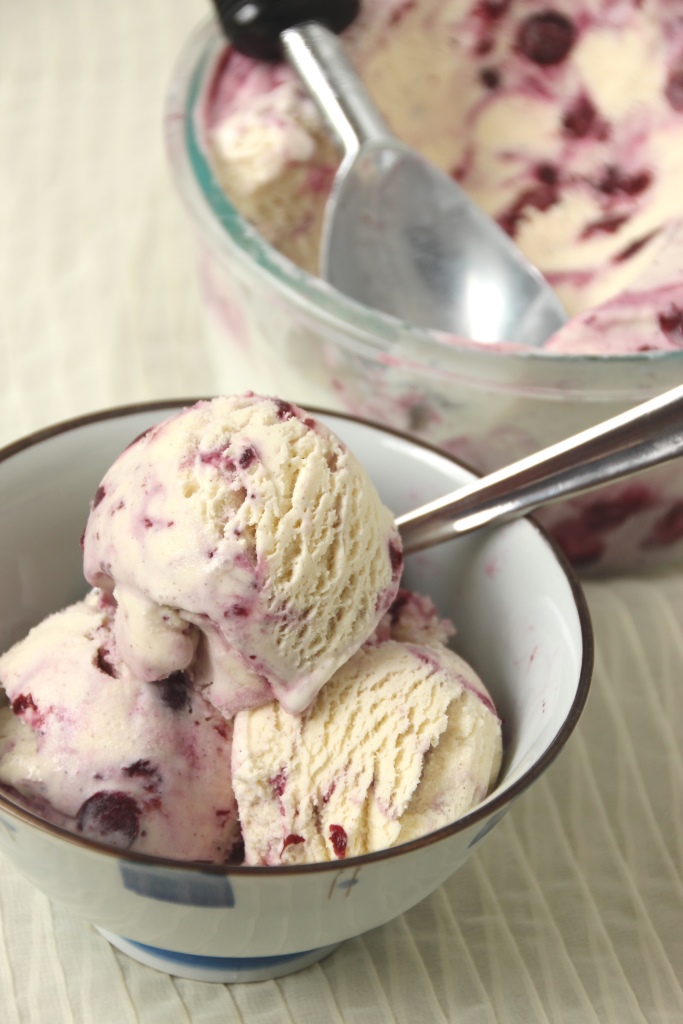
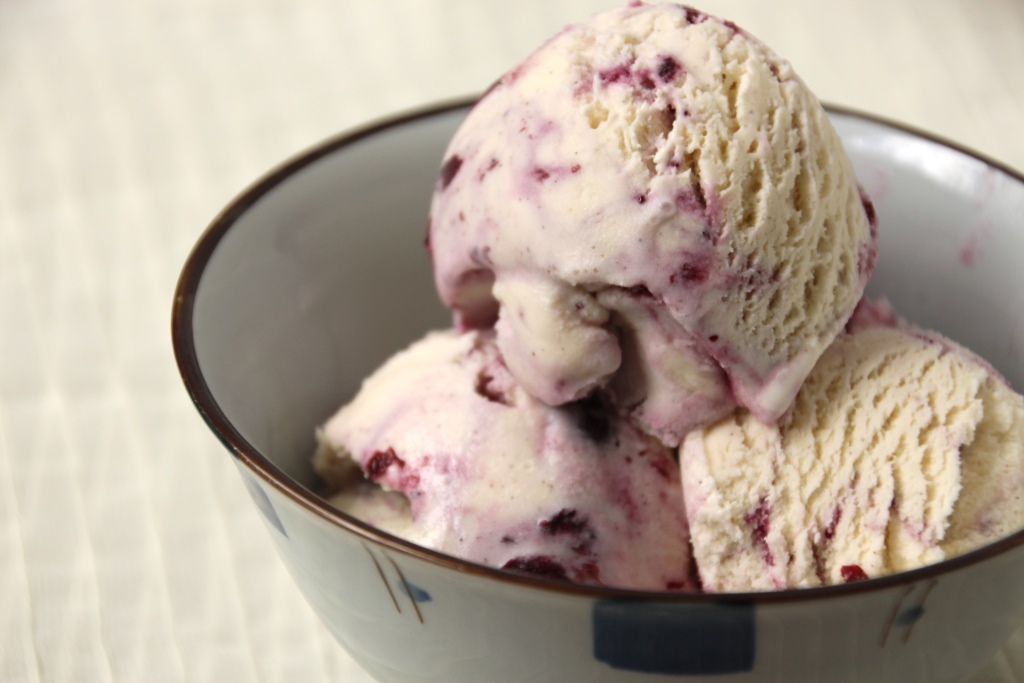
If you need an easy but delicious St. Paddy’s Day dessert, this could be the recipe for you. And if you’re looking for a crazier and more kapowy Guinness experience, then Irish Car Bomb Sundaes might be right up your alley.

Guinness & Baileys Cheesecake Swirl Brownies

Makes one 8×8 pan

Ingredients

1 bottle Guinness beer

1 box Ghirardelli brownie mix (I use Triple Chocolate)
1/3 cup vegetable oil¹
1 egg

8oz cream cheese, room temperature
1 egg
1/4 cup sugar
1/4 cup Baileys liqueur

Directions

  1. In a small saucepan, simmer Guinness until reduced to 1/3 cup¹. Pour into a medium bowl and let cool about 10 minutes or until ready to use (this is a great step to do ahead of time while you’re cooking something else on the stove).
  2. Preheat oven to 325 degrees Fahrenheit. Line a square pan with parchment paper and spray with cooking spray. Set aside.
  3. Add oil and egg and mix until well combined. Stir in brownie mix until just combined.
  4. Reserve about 1/2 cup of brownie mix, and spread remainder into prepared pan.
  5. In a small bowl and using an electric mixer, beat cream cheese until fluffy.
  6. Beat in egg and sugar until well combined, then beat in Baileys until just combined.
  7. Spread evenly atop brownie mix.
  8. With reserved mix, add spoonfuls on to the cream cheese mixture, then use a table knife to swirl in a pattern.
  9. Bake for about 50 minutes, or until brownies are still slightly wiggly but not watery.
  10. Allow to cool in pan for at least 30 minutes, then lift parchment paper to remove and cool completely.
  11. Use a sharp knife to cut into squares, wiping knife between each cut for clean slices.

Notes

¹ Or however much water/oil your brownie specific mix calls for.

Advertisement

Blueberry Cardamom Cheesecake Ice Cream {National Ice Cream Month}

 [Welcome to Frozen Friday! In honor of National Ice Cream Month, I am sharing a new ice cream recipe each Friday morning. In case you missed them, be sure to check out the previous recipes, s’mores and mimosa!]
 
Is it just me, or is July flying by? I feel like May was only a few weeks ago and here it is with August right around the corner. Insane. At least until I take the weather into account. Montana has been met with somewhat of a heatwave this week, and I’m super grateful we don’t get much humidity along with it.
 

Blueberry Cardamom Cheesecake Ice Cream {{Baking Bytes}}

With hot weather comes extra cravings for cold treats, so hopefully you’re ready for a new flavor. The world is full of cheesecake ice creams, usually strawberry, and today we’ll had one more to the mix. I chose blueberry due to the abundance in my freezer, but you could definitely substitute blackberry, strawberry, raspberry, or whatever your favorite is.

Blueberry Cardamom Cheesecake Ice Cream {{Baking Bytes}}

The ice cream itself is a mild cheesecake flavor made more interesting with the addition of cardamom. Although I actually really love the flavor of cardamom, it rarely occurs to me to use it outside of my Christmas krumkake-making sessions with my family. It’s a wonderful spice with a bit more intrigue than cinnamon, and is ready to up the ante in your baking adventures. A few years ago I discovered cardamom cream cheese frosting, and I’ve been a fan ever since.

Blueberry Cardamom Cheesecake Ice Cream {{Baking Bytes}}

This is a pleasantly spiced and cream cheesy ice cream to add to your repertoire, and is excellent on its own. The blueberry sauce swirl not only adds wonderful flavor, but a gorgeous color as well. You can stir it in as much or as little as you like, depending on whether you prefer it streaky or entirely purple.

Although cheesecake ice cream often contains a Graham cracker crust component, I opted not to add one. Personally it adds a level of sweetness I am not looking for, and it alters the texture as well. If you’re missing it, however, you can certainly crumble your favorite Graham cracker crust into the ice cream, or use it as a topping.

Blueberry Cardamom Cheesecake Ice Cream {{Baking Bytes}}

I’ve included recipes for both cardamom cheesecake ice cream and a blueberry sauce below. If you’re in a bind, you can substitute canned blueberry pie filling, but I promise this sauce is quite simple to make, just remember to allow for chilling time. You likely will not have any leftover sauce, so make an extra batch (with extra cornstarch! see note) if that saddens you. Not a fan of cardamom? Substitute cinnamon or nutmeg, or leave it out entirely. If you’re looking to pump up the cream cheese flavor, you can try adding extra cream cheese to the base, or you can add a tablespoon or two of dry Cheesecake-flavored instant pudding mix.

Blueberry Cardamom Cheesecake Ice Cream {{Baking Bytes}}

This is a lovely recipe for these hot summer days, and I hope you enjoy it as much as I have!

Cardamom Cheesecake Ice Cream 

Makes ~6 cups

Ingredients

3/4 cup sugar
8 oz cream cheese, softened

2 cups heavy whipping cream
1 cup half and half
1/2 cup egg substitute

1 tsp vanilla
1-2 tsp ground cardamom1

1-2 Tbsp dry Cheesecake-flavored instant pudding mix (optional)2

Directions

  1. Warm cream cheese in the microwave until easily stirred (if it isn’t already), about 30 seconds.
  2. Add all ingredients to a blender, and blend until mixture is smooth.
  3. (If you don’t have a blender, use a hand mixer. Alternatively, mix cream cheese and sugar first, then slowly whisk in liquids until completely combined and smooth. Whisk in vanilla and cardamom.)
  4. Cover bowl (or keep it lidded in the blender container) and store in the refrigerator until completely chilled, or overnight.
  5. Freeze according to your ice cream maker’s directions, then place in a freezer-safe bowl to freeze for an additional three hours, or overnight. Or, follow Blueberry Cheesecake Ice Cream recipe below.
  6. Top with crushed Graham crackers or Graham cracker crust for extra flair and crunch.

Notes

1 I used 1.5 tsp, but I think I’ll use 2 next time because I like a pretty strong flavor. If you don’t like cardamom, you can leave it out or substitute cinnamon or nutmeg, adjusting quantities to your preference.

I did not add this, but if you want it super cream cheese tasting, this is the easiest way to pump up the flavor.

Blueberry Sauce3

Borrowed from My Baking Addiction
Makes about 2 cups

Ingredients

2 cups blueberries (fresh or frozen)
1/2 cup water
1/2 cup sugar
2 Tbsp lemon juice

1 Tbsp cornstarch
1 Tbsp cold water

1/2 tsp vanilla

Directions

  1. Combine blueberries, 1/2 cup water, sugar, and lemon juice in a saucepan. Cook over medium heat, stirring often, until mixture comes to a low boil.
  2. Mix cornstarch and 1 Tbsp cold water until completely combined. Slowly stream into the blueberries, stirring constantly but gently, and simmer until mixture thickens, about 5 minutes.
  3. Remove from the heat and stir in vanilla and zest, mashing blueberries a little.
  4. Serve on your favorite French toast, pancakes, waffles, ice cream, or mix in to Blueberry Cheesecake Ice Cream (below).
  5. Store leftovers in the fridge and reheat slightly as necessary.

Notes

This is the same recipe I use for topping waffles and Overnight French Toast, but with less cornstarch for a thinner sauce, which keeps it smoother when frozen in the ice cream. If you want to make it as a topping, use 2 Tbsp cornstarch and 2 Tbsp cold water.

Blueberry Cheesecake Ice Cream

Ingredients

1 recipe cheesecake ice cream, chilled but not churned (or *just* churned)
1 recipe of thin blueberry sauce, chilled

Directions

  1. If you haven’t churned the ice cream already, place a freezer-safe bowl in the freezer.
  2. Freeze ice cream according to your ice cream maker’s directions.
  3. Remove bowl from freezer, and drizzle some blueberry sauce on the bottom.
  4. Gently spread about one cup of ice cream into the bowl, and top with another drizzle of blueberry sauce. Avoid stirring if you don’t want your ice cream to be completely blue/purple. Repeat with remaining ice cream and sauce. If desired, gently swirl with a table knife.
  5. Return bowl to freezer for about 3 hours, or until ice cream is firm.
  6. Serve solo or topped with extra sauce and crushed Graham crackers (or crust.)

White Chocolate Raspberry Cheesecake

I am not entirely sure how it could possibly be February already, but the sudden pinkification of everything in stores and on Pinterest means it must be true. Between work, training, and M finally returning home, January flew by at a rather alarming rate. Nonetheless, 2014 has started off pretty well so far and now that I’ve finally established my goals for the year I am pretty excited to start on them. I’m looking forward to a year of new recipes and new experiences.

White Chocolate Raspberry Cheesecake {{Baking Bytes}}

One of my biggest goals for the year is to run six half marathons; the first is on my birthday, March 15. The main goal of this first race was to keep me running all winter (so far a success) and give me a head start with training. Since I’m hoping for a sub-2:10 in September, I knew there was no way I’d get there if I started in June (as is my habit.) So far so good, but we’ll see where the year takes us.

On the flip side, I’m still baking up loads of sugary delight because that’s clearly going to help me get there. Ha. But be that as it may, this is the month of pink and red heart-shaped boxes of mostly terrible chocolates. Or in layman’s terms, Valentine’s Day. I’ve never been particularly fond of this holiday (shouldn’t you appreciate each other all the time?) but it happens to be the same day as my anniversary with M. (He is quick to point out this was coincidence and there is no “sappy love story” behind it. Silly kid.) This has drastically improved the “holiday” in my eyes, and each year I bake a cake to celebrate. Look for that post in a couple of weeks.

White Chocolate Raspberry Cheesecake {{Baking Bytes}}

In the mean time, here’s a fabulous recipe which would be delightful for any special occasion. Chocolate cookie crust, white chocolate, and a raspberry swirl come together in an amazing and smooth cheesecake sure to impress. Drizzle with chocolate sauce for extra presentation points.  It is very rich so just a small piece will do, but it keeps very well in the freezer if you don’t have eleven best friends to invite over.

White Chocolate Raspberry Cheesecake {{Baking Bytes}}

Fair warning, I’ve never managed to make this cheesecake without it cracking along the swirls, but it is beautiful and delicious just the same. If you’re looking to step it up a notch this year, and you have a spring-form pan1, this cheesecake is a fabulous option. Although a bit time-consuming, none of the steps are difficult as long as you pay attention. Bonus: it’s at least as delicious as it is pretty.

White Chocolate Raspberry Cheesecake

Adapted from CindyAnn
Makes 1 cheesecake

Ingredients

1 1/2 cups chocolate cookie crumbs (about 20 Oreos2)
1/4 cup butter, melted

10 oz frozen raspberries
2 Tbsp sugar
1 Tbsp cornstarch
1/2 cup water

2 cups white chocolate chips3
1/2 cup half and half
3 (8 oz) packages cream cheese, room temp
1/2 cup sugar
3 eggs
1 tsp vanilla extract

White Chocolate Raspberry Cheesecake {{Baking Bytes}}

Directions

  1. In a small bowl, mix together cookie crumbs and melted butter until completely combined.
  2. Pour mixture into the bottom of a 9″ or 10″ spring-form pan, pressing down evenly and thoroughly to form the crust. No need to press it up the sides.
  3. In a small saucepan, combine raspberries, sugar, cornstarch and water, and heat over medium-high until boiling. Continue boiling until sauce has thickened, about five minutes. Strain sauce to remove seeds.
  4. Preheat oven to 325 degrees Fahrenheit.
  5. Using a double boiler (or a metal bowl over simmering water), melt chocolate and half and half, stirring until smooth. Set aside.
  6. Meanwhile, beat the cream cheese and sugar on medium-high speed until smooth and fluffy, about three minutes.
  7. Add eggs one at a time, beating on medium until combined.
  8. Stir in vanilla and white chocolate mixture until mixture is very smooth. It will be somewhat runny.
  9. Carefully pour batter over the crust.
  10. Slowly pour raspberry sauce into batter in a spiral shape. Drag a knife or a toothpick through the mixture to create swirls.
  11. Bake 55-60 minutes for a 9″ pan, or 45-50 minutes for a 10″ pan. Filling should be set but still a little jiggly4.
  12. Turn off the oven and crack the door, leaving the cheesecake to cool in the oven for at least 30 minutes. Remove to counter to cool an additional 30 minutes.
  13. Cover pan with plastic wrap and refrigerate for at least 8 hours, or overnight.
  14. Carefully remove from pan, slice in 12 pieces, and serve to adoring guests5.
  15. If you have leftovers, they keep beautifully in the freezer6.

Notes

1 I love my glass-bottom, handled version M got me.
2 Store-brand chocolate sandwich cookies work just fine for cheesecake crusts. I like to pulse the crumbs in a blender a few times to get them extra fine.
3 I like to use Ghirardelli white chocolate chips for this recipe.
4 Cheesecakes are very easy to overbake. Check it at 5 minutes before the lower end of the range: if it still looks kind of like pudding, keep baking. It should look firm but jiggle as one when you tap the side of the pan with a wooden spoon.
5 To get clean slices, wipe off the knife between each slice with a hot, damp cloth. It is a giant pain but worth the effort.
6 If you decide to freeze it (which I highly recommend!), cut strips of parchment paper and gently press on both sides of each slice. Place the slices in a freezer safe container, cover the top with plastic wrap, and make sure the lid is tightly sealed. Defrost in the fridge if you have time, or in the microwave if you’re impatient like me. =)


Mini Pumpkin Cheesecakes

Fair warning, I never tire of pumpkin. I’ve already made my 2nd pumpkin pie of the season and I’m sure there will be a 3rd involved at Thanksgiving. As pumpkin pie is equally good for breakfast as it is for dessert, I don’t mind having a whole one to myself and happily eat it for several days in a row. I greatly look forward to Operation: Eat Everything Pumpkin! (which takes place annually between October and December) and do my best to mix in some new recipes along with my old favorites. If you’re looking for a slightly less traditional pumpkin dessert to serve this Thanksgiving, look no further.

Mini Pumpkin Cheesecakes >> Baking Bytes

Traditional pumpkin and classic cheesecake come together in a wonderful dessert sure to please pumpkin lovers and cheesecakes fans alike. Even my boyfriend, who isn’t a huge fan of pumpkin, thinks these are pretty delicious. Smooth, creamy, and rich, it could very well become a new annual favorite. Even better, the mini size makes for ready to go individual servings and lets you enjoy the evening instead of attempting perfect slices with all eyes on you. These pop perfectly from the pan, and are excellent plain or with a swirl of whipped cream.

Mini Pumpkin Cheesecakes >> Baking Bytes

This recipe does require a specialty pan, of course, but if you have room in your cupboards you surely won’t regret the purchase. Mini cheesecakes are great for potlucks, large dinners, and dessert parties because they’re easy to transport, quick to serve, and require no utensils to eat (although I do prefer a fork, myself.) However, if all you have is a regular cheesecake pan, head over to the original recipe to see instructions for a standard 9″ cheesecake. I’ve not made the full version [yet], but I’m sure it’s equally amazing.

So whether you try some new recipes or stick with the tried and true favorites, have a wonderful Thanksgiving weekend. (Or a wonderful regular weekend, for my foreign readers.)

Mini Pumpkin CheesecakesMini Pumpkin Cheesecakes >> Baking Bytes

Adapted from Glorious Eats
Makes 12 mini cheesecakes

Ingredients

Crust
3/4 cup graham cracker crumbs1
1 Tbsp light brown sugar
1/4 tsp cinnamon
2 Tbsp butter, melted

Filling
8 oz cream cheese, at room temp
1/2 cup plus 1 Tbsp canned pumpkin puree
1 egg
2 Tbsp sour cream
1/2 cup white sugar
1/8 tsp ground nutmeg2
pinch of ground cloves

1 Tbsp flour
1/2 tsp vanilla extract

Directions

  1. Preheat oven  to 350 degrees Fahrenheit and lightly spray a mini cheesecake pan.
  2. Using a fork or pastry blender, mix the crust ingredients in a small bowl.
  3. Add a rounded tablespoon of the mix to each well in the pan, and press firmly to form a crust, sealing the edges well.3
  4. Using an electric mixer, beat the cream cheese until fluffy and smooth.
  5. Beat in pumpkin, eggs, sour cream, sugar and spices, then add flour and vanilla and beat until completely combined.
  6. Divide batter among the wells, about 3 Tbsp of filling atop each crust.
  7. Bake for 20 minutes, remove from oven, and cool 15 minutes on the counter.
  8. Cover lightly with plastic wrap and refrigerate 2 hours or until ready to eat.
  9. Top with whipped cream and a sprinkle of cinnamon, if desired, and serve to adoring fans.

Mini Pumpkin Cheesecakes >> Baking Bytes

Notes

About 6 graham crackers.
The original recipe calls for fresh, but dried works just fine.
A flat-bottomed shot glass works nicely for this, but use your fingers to make sure the edges are well sealed.
4 The cheesecakes keep well in the fridge for several days, or in the freezer for up to two months. They’re a great dessert to have on hand! Store in an airtight container.