Peppermint Crunch Ice Cream

Despite the (hopefully) chiller temperatures, December is just as good a time for ice cream as the more traditional summer months. There are some flavors that just scream winter, and although I don’t have too many qualms eating them in June, it’s nice to have them during their so-called proper time. Eggnog, for example, is just not something one typically enjoys in mid-summer, but it’s just as delightful in ice cream form.

This year I went after another Christmas classic – peppermint. I drink copious amounts of peppermint tea all year round, but typically save the more decadent uses of the flavor for winter. Peppermint is found in everything from candies and hot chocolate to brownies and truffles, and everything in between. Admittedly I feel a little goes a long way, but during the right season peppermint certainly has its place.

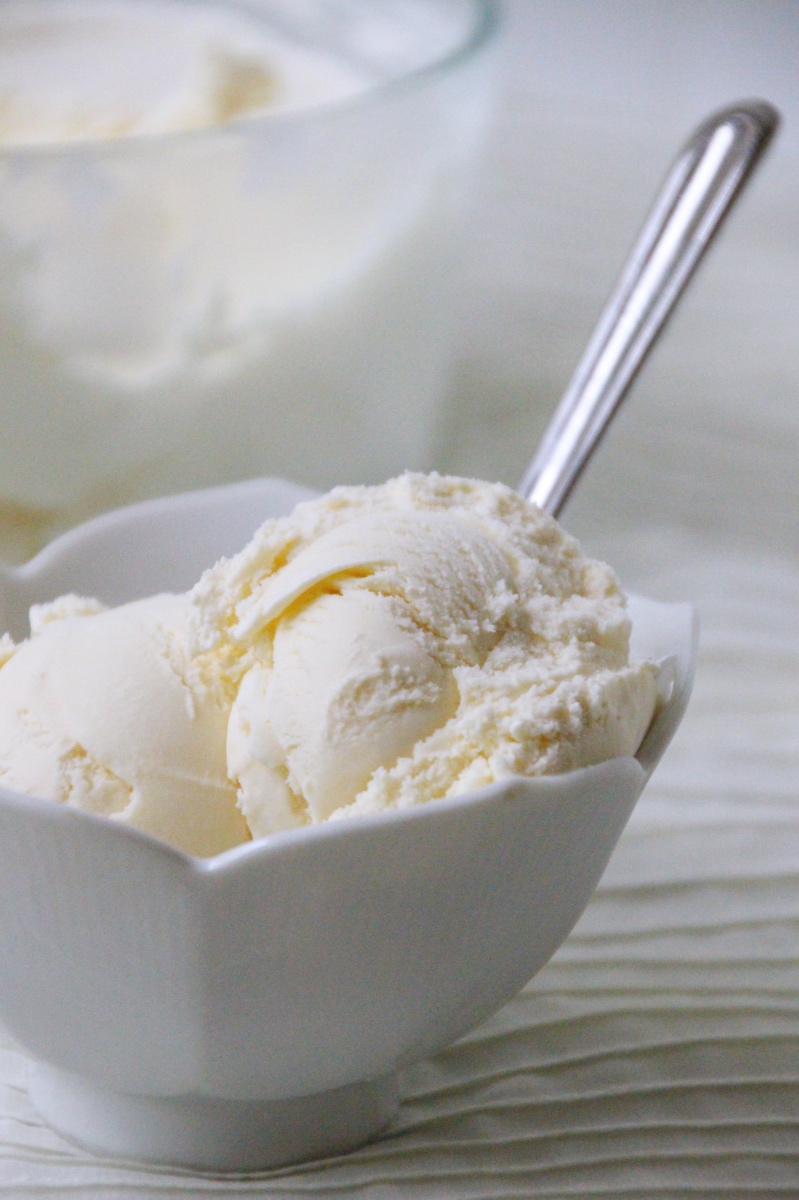
I opted for the white chocolate and peppermint pairing, a favorite as a hot beverage that I figured would play just as well in a chillier twist. Melted white chocolate paired with crushed peppermint candy for flavor, color, and a tiny bit of crunch. The smooth vanilla flavor is nicely complemented by the sharper flavor of peppermint, and should be reminiscent of your favorite peppermint truffles.

Crushed peppermint candy gives us our flavor profile, and a little pink color as a side effect. I cheated and bought pre-crushed peppermint candy, but crushing your own candy canes is a fun way to get the kids involved. The peppermint flavor is given some extra punch with a little extract, but be careful not to go overboard as it’s very easy to venture closer to toothpaste than candy. I recommend starting with half a teaspoon and letting it all chill overnight, then tasting right before you churn. If you feel it’s not quite strong enough, add that extra quarter teaspoon and churn away. You can also add a few drops of red food dye if you want to deepen the pink hue.

Creamy, cold, and chalk full of a favorite winter flavor, this ice cream is delightful on its own or an excellent match for a gooey chocolate brownie. Top it with a sprinkle of candy for extra flair.

Peppermint Crunch Ice Cream 

Makes ~6 cups

Ingredients

1 cup half and half
1/2 cup white chocolate chips

2 cups heavy whipping cream
1/2 cup egg substitute
1/4 cup sugar
1/4 cup plus 1-2 T crushed peppermint candy, divided1

1/2 – 3/4 tsp peppermint extract
1 tsp vanilla

optional: a few drops red food dye

Directions

  1. In a medium bowl, combine cream, egg substitute and sugar. Set aside.
  2. In a small saucepan over medium heat, combine half and half and white chocolate chips. Heat, whisking often, until chips are melted and mixture is smooth.
  3. Let cool about 10 minutes, then slowly stream into the heavy cream, whisking constantly.
  4. Whisk in vanilla, 1/2 tsp peppermint extract, and 1/4 cup peppermint candy1, then chill completely in fridge, or overnight. (The peppermint candy will likely have completely dissolved.
  5. Taste briefly, and add additional peppermint extract if desired. You can also add the red food dye now.
  6. Freeze according to your ice cream maker’s directions, adding remaining candy during the last 5 minutes of churning.
  7. Transfer to a freezer-safe bowl to freeze for at least four hours, or overnight.
  8. Serve garnished with a sprinkle of crush candy canes, solo or atop a warm chocolate brownie.

Notes

If you don’t want the crunchy aspect, you can either nix the extra 2 tablespoons, or add them at the beginning.

Advertisement

Lemon Basil Ice Cream

[Welcome to July AKA National Ice Cream Month! To celebrate, each Friday I will be posting a new delicious ice cream flavor alongside my regularly scheduled posts. Hope you enjoy the series!]

Once again we have arrived at the final week of National Ice Cream Month. It’s been a whirlwind of a month (at least for me) and hard to believe August is nearly upon us. With three weddings and two extremely intense races ahead of me, the next five weeks are set to be pretty crazy. Here’s hoping I make it out alive and unbroken. In the meantime, we can enjoy one more ice cream recipe together.

This one is easily my favorite of this year’s ensemble. Although I’ve really enjoyed the other three, this is the one that really struck home for me. Light and refreshing lemon with the herbal notes of basil, it’s a concoction more often found in a savory entrée than sweet desserts, but I assure you it works extremely well in both situations. I originally tasted this pairing at a gelato shop in Boulder, Colorado last summer, during a work trip. I loved how the basil added a different note to the whole experience, without being overpowering.

This year I attempted to create my own version to share with all of you. Although it took a few tries to get right, it was worth those mediocre batches to get to the final product. The superbly creamy texture is brightened with a pronounced lemon flavor without it tasting sour. The basil comes as a surprise since there’s no indication in the pale yellow coloring (unless you miss a few leaves when you strain it…which I did), so I recommend warning consumers ahead of time. The two are a flawless pairing and perfect on a hot summer day, but might be shocking if you aren’t expecting it.

Like the blueberry lavender from a few weeks ago, this ice cream tastes much lighter than it actually is, but I assure you it’s as high in fat and sugar as ever. I portioned mine into small 4-6oz servings as it’s very easy to get carried away, and then I can just grab them straight from the freezer. This makes it easier to serve, and to make sure it’s a reasonable amount – it’s also much faster to serve to guests! I will admit the containers I use have a tendency to fall over, but I’ve yet to find stable ones that are both small enough and not crazy expensive. The search continues.

This ice cream is delightful all on its own, but I think it’d also be lovely with a scoop of blueberry crisp. Lemon and blueberry are always a sure bet, and I think the basil would blend wonderfully into the whole shebang. The next time I make crisp or cobbler I will definitely make a batch of this to pair with it.

I hope you have enjoyed this month’s series and have some fun new flavors to try, or at least drool over. We will now resume our regularly scheduled programming, with plenty of deliciousness ahead!

Lemon Basil Ice Cream 

Makes ~6 cups

Ingredients

1 1/4 cups whole or 2% milk
1 oz fresh basil leaves (a large handful), chopped
zest of 2 lemons

3/4 cup sugar
2 cups heavy whipping cream
1/2 cup egg substitute
juice of 2 lemons

Directions

  1. In a small saucepan, lightly muddle basil and lemon zest. Add milk and heat to a light simmer.
  2. Remove milk from heat and let steep at least 15 minutes.
  3. In medium bowl, whisk together remaining ingredients until completely combined.
  4. Slowly stream in milk with the basil and zest, whisking constantly.
  5. Cover bowl and chill in the refrigerator at least 4 hours, or overnight. (Mixture will likely be rather thicker than normal – this is expected!)
  6. Using a fine-mesh sieve, strain mixture to remove leaves and zest.
  7. Freeze according to your ice cream maker’s directions, then place in a cold freezer-safe bowl to freeze overnight, or until firm.

London Fog Ice Cream

[Welcome to July AKA National Ice Cream Month! To celebrate, each Friday I will be posting a new delicious ice cream flavor alongside my regularly scheduled posts. Hope you enjoy the series!]

Ten years ago (wow time flies) whilst gallivanting around London with a few high school friends, one of them introduced me to what has remained a favorite of mine ever since. Called a London Fog, it’s comprised of steamed milk, vanilla, and Earl Gray tea. Warm and caffeinated without being overly sweet, it’s one of my go-to treat beverages during the winter months.

It’s not even vaguely chilly outside, but I bribed a friend into watering my garden during a recent vacation with promises of homemade ice cream and she requested I attempt an Earl Gray version (as well as maple chipotle). Given my love of the London Fog I had no qualms about doing so and set off to make it happen. After a stop at our local Townshend’s Tea House for some loose leaf tea, I was pretty much set to give it a whirl. I chose to use loose leaf tea because it is not only typically much better quality, but it infuses into thicker liquids (i.e. milk) much better than bags do. You can certainly try a bagged tea if you really want, but I highly recommend splurging here if you can.

This is one of those flavors that worked beautifully the first time I tried, basically following my usual method for infused ice creams, like the coffee and lavender from years past. The wonderful and cozy flavor of Earl Gray works just as well in chilled dessert as it does in a warm beverage, and makes it much easier to enjoy during this 90*F nonsense we’ve been having. A dash of vanilla adds a mellow touch and, in my opinion, balances the tea nicely with the cream.


I like my flavors quite strong so I used a full half-cup of tea and let it infuse in the fridge overnight. It is critical to heat the milk before adding the tea, as the cold-brew method doesn’t quite work here, but it doesn’t take too long to heat some milk on the stove. If you prefer a milder flavor, you can use less tea or steep it for less time (or both). However, keep in mind it will be a bit more mild after churning than straight out of the fridge, since the volume of the ice cream is much larger.

This ice cream is a perfect way to bring a favorite cold-weather beverage into a warm-weather dessert. I enjoyed it plain, but for a little flair it’d be delightful with a shortbread cookie topping.


London Fog Ice Cream 

Makes ~6 cups

Ingredients

2 cups heavy whipping cream
1/2 cups egg substitute (optional)
3/4 cup sugar

1 1/2 cups whole or 2% milk
1/3 – 1/2 cup loose-leaf Earl Grey tea

1 tsp vanilla

Directions

  1. In a medium bowl, whisk together cream, egg substitute (if using) and sugar. Set aside.
  2. In a small saucepan, heat milk on medium until it just starts to simmer, then remove from heat. Add tea to the milk and allow it to steep for about 30 minutes.
  3. Slowly stream into cream mixture, whisking constantly (leave the tea in!)
  4. Cover and chill in the refrigerator completely, or overnight.
  5. Whisk in vanilla, then strain mixture with a fine mesh sieve, pressing on the tea to extract as much milk as possible.
  6. Freeze according to your ice cream maker’s directions
  7. Place in a cold freezer-safe bowl to freeze until firm, or overnight.

Chocolate Merlot Ice Cream

[Welcome to July AKA National Ice Cream Month! To celebrate, each Friday I will be posting a new delicious ice cream flavor alongside my regularly scheduled posts. Hope you enjoy the series!]

Despite not regularly imbibing in day-to-day life, alcoholic ice creams are typically some of my favorite concoctions. Having experimented with Baileys, Kahlúa, beer, and champagne, this year seemed like a red wine was in order. Although for drinking purposes I don’t stray far from the sweet white delight of a Riesling or Pinot Grigio, I enjoy reds for adding complexity to desserts and entrées alike.

Several years ago I tasted a dark chocolate red wine fudge that was just fantastic. Rich and chocolatey with just the right balance of red wine flavor, it didn’t slam you in the face with the alcohol, but just enhanced the whole chocolate experience. I kept this in mind as my flavor goal and set off to create the chocolate wine dessert of my dreams.

For Christmas my mom gave me Molly Moon’s ice cream recipe book, with the idea that even if I didn’t use exact recipes it would likely spark ideas and give guidance to my own creations. It is a delightful book even just to read, equally filled with traditional flavors as it is more exotic combinations. Their melted chocolate ice cream seemed like the perfect starting point for my newest creation, and it does not disappoint.

High quality dark chocolate bars melted into a pretty standard cream base results in a velvety smooth and rich chocolate experience. It’s worth it to splurge for the fancy chocolate bars instead of the standard Hershey’s. The chocolate will not only have a more decadent flavor, but it will be easier to find a truly dark chocolate with 70-75% cacao. Quality chocolate also has fewer additives and will melt much more smoothly, for a creamier texture in the final product. As an added bonus, you’ll likely be supporting a smaller Fair Trade farm which is always a good idea in my book.

To supplement the chocolate, I chose a Barefoot Merlot. Since I know approximately nothing about red wine, and don’t care for it in its standalone form, it can be challenging to choose a product. If you have a favorite red, go with that. If, like me, you’re not a red wine aficionado, go with one that describes a chocolate note or pairing on the back. After being reduced on the stove and mixed in with a quality chocolate, even a fairly inexpensive red wine will do just fine here.

Velvety smooth and with a light alcoholic bite, this flavor is sure to please any chocolate or wine lover. The wine flavor is not overpowering, and doesn’t slam you in the taste buds, but somewhat slowly grows with each bite. A small serving would be the perfect end to a dinner party, be it anywhere from casual to cocktail.

Chocolate Merlot Ice Cream 

Adapted from Molly Moon
Makes ~6 cups

Ingredients

1 bottle (3-4 cups) dry red wine (I used a Merlot)

1 cup heavy whipping cream
1 cup half and half
3/4 cup sugar

6 oz dark (~70%) chocolate, coarsely chopped

1 tsp vanilla

Directions

  1. Place chopped chocolate in a medium bowl. Set aside.
  2. In a small saucepan, gently heat wine at a light simmer until reduced to 1/4 the original amount (3/4 – 1 cup). Let cool on the counter or chill in the fridge at least 10 minutes or until ready to use. (This is a slow process; set aside at least 30 minutes and feel free to do it ahead of time.)
  3. Meanwhile in a medium saucepan, heat half and half, whipping cream, and sugar until sugar is dissolved and mixture is just coming to a simmer.
  4. Pour over chocolate and whisk vigorously until smooth.
  5. Slowly stream in wine reduction (especially if it’s still a bit warm), whisking constantly.
  6. Cover bowl and chill in the refrigerator completely, or overnight.
  7. Freeze according to your ice cream maker’s directions, then place in a cold freezer-safe bowl to freeze for an additional three hours, or overnight.
  8. Enjoy solo or with a fudgy dark chocolate brownie for an extra decadent dessert.

Blueberry Lavender Ice Cream

[Welcome to July AKA National Ice Cream Month! To celebrate, each Friday I will be posting a new delicious ice cream flavor alongside my regularly scheduled posts. Hope you enjoy the series!]

Each summer in Bozeman there is a weeknight Farmers’ Market just a few blocks from my work. If I remember, I love cruising through to see the array of fresh produce, baked goods, artisan jewelry, and local craftsmen from the area. One of my favorite things is the abundance of jam flavors, everything from the standard mixed berries to the more unusual sweet and spicy concoctions.

Last summer I discovered a delightful blueberry lavender jam that I just fell in love with. Bursting with blueberry and complimented by the lightness of lavender, it’s a flavor profile that is excellent on toast or a scone, but also escalates your standard PB&J into something a bit more exciting. Given its huge success in jam form, I decided it’d be an excellent combination as one of this year’s ice cream flavors.

I combined the ideas from my favorite blueberry sauce and my lavender ice cream from two years ago into one glorious experience. The syrup is excellent on its own and in a thickened form2 would be delicious for pancakes or waffles. Mixed into the ice cream it’s lighter in taste than some of your more traditional flavors (although the nutritional information looks no different.)

This is a fantastic summer flavor and works well with both fresh or frozen blueberries, whichever you have on hand. It’s also a great way to use up last year’s berries to make room for the new crop. Summery blueberry and fragrant lavender is a combination of which I will never tire,  and I encourage you to give it a try. As an added bonus, the ice cream is a beautiful swirled reddish-purple and adds lovely color to your dessert table. If you’re a cake and ice cream person, I’d recommend a light vanilla bean cake to pair it with.

Give this one a try and be sure to come back next week!

Blueberry Lavender Ice Cream 

Makes 6-7 cups

Ingredients

Blueberry Lavender Syrup
2 cups blueberries (if frozen, thaw and drain before using)
1/2 cup water
1/4 cup sugar
1 Tbsp lemon juice

1/2 tsp vanilla
1 Tbsp culinary lavender

Ice cream
2 cups heavy whipping cream
1 cup half and half
1/2 cup egg substitute
1/2 cup sugar

Directions

  1. In a small saucepan, combine blueberries, water, 1/4 cup sugar, and lemon juice. Bring to a light boil and heat for an addition 5 minutes, stirring occasionally and mashing blueberries to release more flavor.
  2. Meanwhile, gently crush the lavender buds with a spoon (or a mortar and pestle, if you’re fancier than I am).
  3. Remove blueberry sauce from heat and strain through a fine mesh sieve to remove the berries. Stir lavender into the syrup and allow to steep for about 30 minutes.
  4. Strain syrup through the sieve again, then store in the fridge until chilled or ready to use.2
  5. Meanwhile, in a large bowl, whisk together cream, half and half, egg substitute, and 1/2 cup sugar.
  6. Cover bowl and chill in the refrigerator until completely chilled, or overnight.
  7. Reserve 1/2 cup of blueberry lavender syrup, and whisk 1 – 1.5 cups into the ice cream mixture.
  8. Freeze according to your ice cream maker’s directions. During the last minutes of churn time, stream in the reserved syrup for a marbled effect.
  9. Transfer ice cream to a cold freezer-safe bowl to freeze for an additional three hours, or overnight.
  10. Excellent solo or with extra syrup.

Notes

You can discard the berries or store in the fridge to use as an ice cream topping. I also used some in oatmeal and smoothies which were both excellent.

If you are making the syrup specifically as a topping, you could stir in some cornstarch (mixed with water). Return to a boil for a few minutes to thicken the consistency of the syrup. Add the berries back in for a chunkier sauce if you like.