Peanut Butter Banana Green Smoothie

Has summer hit your area yet? It’s been hit or miss here but we did have a lovely hailstorm the other day. And I say that with great sincerity, storms are fun so long as they don’t happen constantly.

The recipe I have for you today (although “recipe” might be kind of a generous term for a smoothie, if I’m honest) is great for those hot days when you want a healthy and filling meal but it’s too hot to make anything. It may not seem like much but I’m always surprised just how full I am at the end. Great for lunch (or dinner, if you’re as lazy as I am) and it is awesome for refueling after a long run.

Peanut Butter Banana Green Smoothie {{Baking Bytes}}

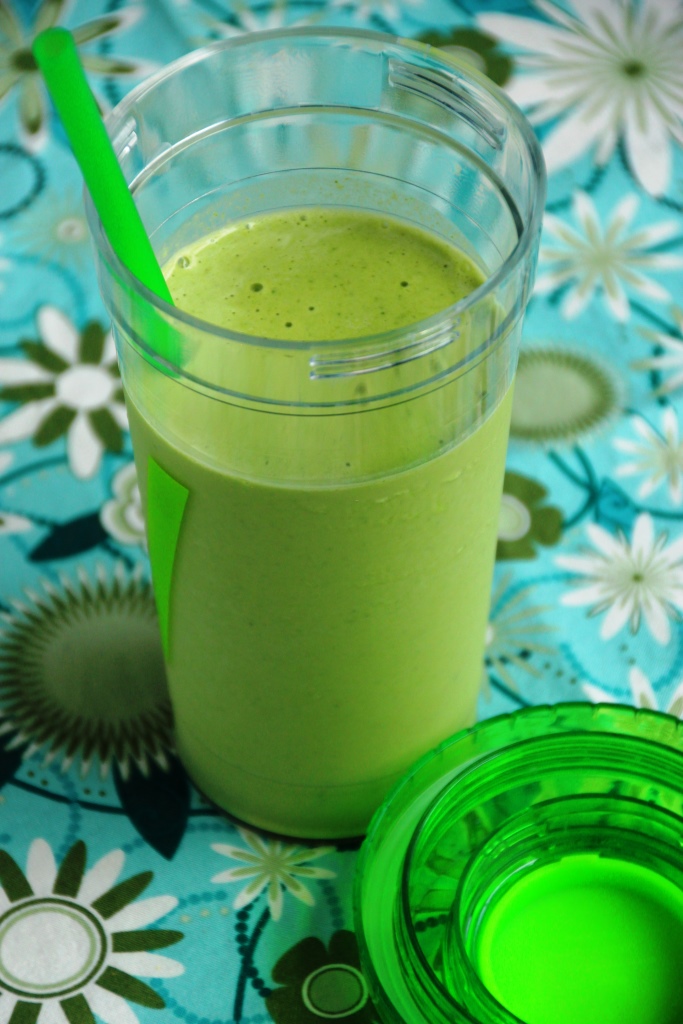
I’ll admit the green color can be a bit off-putting, but it tastes like a peanut butter banana milkshake. If you’re extra afraid of vegetables, like I was when I first started making this, just add a little bit more peanut butter or yogurt until you can’t taste the green. Maybe even put it in an opaque cup if that helps you come to terms with it.

Peanut Butter Banana Green Smoothie {{Baking Bytes}}

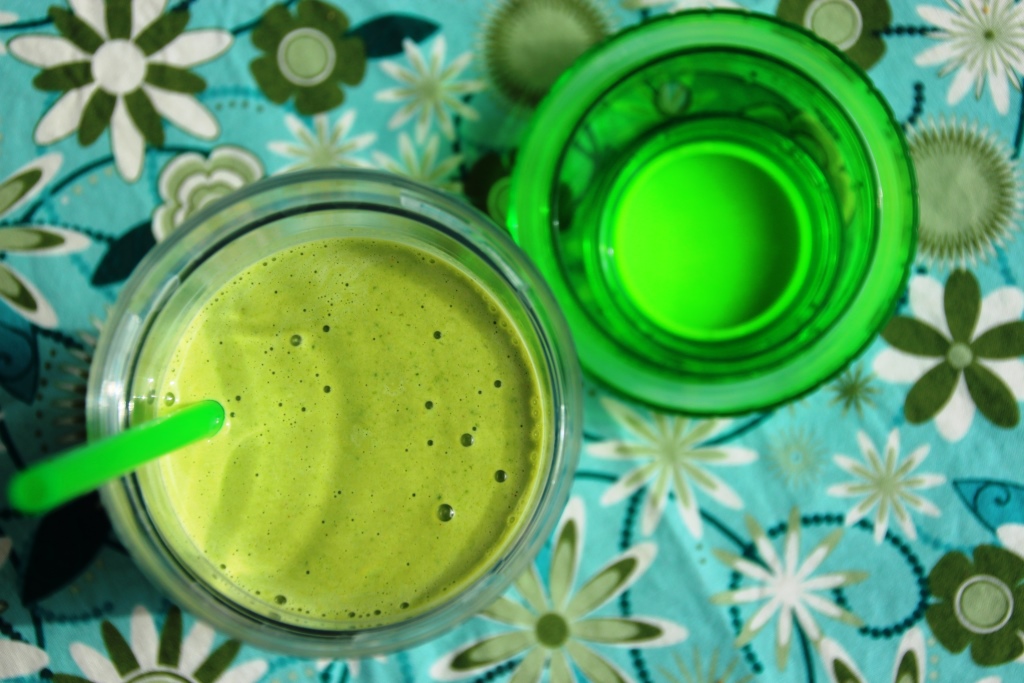
Cold, creamy, and sweet, it drinks like dessert but is a protein- and vitamin-packed meal replacement perfect for any day, but especially great on hot ones. A few years ago we had an extremely hot summer here in Montana (especially by Alaskan standards) and there were a couple weeks where I had one of these for dinner while I sat in front of the air conditioner pretty much every day after work. Five minutes to make and no heat to add to already scorching 98 degrees inside and out. Perfect.

Peanut Butter Banana Green Smoothie {{Baking Bytes}}

If you’re looking for a quick, cold, and healthy meal (or very large snack), this is the one you want. Go forth and blend!

Note: I like to blend the spinach and milk first to make sure it is well puréed. If you have a really nice blender and/or are not as averse to larger bits of leaf in your smoothie, you can definitely just blend it all at once instead of in two steps. Also! You can totally buy one of those giant containers of baby spinach (like Costco sells), blend it all up at once with some milk (or water if you prefer), and freeze it in to smoothie-sized portions. I used a muffin tin because that’s what I had on hand, and then I use two frozen portions per smoothie. Works great and there’s no risk of your spinach going bad (although I’ll admit getting them out of the muffin tin was somewhat annoying. In the future I will line it with foil or plastic wrap or something.)

Peanut Butter Banana Green Smoothie {{Baking Bytes}}

Peanut Butter Banana Green Smoothie

Adapted from Iowa Girl Eats
Makes one ~16oz smoothie

Ingredients

1/2 – 1 cup milk (I use 2% but any milk or plant wannabe will work)
1+ cups baby spinach, to taste1

1 ripe banana (peeled, sliced, and frozen)2
1/4 cup yogurt (I use vanilla honey Greek yogurt)
2 Tbsp peanut butter

Directions

  1. Blend spinach and 1/2 cup milk until reasonably smooth (no large pieces).
  2. Add remaining ingredients and blend until completely mixed (this could take a minute or so). If it’s too thick, blend in additional milk 2 tablespoons at a time until desired consistency is reached.
  3. Enjoy immediately with a straw and a sunny day.

Notes

1  I use one or two cups depending what fits, but you can add up to around four cups if you’re a big spinach fan. You likely want to use more yogurt and milk if you add much more than two cups of spinach.

I typically slice mine into roughly fourths as they fit into my single-serving blender cup better that way. You can slice yours more or less to suit your needs.

Overnight Baked French Toast & Blueberry Sauce

Hello hello! It’s 2015! Fun fact, the year 2030 is now closer than the year 1999. Crazy.

I was originally intending to start off the year with a savory dish to contrast the sugar overload that is December, but I changed my mind. If you want savory, I suggest you look at last year’s post.

Overnight Baked French Toast & Blueberry Sauce {{Baking Bytes}}

I was lucky enough to be able to take two weeks off work over the holidays, so I spent Christmas at home in Alaska. Unfortunately, Alaska forgot it was winter and didn’t have any snow, so no skiing for me, but I did run over 20 miles that week, my highest mileage week of the year. And I’ve got lots of skiing in since returning to Montana.

Prior to this trip, I’d been eyeing this recipe for well over a month but never had a good reason to make it. I sneakily offered to make breakfast for Christmas Day, and I don’t think anyone minded. I made a substantially less sweet version than the original and I thought it was the perfect amount of sweetness, especially if you’re planning to serve it with regular pancake syrup. I made a quick blueberry sauce as a topping and I’m pretty sure I’ll never eat it any other way. Well, maybe a different fruit. I bet blackberry would be awesome too.

Overnight Baked French Toast & Blueberry Sauce {{Baking Bytes}}

In any case, this is a great meal for the holidays as it doesn’t require much time in the morning, but it would be equally great any time of the year. Just make sure you leave enough time in the morning for it to bake to your desired consistency. and you’re good to go. (You can always put it in the oven and go back to bed for an hour, I won’t judge.) We had it with a side of scrambled eggs and bacon for a well-rounded meal.

Oh yeah: Blueberry sauce. This stuff is super easy and super delicious, so you should definitely make a batch while the French toast is baking.

Overnight Baked French Toast & Blueberry Sauce {{Baking Bytes}}

Also: The French toast reheats decently well, but if you don’t have enough people to eat a 9×13 baking dish you can certainly halve the recipe. Or you can split the full recipe between two 8×8 pans and put one of them in the freezer after they’ve refrigerated overnight. Just let it thaw in the fridge the night before and bake as normal (although perhaps a little bit longer depending on how cold your fridge is.) The 8×8 pans bake for roughly the same amount of time as the 9×13 pans.

If you’re looking to please a crowd with very minimal effort, this is definitely the recipe for you! Or if you’re just looking to please yourself, even better. Just try not to eat the whole pan at once.

Overnight Baked French Toast

Adapted from The Pioneer Woman
Serves 8-12

Ingredients

1.5 lbs sourdough bread
8 eggs, lightly beaten
2 cups milk
1/2 cup heavy cream
1/2 cup sugar
2 Tbsp vanilla extract
2 tsp cinnamon

Directions

  1. Grease a 9×13 baking dish.
  2. Tear or cut bread into bite-sized pieces and spread evenly into the pan.
  3. In a large bowl, whisk remaining ingredients until completely combined. Pour liquid gently and evenly over the bread.
  4. Cover dish tightly with plastic wrap and store in the fridge overnight.
  5. Preheat oven to 350 degrees Fahrenheit.
  6. Retrieve dish from the fridge and use a large spoon to gently stir the mixture, so as to put the wetter pieces on top and the drier ones toward the bottom.2
  7. Bake 45-75 minutes (shorter time for closer to the texture of bread pudding, longer for a crispier texture.)3
  8. Serve immediately with toppings of choice.

Notes

You must use sourdough or some other kind of very dense bread.
This is not strictly necessary, but I found the texture to be more even throughout the dish after stirring.
I baked mine for just over an hour to avoid it being wet in the middle, although it was still quite soft. I will likely plan for 70 minutes in the future. If you think it’s getting too crispy on top, you can cover the pan with tinfoil for the last 20 minutes or so, but I haven’t found this necessary.

Blueberry Sauce {{Baking Bytes}}

Blueberry Sauce

Borrowed from My Baking Addiction
Makes about 2 cups

Ingredients

2 cups blueberries (fresh or frozen)
1/2 cup water
1/2 cup sugar
2 Tbsp fresh lemon juice

2 Tbsp cornstarch
2 Tbsp cold water

1/2 tsp vanilla
zest of 1 lemon

Directions

  1. Combine blueberries, 1/2 cup water, sugar, and lemon juice in a saucepan. Cook over medium heat, stirring often, until mixture comes to a low boil.
  2. Mix cornstarch and 2 Tbsp cold water until completely combined. Slowly stream into the blueberries, stirring constantly but gently, and simmer until mixture thickens, about 5 minutes. (Cook less if you prefer a thinner sauce).
  3. Remove from the heat and stir in vanilla and zest.
  4. Serve on your favorite French toast, pancakes, waffles, ice cream, or whatever needs some blueberry-fication.
  5. Store leftovers in the fridge and reheat leftovers as necessary.

Tortellini Tomato Soup

Guys. Guys. It’s not summer anymore! I need gloves and a hat for my bike ride to work! It’s a miracle! And very convenient because I happened across this soup recipe and it sounded so delightful I made it the next day. I would have made it that same day but I had a Halloween party to attend. I went as two-eyed Leela from Futurama this year.

Leela

Aaaand it’s winter. I wrote this last week and then left for my 6th and final half marathon of the year in Nevada. I got back last night and this morning I woke up to snow. A far cry from the 84 degrees at the finish line. But I got first in my age group! First time ever placing, so that’s fun.

In any case, soup. This one has a chunky tomato base with a hearty dose of tortellini and spinach to switch it up a bit from your average tomato soup recipe. Don’t get me wrong, Pacific Food Roasted Red Pepper & Tomato soup with a side of grilled cheese is one of my go to meals any time of year, but it’s nice to have a homemade option to add to the mix. Even better, this soup has great flavor, is very filling, and is easy to make vegetarian so long as you pick a package of tortellini without meat.

Tortellini Tomato Soup {{Baking Bytes}}

Spaghetti sauce is a key ingredient and flavor in this soup so make sure you pick one you like (or make your own if you’re into that sort of thing.) Adding diced tomatoes, onion, and garlic step it up a notch while the vegetable broth takes it into soup territory. I added a diced red bell pepper as well but that is totally optional. Add several big handfuls of baby spinach and a package of tortellini and you’ve got a quick healthy meal to add to your repertoire.

Tortellini Tomato Soup {{Baking Bytes}}

If you’re in need of a nice warm meal, this one is perfect. Serve with a side of bread (like whole wheat beer bread) or grilled cheese sandwiches for an extra hearty meal. It would also be great topped with a little shredded cheese.

Tortellini Tomato Soup {{Baking Bytes}}

Tortellini Tomato Soup

Adapted from DietHood
Makes about 3.5 quarts

Ingredients

2 Tbsp olive oil
1 Tbsp butter
1 small-medium yellow onion, diced
1 red bell pepper, diced
3 cloves garlic, minced

2 (14.5oz) cans Italian Diced Tomatoes
4 cups spaghetti sauce

4 cups vegetable broth
salt and pepper, to taste

1 package frozen tortellini1
10 oz fresh baby spinach2

Directions

  1. Over medium heat, heat oil and butter in a large pot until butter is melted.
  2. Add onions, garlic, and bell pepper, and cook for a few minutes, or until onions are soft.
  3. Increase heat to medium-high and add tomatoes and sauce. Bring to a boil, stirring occasionally.
  4. Stir in vegetable broth and return to a boil.
  5. Add salt and pepper to taste, if desired.
  6. Add tortellini and spinach and continue cooking until tortellini is done (check your package instructions), about 10 minutes.
  7. Serve hot and refrigerate or freeze any leftovers.3

Notes

The original recipe called for 10 oz of tortellini, but I like a lot of pasta and the package I on hand was 20 oz so that’s what I used. Anything in that range would be great.

I buy spinach at Costco in the giant containers so I just added several large handfuls. Add more or less to suit your tastes.

It reheats great but it’s definitely thicker the next day (especially if you put in lots of pasta like I did because that is what soaks up the liquid.) If it doesn’t seem soupy enough, add a little water when you microwave it.

Stuffed Peppers

[First things first…I am so sorry for the ridiculous semi-accidental hiatus. September was M’s last month in town before he headed back to Antarctica (yes, you read that right) for three months, so I let the blog fall by the wayside. My apologies. But there’s good news! I’m going to post something every Monday in October to make up for it.]

In other news, Montana refuses to legitimately enter autumn and insists on holding onto summer as long as possible. It is in the high 60s as I write this, which personally I think is just ridiculous for October. Maybe it’s just me but I am definitely ready for cooler temperatures. Mainly because I want to run in like 40 degrees rather than almost 70 and then come home to a steaming bowl of soup, but until I get that weather machine working I’ll just be staring forlornly at the weather forecast. Shorts and tank top weather will be over soon enough (I hope) just in time for everyone to complain it’s too cold. In preparation for that glorious time of year, here is a fabulous and easy dinner recipe that’s great for a chilly fall day and conveniently includes almost all of the food groups.

Stuffed Peppers {{Baking Bytes}}

As a kid I was not big on the bell peppers thing. I still don’t really care for them raw, but I love them cooked in things. Stir fry, tacos, pizza, soup, stew, etc are all improved by the addition of a bell pepper or three. Bonus: veggies are healthy. I saw a picture of stuffed peppers on Pinterest a few months ago and thought to myself “that looks like something I could maybe handle” and then promptly never made it because it was 85 degrees outside and I didn’t want to turn on the oven.

Stuffed Peppers {{Baking Bytes}}

Fortunately it has cooled down a bit since then and my hypothesis was correct: they are delicious. Wild rice, Italian sausage, cheese, and a smattering of other flavors come together in a delightfully simple recipe. Although it’s not super quick, particularly if (like me) you’re not practiced at cutting things, it’s incredibly easy and hard to mess up. You could cut down on the time by preparing them the night before and popping them in the oven when you get home from work. They may need a bit longer in the oven to warm through so make sure you check that the center isn’t cold.

I did not add a lot of spices to mine because I was using hot Italian sausage and that was enough for me, but the addition of some red pepper flakes, cayenne pepper, curry powder, or whatever you’re feeling that day would work beautifully. Conveniently you can taste the filling before you finish them up in the oven, so it’s easy to play around with the flavors before you stuff the peppers. Try adding zucchini or spinach for an extra veggie boost.

Stuffed Peppers {{Baking Bytes}}

Bake these up, serve with homemade applesauce and a glass of milk and you’ve got all the food groups covered in a healthy and delicious meal.

Note: They reheat pretty well in the microwave but I find it works better if you cut them in half beforehand.

Stuffed Peppers

Inspired by Kalyn’s Kitchen
Makes 4 peppers

Ingredients

1 cup (uncooked) wild rice
4 large green bell peppers

12 oz Italian sausage (or ground meat of choice)
olive oil (for sauteing)

1 bell pepper (any color, I used orange)
1 small-medium onion
1-2 cloves garlic
1/2 cup grated Parmesan
salt and pepper, to taste

1/2 cup grated mozzarella

Directions

  1. Preheat oven to 375 degrees Fahrenheit and lightly grease an 8″x8″ glass baking dish (or any glass baking dish that your peppers will all fit into.)
  2. Cook rice according to directions and set aside.
  3. Meanwhile, cut the tops off the peppers, hollow out the inside, and slice a bit off the bottom so they sit flat (if necessary).
  4. Dice the tops of the peppers (minus the stem of course), onion, garlic, and remaining pepper into small pieces.
  5. Saute meat and a little olive oil in a large pan over medium heat for a few minutes.
  6. When meat is about halfway done, add the diced veggies and continue sauteing until meat is cooked through and veggies are heated.
  7. In a large bowl, combine rice, cooked sausage mixture, and Parmesan cheese, stirring to combine thoroughly. (I found it easiest to use my hands.)
  8. Add spices to taste and stir to combine.
  9. Firmly stuff mixture into the hollowed-out peppers, filling them full and using a spoon to aid in packing it tightly. (You may have a little extra filling, I saved it and used it like a taco filling.)
  10. Bake about 30 minutes, then sprinkle (or pile) mozzarella onto the tops of the peppers and bake an additional 15-20 minutes, until cheese is melted and beginning to brown.
  11. Serve hot and refrigerate leftovers for up to one week.

Bacon Baked Beans

Okay everyone, don’t panic, but I didn’t make dessert this week. I know, I know. *GASP* But don’t worry, I’m sure next time we’ll return to our regular scheduled programming.

This week, however, I stepped slightly outside my forte into the world of real food and made baked beans. Granted, I still used the oven, and there was bacon involved, so I guess it wasn’t that far outside my comfort zone after all.

I’m still counting it.

This recipe comes from my mom, who got it from her mom, who got it from a friend of hers. It’s the family favorite for taking to potlucks and barbecues and my mom is asked for the recipe every time. A plethora of beans and bacon with the taste of brown sugar results in a fabulous and filling side dish sure to complement any barbecue.

Baked Beans

Admittedly, I did not like this dish as a kid. It wasn’t till a few years ago that I had another taste and suddenly understood why family friends always raved about my mom’s baked beans. This past weekend I took a pan to a pig roast and didn’t bring any home. In the words of my mom, this recipe is “too delicious not to share.” I’m definitely inclined to agree.

But don’t take our word for it. Make it yourself and let me know what you think. Your family will thank me.

Baked BeansBaked Beans

Makes a shallow 9″x13″ pan

Ingredients

1 can (15 oz) lima beans
1 can (15 oz) butter beans
1 can (15 oz) kidney beans
1 can (28 oz) pork ‘n’ beans

1/2 lb bacon
1 medium-large onion, diced
2 cloves garlic, minced

3/4 cup brown sugar
1/4 apple cider vinegar
1/2 tsp ground mustard

Directions

  1. Preheat oven to 325 degrees Fahrenheit.
  2. Drain lima, butter and kidney beans.
  3. Slice the bacon into roughly 1″ pieces.
  4. In a large bowl (at least 3 quarts), combine drained beans, pork ‘n’ beans, bacon, onion and garlic.
  5. In a small bowl, whisk together brown sugar, vinegar and mustard.
  6. Pour sauce into beans and mix gently, but thoroughly.
  7. Pour beans into a 9×13 baking dish, cover tightly with aluminum foil, and bake for two hours.
  8. Remove the foil, stir gently, and bake for another hour or so, stirring every
    15-20 minutes. Beans should be nicely browned and not too runny when done.
  9. Remove from the oven and allow to cool slightly before digging in.

Baked Beans

Notes

  • This is a very forgiving recipe. Likely it will look pretty runny when you remove the foil, but it will thicken up during the uncovered baking time. If it looks too thick, you can always stir in a little water.
  • If you double the recipe use a deep dish lasagna pan OR one 9×13 pan and one 8×8 pan. Bake them at the same time but switch sides of the oven after you remove the foil.
  • In a little bit of a hurry? Raise the temp up to 375 and cut the covered baking time to 90 minutes. Uncovered time will likely be closer to 45 minutes but keep an eye on them.
  • Taking them to a potluck? Use a slow cooker to keep them warm for serving.
  • If needed, you can use regular white vinegar, but apple cider vinegar is best.
  • I love bacon, so I used the thick cut variety.
  • You can easily make this vegetarian by getting the “vegetarian” labeled pork ‘n’ beans, and leaving out the bacon.