Roasted Brussels Sprouts

And we’re back on schedule! …for now. No promises but I’ll do my best to maintain the bi-weekly posts. I certainly have enough planned it’s just a matter of having enough daylight to work with; it’s a bit of a struggle when I get home from work and it’s already dark.

Excuses aside, this week I have a fantastic and easy side dish you’re sure to love. With a 2-pound bag of Brussels sprouts all to myself,  I knew I needed to eat them right quick. I remembered Pinning a recipe for a roasted version a few weeks ago and thought I would finally give it a try. My main aversion to roasting vegetables is that they often require upwards of half an hour in the oven and I rarely want to wait that long to eat things, but this recipe called for just twenty minutes which seemed like something I could handle.

Garlic Roasted Brussels Sprouts {{Baking Bytes}}

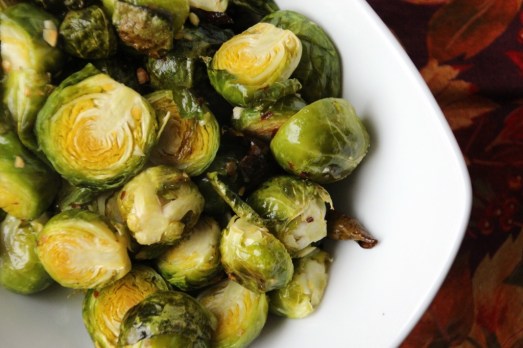
For making these sprouts, the most time-consuming part was trimming and halving them, mainly because I’d already had them a week and they were starting to brown, and also because produce from Costco tends to be gigantic and this batch was no exception. In any case, I tossed them in the oil concoction and put them in the oven, and 25 minutes later had a delicious, healthy, and easy side dish. As a bonus it made enough to last me several days.

IMG_0552

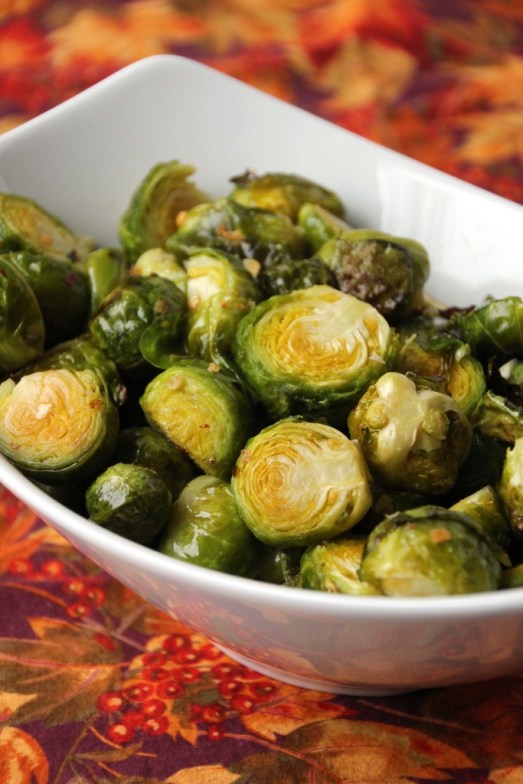
Roasted veggies are much less likely to be bitter and the added seasonings give these a little something extra. Garlic and salt go with pretty much anything and some red pepper flakes add a slight kick. If you’re bigger into the spicy thing, add some more flakes or a dash of cayenne pepper to suit your preferences.

IMG_0556

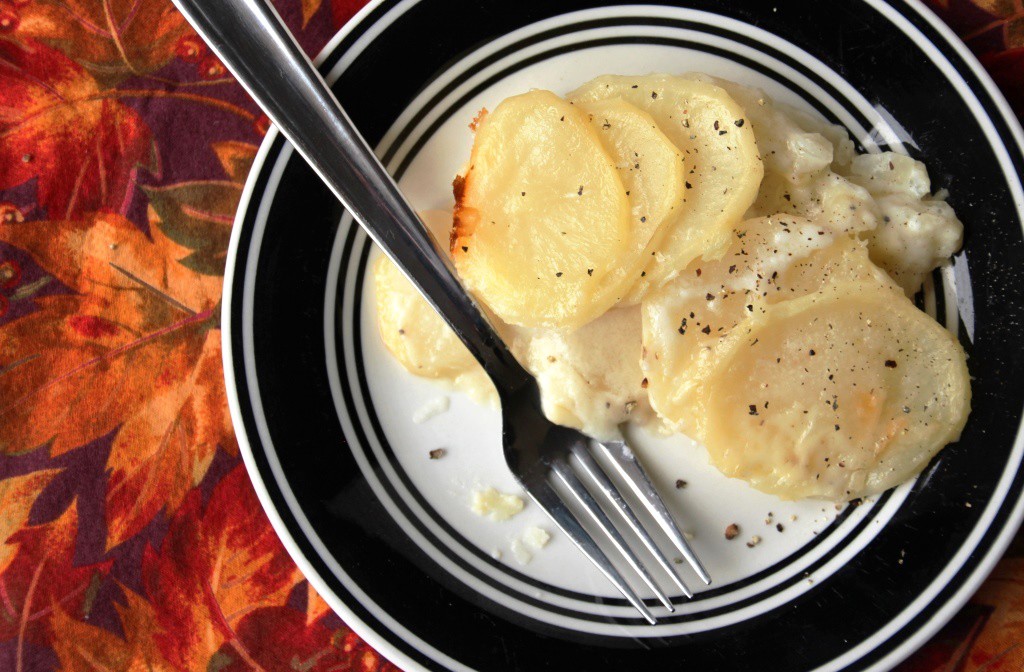
I enjoyed this recipe even more than anticipated and I hope you do too. An easy recipe that feeds the whole family and even reheats well if you have extras. These went great with the scalloped potatoes from last week and are definitely something I’ll be adding to the dinner rotation. I look forward to trying it with broccoli also – I’m sure it’ll be fantastic.

Roasted Brussels Sprouts

Adapted from South Your Mouth
Makes 4-6 servings

Ingredients

2 lbs Brussels sprouts, washed and dry

1/4 cup olive oil
4 cloves garlic, minced
1 tsp sea salt
1/2 tsp red pepper flakes

Directions

  1. Preheat oven to 400 degrees Fahrenheit. Line a large baking sheets with a silicon mat or parchment paper. (Not strictly necessary but easier to clean up later.)
  2. Trim sprouts and cut in half if they are larger than about one inch in diameter.
  3. In a large bowl, combine sprouts, oil, garlic, salt, and red pepper flakes. Stir with a rubber spatula until sprouts are well coated with the oil mixture. (This is why the sprouts should be dry.)
  4. Spread in one layer on prepared baking sheet, and bake for 18-25 minutes, until sprouts are tender with some light charring, as desired. The time will vary depending on the size of your sprouts and how you lined your pan, so check every few minutes until you like what you see.
  5. Serve immediately and refrigerate any leftovers.

Classic Scalloped Potatoes

Hello, hello. Apologies for being a week late; between getting back in to the swing of work life and M leaving town last week, it’s been a busy start to the year. A few weeks in I am finally getting caught up and ready to work on some fun projects this year, both with food and other crafts. I’m also intending to run my first full marathon in June, dependent on how well my training plan meshes with ski season. There are tons of marathons all year so I can always delay a month or so if needed.

In any case, with M leaving on Monday and the snow hitting on Saturday, I felt some comfort food was in order. M’s parents generously gifted me a very nice mandolin food slicer for Christmas so scalloped potatoes seemed the obvious choice.

Classic Scalloped Potatoes {{Baking Bytes}}

As a kid, scalloped potatoes were always one of my most favorite foods and probably one of the most-requested items each time I came home from college. Warm, and creamy, I could eat them for days and not get bored. They always remind me of family and cozy evenings and often made an appearance for Christmas dinner. Hand slicing potatoes was too much of a deterrent for me to make them on my own, but with a mandolin they are easy-peasy.

Classic Scalloped Potatoes {{Baking Bytes}}

With just a few simple ingredients they are not going to open a whole new world of flavors, but they are a delicious side dish (or entrée, if you’re me) and coordinate nicely with almost anything. This recipe is straight from the Better Homes & Gardens Cookbook, one of the few I ever manage to use in lieu of the internet.

Classic Scalloped Potatoes {{Baking Bytes}}

If it isn’t already, this recipe is sure to become a staple in your household; I know it is in mine. If you have several mouths to feed, this recipe can easily be doubled and baked in a 9×13″ dish instead – this is the way my mom always made it.

Classic Scalloped Potatoes

Borrowed from The Better Homes & Gardens Cookbook
Makes 4 servings

Ingredients

3 medium potatoes, peeled and rinsed

1/4 cup finely chopped onion
2 Tbsp butter

2 Tbsp flour
1/2 tsp salt
1/8 tsp (a dash) of pepper

1 1/4 cup milk

Directions

  1. Preheat oven to 350 degrees Fahrenheit and grease an 8×8″ baking dish. Set aside.
  2. Thinly slice potatoes using a mandolin or a knife and a lot of patience. Place half the potatoes in the prepared dish.
  3. In a medium saucepan, heat butter over medium-high until melted. Add onion and cook until tender and mostly translucent.
  4. Stir in flour, salt, and pepper, then add milk all at once.
  5. Continue cooking and stirring until mixture bubbles and thickens. Remove from heat.
  6. Pour half of the sauce over the potatoes, then repeat with remaining potatoes and sauce. Make sure mixture is evenly spread in the baking dish.
  7. Cover with foil and bake for 35 minutes. Remove foil and continue to bake until potatoes are tender and a little browned on top, about 30 minutes.
  8. Let rest on the counter for 5 minutes, then serve hot, topping with a little extra freshly ground pepper, if desired.
  9. If you have leftovers, they keep well in the fridge for several days.

Easy Cinnamon Roll Wreath

Hello and Happy Holidays friends! Hope you’re having an appropriately white or warm season depending on your location. I am visiting my family in Alaska for the holidays and it’s been pleasantly snowy here – quite the change from last year’s raining nonsense. Apologies for the late post, time at home always seems to go by much more quickly than real life.

In any case, this morning I have another easy pastry recipe to share. The overwhelming popularity of my Cream Cheese Danishes led me to try another style. A few months ago I saw a braided Nutella bread that looked beautiful. As you may now be aware, I am not a fan of Nutella but I really loved the idea of a twisted bread with a contrasting filling. Filing it away for future reference, several months passed before I took up the project.

Easy Cinnamon Roll Wreath {{Baking Bytes}}

I love cinnamon rolls any time of year but for some reason I always crave them even more around Christmas. The homemade version is quite a bit of work which makes them extra special (and extra tasty) so we don’t make them very often, except sometimes for Thanksgiving or Christmas breakfast. Pillsbury makes actual cinnamon rolls, of course, which are surprisingly good, but feel somewhat commonplace as far as excitement goes.

Easy Cinnamon Roll Wreath {{Baking Bytes}}

The idea for twisted bread returned to me and twisted cinnamon rolls were born. Using an easy cinnamon sugar filling and the pre-made dough makes for a super quick breakfast or pretty dessert without the hassle and tediousness of dealing with yeast and rising times. Small enough for the family or simple enough to make several for the office, these are a pretty way to switch up the traditional and delicious flavors of a cinnamon roll.

Easy Cinnamon Roll Wreath {{Baking Bytes}}

Sure to please both the kids and the coworkers, this is a great holiday option for all the busy people out there.

Easy Cinnamon Roll Wreath

Makes 8 small servings

Ingredients

1 package Pillsbury Crescent Rolls1

2 Tbsp butter, softened
1/4 cup brown sugar
1 1/2 tsp ground cinnamon

2 oz cream cheese, softened
2 Tbsp butter, softened
3/4 cup powdered sugar
1/4 tsp vanilla
1-3 Tbsp milk (optional)

Directions

  1. Preheat oven to 375 degrees Fahrenheit. Line a baking sheet with a silicon baking mat or parchment paper.
  2. On an extra sheet of parchment paper, unroll the dough and pinch the seams together. Put face down on the prepared baking sheet and then gently peel off the parchment paper. Pinch the seams together from this side also.
  3. Spread 2 Tbsp butter over the dough.
  4. Mix together brown sugar and cinnamon until well mixed, then sprinkle evenly over the dough, leaving about 1/2 inch clear on one long end.
  5. From the other long end, gently roll up the dough and then pinch closed.
  6. Carefully cut down longwise down the center of the rolled dough (a plastic pizza cutter works great, and won’t damage your silicon mats or your baking sheet). Gently turn the cut side facing up.
  7. Carefully lift one side and place it over the other dough strip, repeating on the same side to form a twist. Gently move into a circle and pinch the ends together.
  8. Bake for about 18 minutes. It should be browned on the top and not doughy in the middle.
  9. Meanwhile, prepare the frosting: beat together cream cheese and 2 Tbsp butter until fluffy, then beat in powdered sugar and vanilla. Stir in milk 1 tablespoon at a time until it reaches your desired consistency – less milk for spreading, more milk for drizzling.
  10. Let the cinnamon roll cool for a couple of minutes, then transfer to your serving plate and spread/drizzle with the frosting. (You will likely have frosting left over, so feel free to halve the recipe if you don’t like lots of it.)
  11. Serve immediately with coffee for a lovely snack, or eggs and fruit for a more well-rounded breakfast.

Notes

Any of the styles should work, although they may all bake up slightly differently, so watch carefully and adjust the baking time accordingly. For example, the “big and flaky” version would probably need a couple more minutes in the oven.

Perfect Dinner Rolls

Hello, hello. Today we break with tradition and enjoy a non-dessert recipe. Who even knew that was a thing this time of year? Joking aside, I have a wonderful dinner roll recipe here for you.

Perfect Dinner Rolls {{Baking Bytes}}

As someone who is not super proficient with yeast breads, I am typically too intimidated to give them a try. Last year my mom tried to cure me of this by helping me make dinner rolls and cinnamon rolls and sandwich bread. They all turned out edible and so this year I decided maybe I’d venture into the arena alone.

Perfect Dinner Rolls {{Baking Bytes}}

I had previously made this recipe a couple of times with limited success. The first time we made it (using a little whole wheat flour) we didn’t realize the original recipe makes 24 rolls and so ended up with 12 delicious monstrosities. Unfortunately the large size meant they weren’t quite cooked all the way through. They were great for leftover cranberry cream cheese turkey sandwiches though (my favorite!).

Perfect Dinner Rolls {{Baking Bytes}}

We later tried it again, this time halving the recipe for 12 normal-sized rolls but still using a whole wheat flour in place of some of the white. Much better outcome given the size issues from before, but although substituting wheat flour for part of the whole amount resulted in a lovely flavor, it seemed also to result in a rather denser texture than expected.

Take three, a year passes: Given my inexperience, I wasn’t positive the substitution was the culprit and figured I should probably make the recipe to the letter before determining what issues I may have with it. This year M and I were invited to a potluck Thanksgiving house party which seemed a perfect excuse to attempt this recipe yet again. I followed the recipe as directed and lo and behold: perfect rolls. Light and fluffy with a delightful buttery taste, they are the perfect addition to any dinner.Perfect Dinner Rolls {{Baking Bytes}}

They have a wonderful flavor all on their own but dressed up with honey or butter and jam they are a perfect side dish and a delightful snack. Fantastic addition to a holiday meal but easy enough to be a fairly regular guest on the table. Also great for sliders or small sandwiches if you have a few leftovers the next day.

Perfect Dinner Rolls {{Baking Bytes}}

The only downside is they do not keep particularly well, so it’s best to eat them all on day one or two. It’s possible you could freeze them and thaw as desired but I haven’t tried this yet, so if you do please let me know how it works for you! On the other hand, if you have a crowd to feed the recipe is easily doubled from the yield of a dozen I have below.

I still hold out hope for the whole wheat version, so stay tuned for sometime next year when I finally figure it out.

Perfect Dinner Rolls

Adapted from The On-Call Cook
Makes 12 rolls

Ingredients

1 cup milk (2% or whole)
1/4 cup + 1.5 tsp sugar, divided
1/6 cup butter (about 2 and 2/3 Tbsp)
1 tsp salt

1 package dry yeast
1/3 cup warm water (~110 degrees Fahrenheit)

4-4.5 cups all-purpose flour

1.5 eggs, beaten

1 Tbsp butter, cold (optional)

Directions

  1. In a medium saucepan combine milk, 1/6 cup butter, 1/4 cup sugar, and salt. Heat over medium until the butter melts, then place in the fridge to cool.
  2. In the bowl of your stand mixer (or a large bowl, if you don’t have a stand mixer) gently stir the water, yeast, and 1.5 tsp of sugar. Set aside for ten minutes – if the yeast has not foamed do this step again until it does. If the yeast doesn’t foam, the bread won’t rise.
  3. Add two cups of flour to the cooled milk mixture (I just did it in the saucepan) and whisk by hand until completely combined.
  4. Add the flour-milk to the yeast, and stir on low with your stand mixer until combined. Increase speed to medium and beat for 2-3 minutes.
  5. Stir in eggs until combined, then add 1 more cup of flour, and stir on low until combined.
  6. Switch to dough hook attachment. Add 3/4 cup of flour and mix on low until combined. Add additional flour 1/4 cup at a time until dough starts to pull away from the sides into a ball. It will not all pull away – that’s normal. (It should total between 4 and 4 1/4 cups of flour or so.)
  7. Remove dough hook then cover bowl and place in a warm area to rise. Let rise 30-60 minutes, or until dough has doubled in size. (The rising time can vary drastically depending on how warm or drafty your house is.)
  8. Grease a 9×13″ baking dish, set aside.
  9. On a floured surface with floured hands, pat dough into a rectangle about 1″ thick. Use a pizza cutter or very sharp knife to cut into twelve equal pieces.
  10. Pinch each piece into a ball and place seam-side down into the baking dish. If, like me, your balls are not all the same size, put the two smallest ones in the middle.
  11. Cover and let rise again 30-60 minutes, or until balls have doubled in size. They should all touch each other with maybe just a little space where the corners are.
  12. Preheat oven to 375 degrees Fahrenheit.
  13. Bake rolls about 15-20 minutes. (With my oven 19 minutes seems to be correct.) Rolls should be golden brown on top and reach an internal temperature of about 200 degrees Fahrenheit. I highly recommend using an instant-read thermometer here as they will look done on top before they are done in the middle. Pro-tip: check a middle roll if you can.
  14. Let cool about 10 minutes, then rub the tops of the rolls with cold butter (optional, but it makes them pretty and shiny and extra tasty.)
  15. Serve plain or with your favorite toppings. They are also great for sliders! You can store leftover rolls on the counter for a couple of days, but they are definitely best on day one.

Notes

To measure half an egg, beat in a liquid measuring cup then use half of that. Save the rest to add to a veggie scramble. In future iterations I will try it with two eggs and one egg, and update the recipe with my findings.

Pumpkin Pie Jack-o-lanterns

Fall actually hit Montana while I was gone so I woke up to frost this morning for my bike ride to work. It was glorious. I just returned from my whirlwind half marathon tour yesterday so I am pretty tired, but very glad to be home. Three great races and lots of fun seeing new places and old faces in all four Lower 48 timezones. This week I have a bonus post for you! I actually thought of this idea last year, but never got around to implementing it, so I decided I should definitely get it done this year.

Pumpkin Jack-o-lantern Mini Pies {{Baking Bytes}}

Pumpkin pie is one of my favorite pies and I will happily eat it all year round. Unfortunately M doesn’t super care for it so mostly I just make it in the fall when I don’t mind having it for breakfast all week (yum). It’s a traditional dessert this time of year, which can be boring (according to some) so I thought I’d try giving it a new package.

Pumpkin Jack-o-lantern Mini Pies {{Baking Bytes}}

I used my normal pie crust recipe and pie filling recipe, and then used mason jar rings to form little pies. The jack-o-lantern faces make them great for Halloween but with a different decoration (like the leaf cutouts below) they’d be great for any fall potluck. They are way easier to serve and eat which makes them great for when you aren’t having a sit down dinner. They do have a high crust to filling ratio, so make sure you use a crust recipe that you like; I have mine linked below if you don’t already have a favorite.

Pumpkin Jack-o-lantern Mini Pies {{Baking Bytes}}

They are a little time consuming, especially if you cut out faces, but not difficult and I’d say pretty beginner friendly. I got 9 out of my recipe but that could vary based on how thin you roll your crust and how many times you are able to reuse the scraps. (I wouldn’t recommend more than once or twice as the dough gets very tough the more you handle it. Tip: you can drip a little extra water to help the scraps stick together again to re-roll.)

Pumpkin Jack-o-lantern Mini Pies {{Baking Bytes}}

Your usual pumpkin filling, yummy pie crust, and a dusting of cinnamon sugar makes a great treat that’s easy to portion control and is a wonderful whipped cream vessel. The cuteness is an added perk. =)

If you need a dessert for your Halloween parties this weekend, give these a try.

Pumpkin Pie Jack-o-lanterns

Makes about 8 double-crust handpies

Ingredients

Pastry for double-crust pie

1/3 cup sugar
1/2 tsp ground cinnamon
1/4 tsp salt
pinch ground cloves

1 egg
1 cup pumpkin puree
1/4 cup heavy whipping cream

cinnamon & sugar mixture (optional)

Other Supplies

8+ wide-mouth jar rings
1 small-mouth jar ring with lid
1/4 cup of water or one egg white

Directions

  1. Line a cookie sheet with a silicon mat or parchment paper. Preheat your oven to 350 degrees Fahrenheit (or wait a bit since some of these steps can be time-consuming.)
  2. Whisk together sugar, spices, and salt in a medium bowl.
  3. Stir in egg, pumpkin, and whipping cream until combined. Set aside.
  4. Take half of your crust pastry and roll it out slightly thinner than you normally would. Use a 4″ biscuit cutter to cut out as many rounds as possible. Repeat with remaining pastry.
  5. For jack-o-lanterns, cut faces into half of the unbaked pie crust circles. (Totally optional, of course.)
  6. Place appropriate number of wide-mouth jar rings (not lids!) upside-down on your prepared baking sheet and spray with cooking spray. Set aside. (Preheat your oven to 350 degrees Fahrenheit if you haven’t already.)
  7. Using the small jar ring with lid inside, gently place one pie crust circle on top of it (yes it will hang over the sides, that’s important.)
  8. Carefully spoon about 3 tablespoons of the pumpkin mixture into the center of the pie crust, such that it is contained by the jar lid ring.
  9. Brush the circumference of the circle with water or egg white, and top with one of your jack-o-lantern faces, pressing the edges together to seal completely.
  10. Gently remove the sealed pie from the small ring/lid and transfer to one of the wide-mouth rings such that it is centered and the edges are supported by the ring. Your pumpkin may overflow a little, but with practice you’ll get better.
  11. Repeat steps 7-11 with remaining pastry and pumpkin mixture. If you have a decent amount of pumpkin mixture remaining, pour it into a (sprayed) ramekin or small glass baking dish and bake the same as the pies.
  12. If desired, sprinkle cinnamon & sugar mixture over the pies (I do this with pretty much all my pies), then bake for 30-40 minutes, or until a small knife inserted into the pumpkin mixture comes out clean.
  13. Let cool completely, then serve with whipped cream.