Lemon Meringue Pie

LemonsThis week we return to the lovely summery flavor of lemon, since I successfully created a lemon meringue pie this time. As both a citrus flavor and a chilled dessert, it makes for a great summertime treat, although it’s equally delicious any other time of year.

Lemon meringue pie was the favorite of my maternal grandmother, and I made it for her birthday a couple of the years I was there to celebrate with her. Her birthday conveniently falls on Pi Day, the day before my own birthday, which make a lovely two days of meringue pie (lemon for her, chocolate for me.) Although she passed away last year, I still intend to celebrate Pi Day with lemon meringue for many years to come.

Lemon Meringue PiePerhaps the most easily screwed-up pie I’ve ever made, lemon meringue can be a daunting task for even an experienced pie baker. The easiest way to screw it up is to not cook the filling long enough, causing it not to set correctly in the fridge. It’s extremely important to heat the filling to a full rolling boil and then cook and stir for another minute or so; if in doubt go an extra thirty seconds just to be safe.

The instruction list is fairly long, but I have laid it out in the order I find to be most successful for me. I recommend reading through the entire list before starting to make sure you have everything easily accessible. The success of this pie relies somewhat on timing, and taking too long (or not long enough) between certain steps can result in a liquid filling or the meringue completely separating from the crust.

Lemon Meringue Pie

Lemon Meringue Pie

Adapted from argostarch.com
Makes 1 deep dish pie

Ingredients

Pastry for single-crust pie

1 1/2 cups sugar
1/3 cup heaping corn starch
2 cups water
5 egg yolks, lightly beaten
1/2 cup lemon juice
1 tablespoon lemon zest
2 tablespoons butter

5 egg whites
1/2 cup sugar
1 tsp corn starch

Directions

  1. Preheat oven to 450 degrees Fahrenheit.
  2. Place pastry in pie dish being careful not to stretch the dough. Trim and crimp edges.
  3. Prick pastry GENEROUSLY with a fork, all over the bottom and sides of the pan.
  4. Bake for 8-10 minutes, or until golden brown, and then cool on a wire rack.
  5. Reduce oven heat to 375 degrees, and move oven rack to bottom third.
  6. Using an electric mixer on high speed, beat egg whites until soft peaks form.
  7. Gradually add the sugar and corn starch, mixing between each addition to medium peaks. Leave in mixer bowl and start the pie filling.
  8. In a medium saucepan, whisk together sugar, cornstarch, water and egg yolks.
  9. Heat over medium heat, whisking nearly constantly until mixture thickens and reaches a boil.
  10. Continue cooking, vigorously whisking until mixture is very thick and smooth, approximately 1 minute.
  11. Remove from heat and stir in butter, zest and lemon juice until smooth.
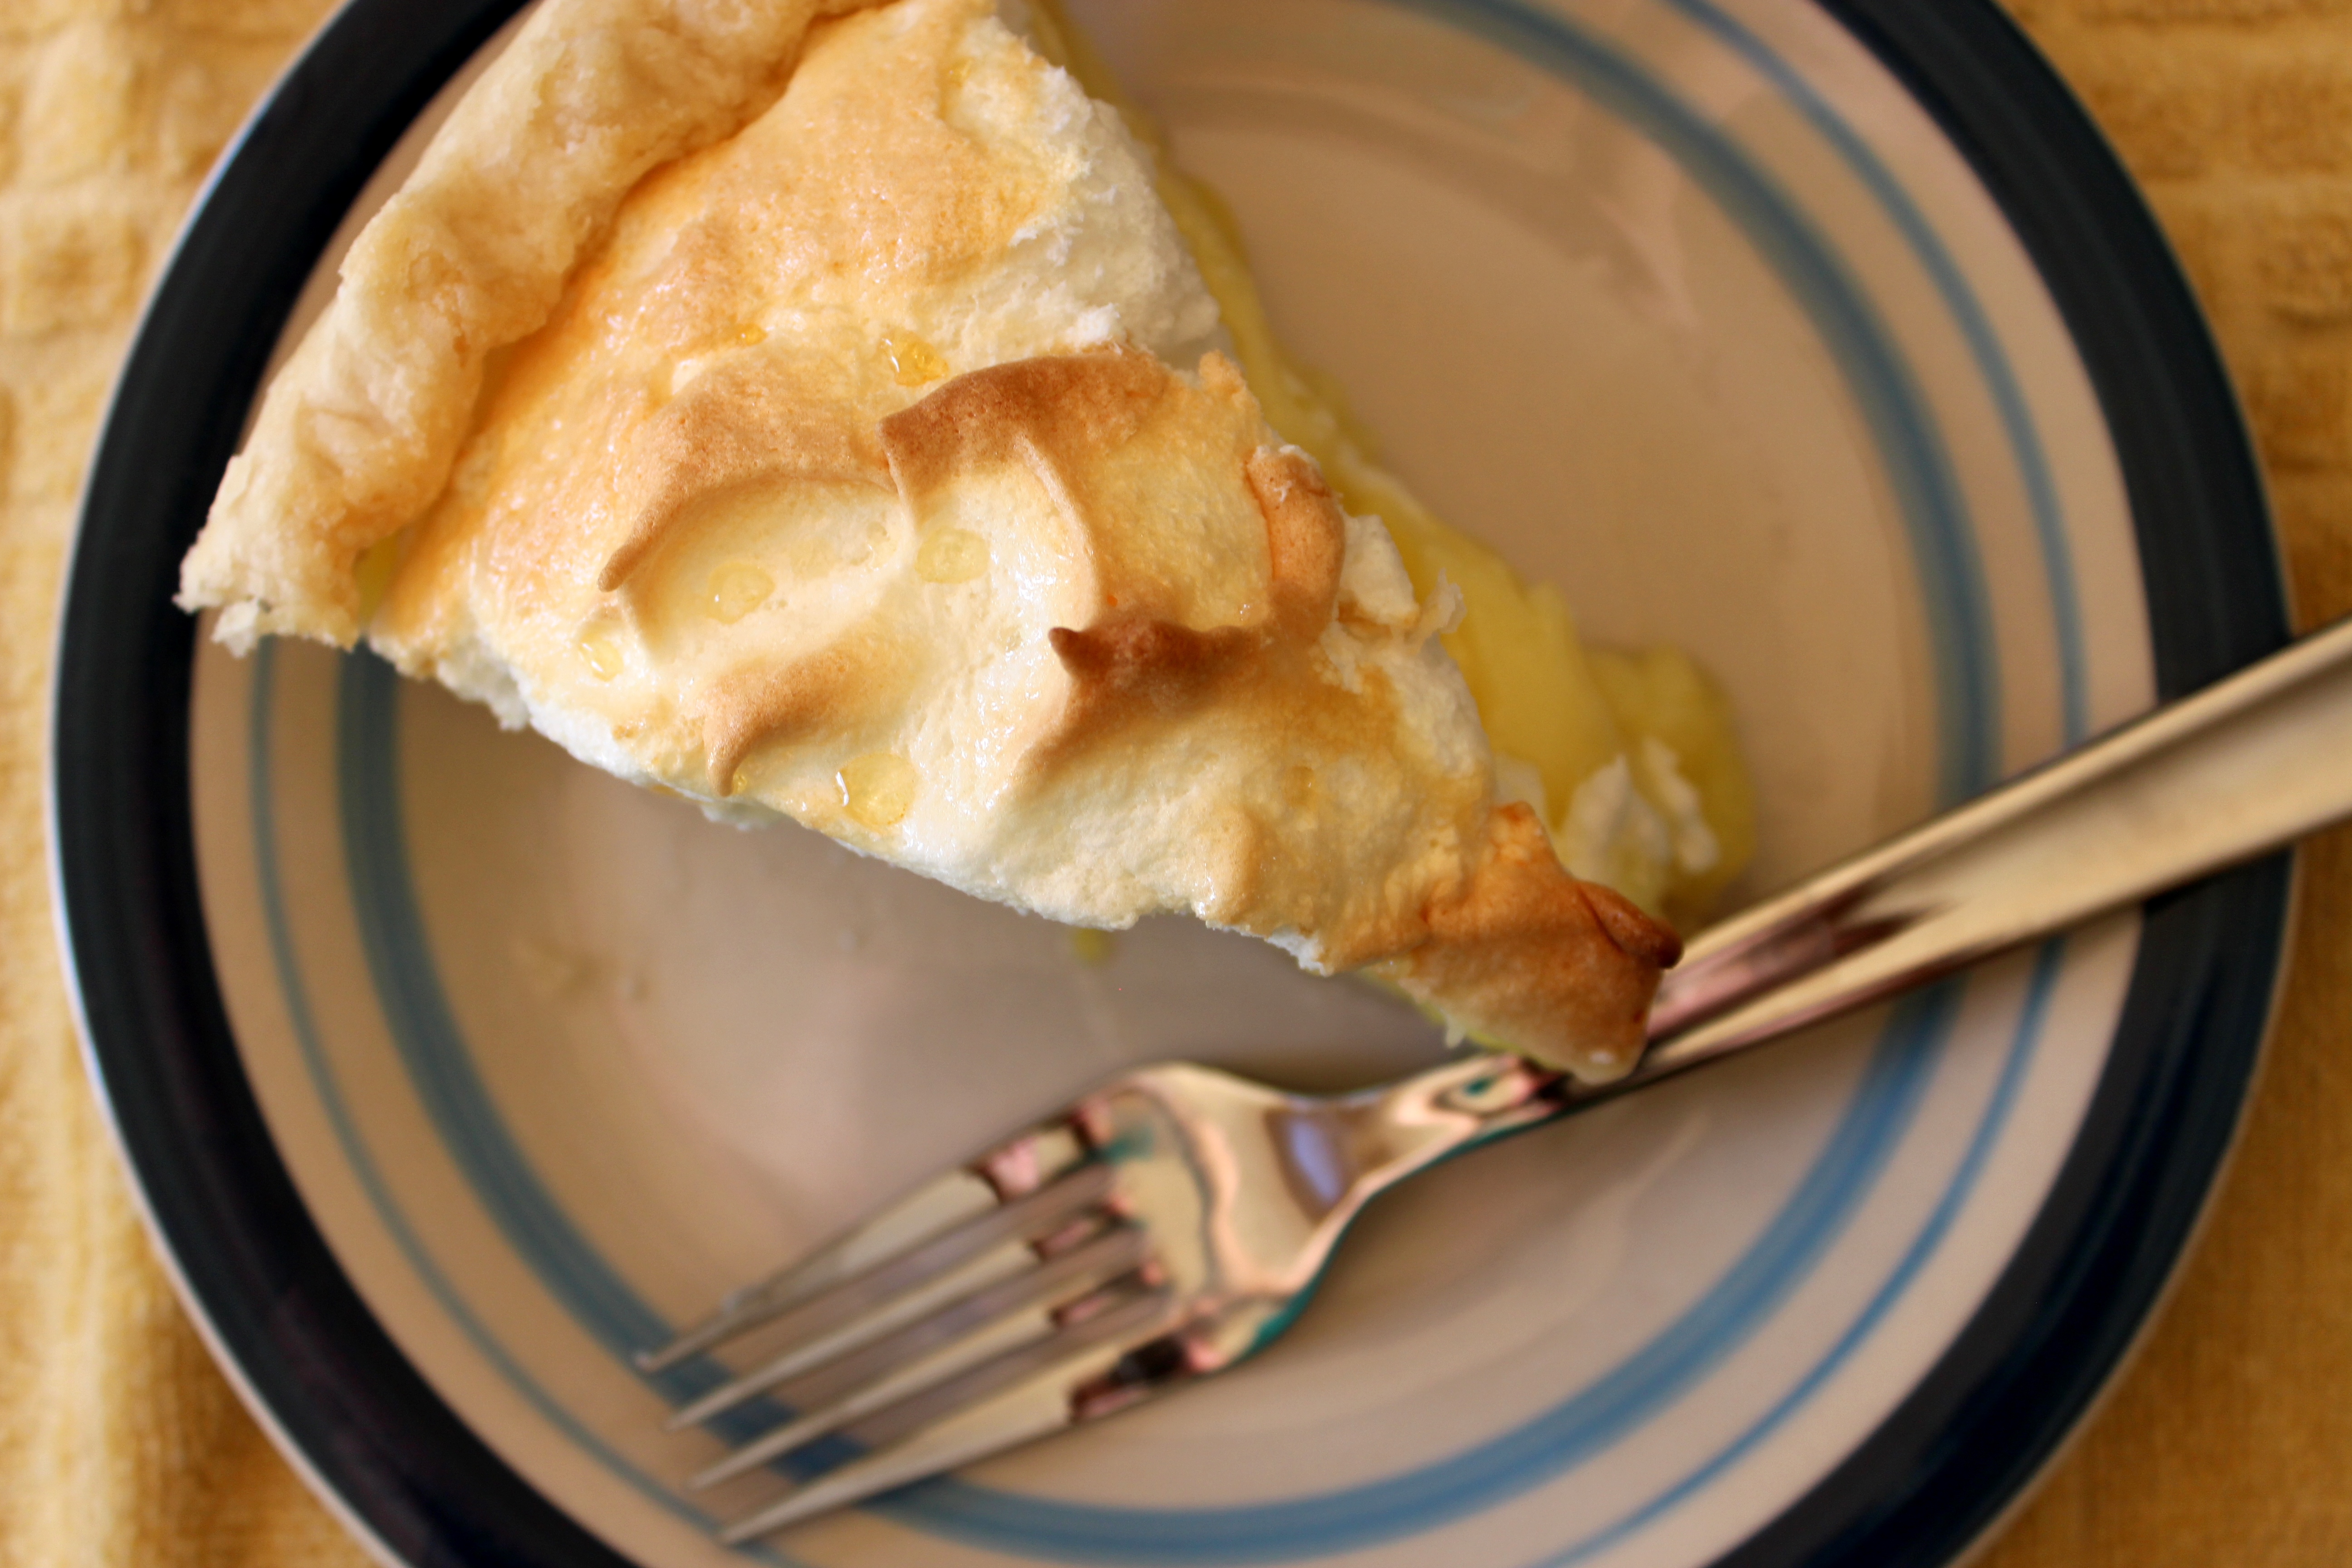
  12. Pour hot filling into pie crust, being careful to leave room for the meringue (it weighs more than you might think!)
  13. Return to your egg whites and beat on high speed until stiff peaks form. (Tips stay straight.)
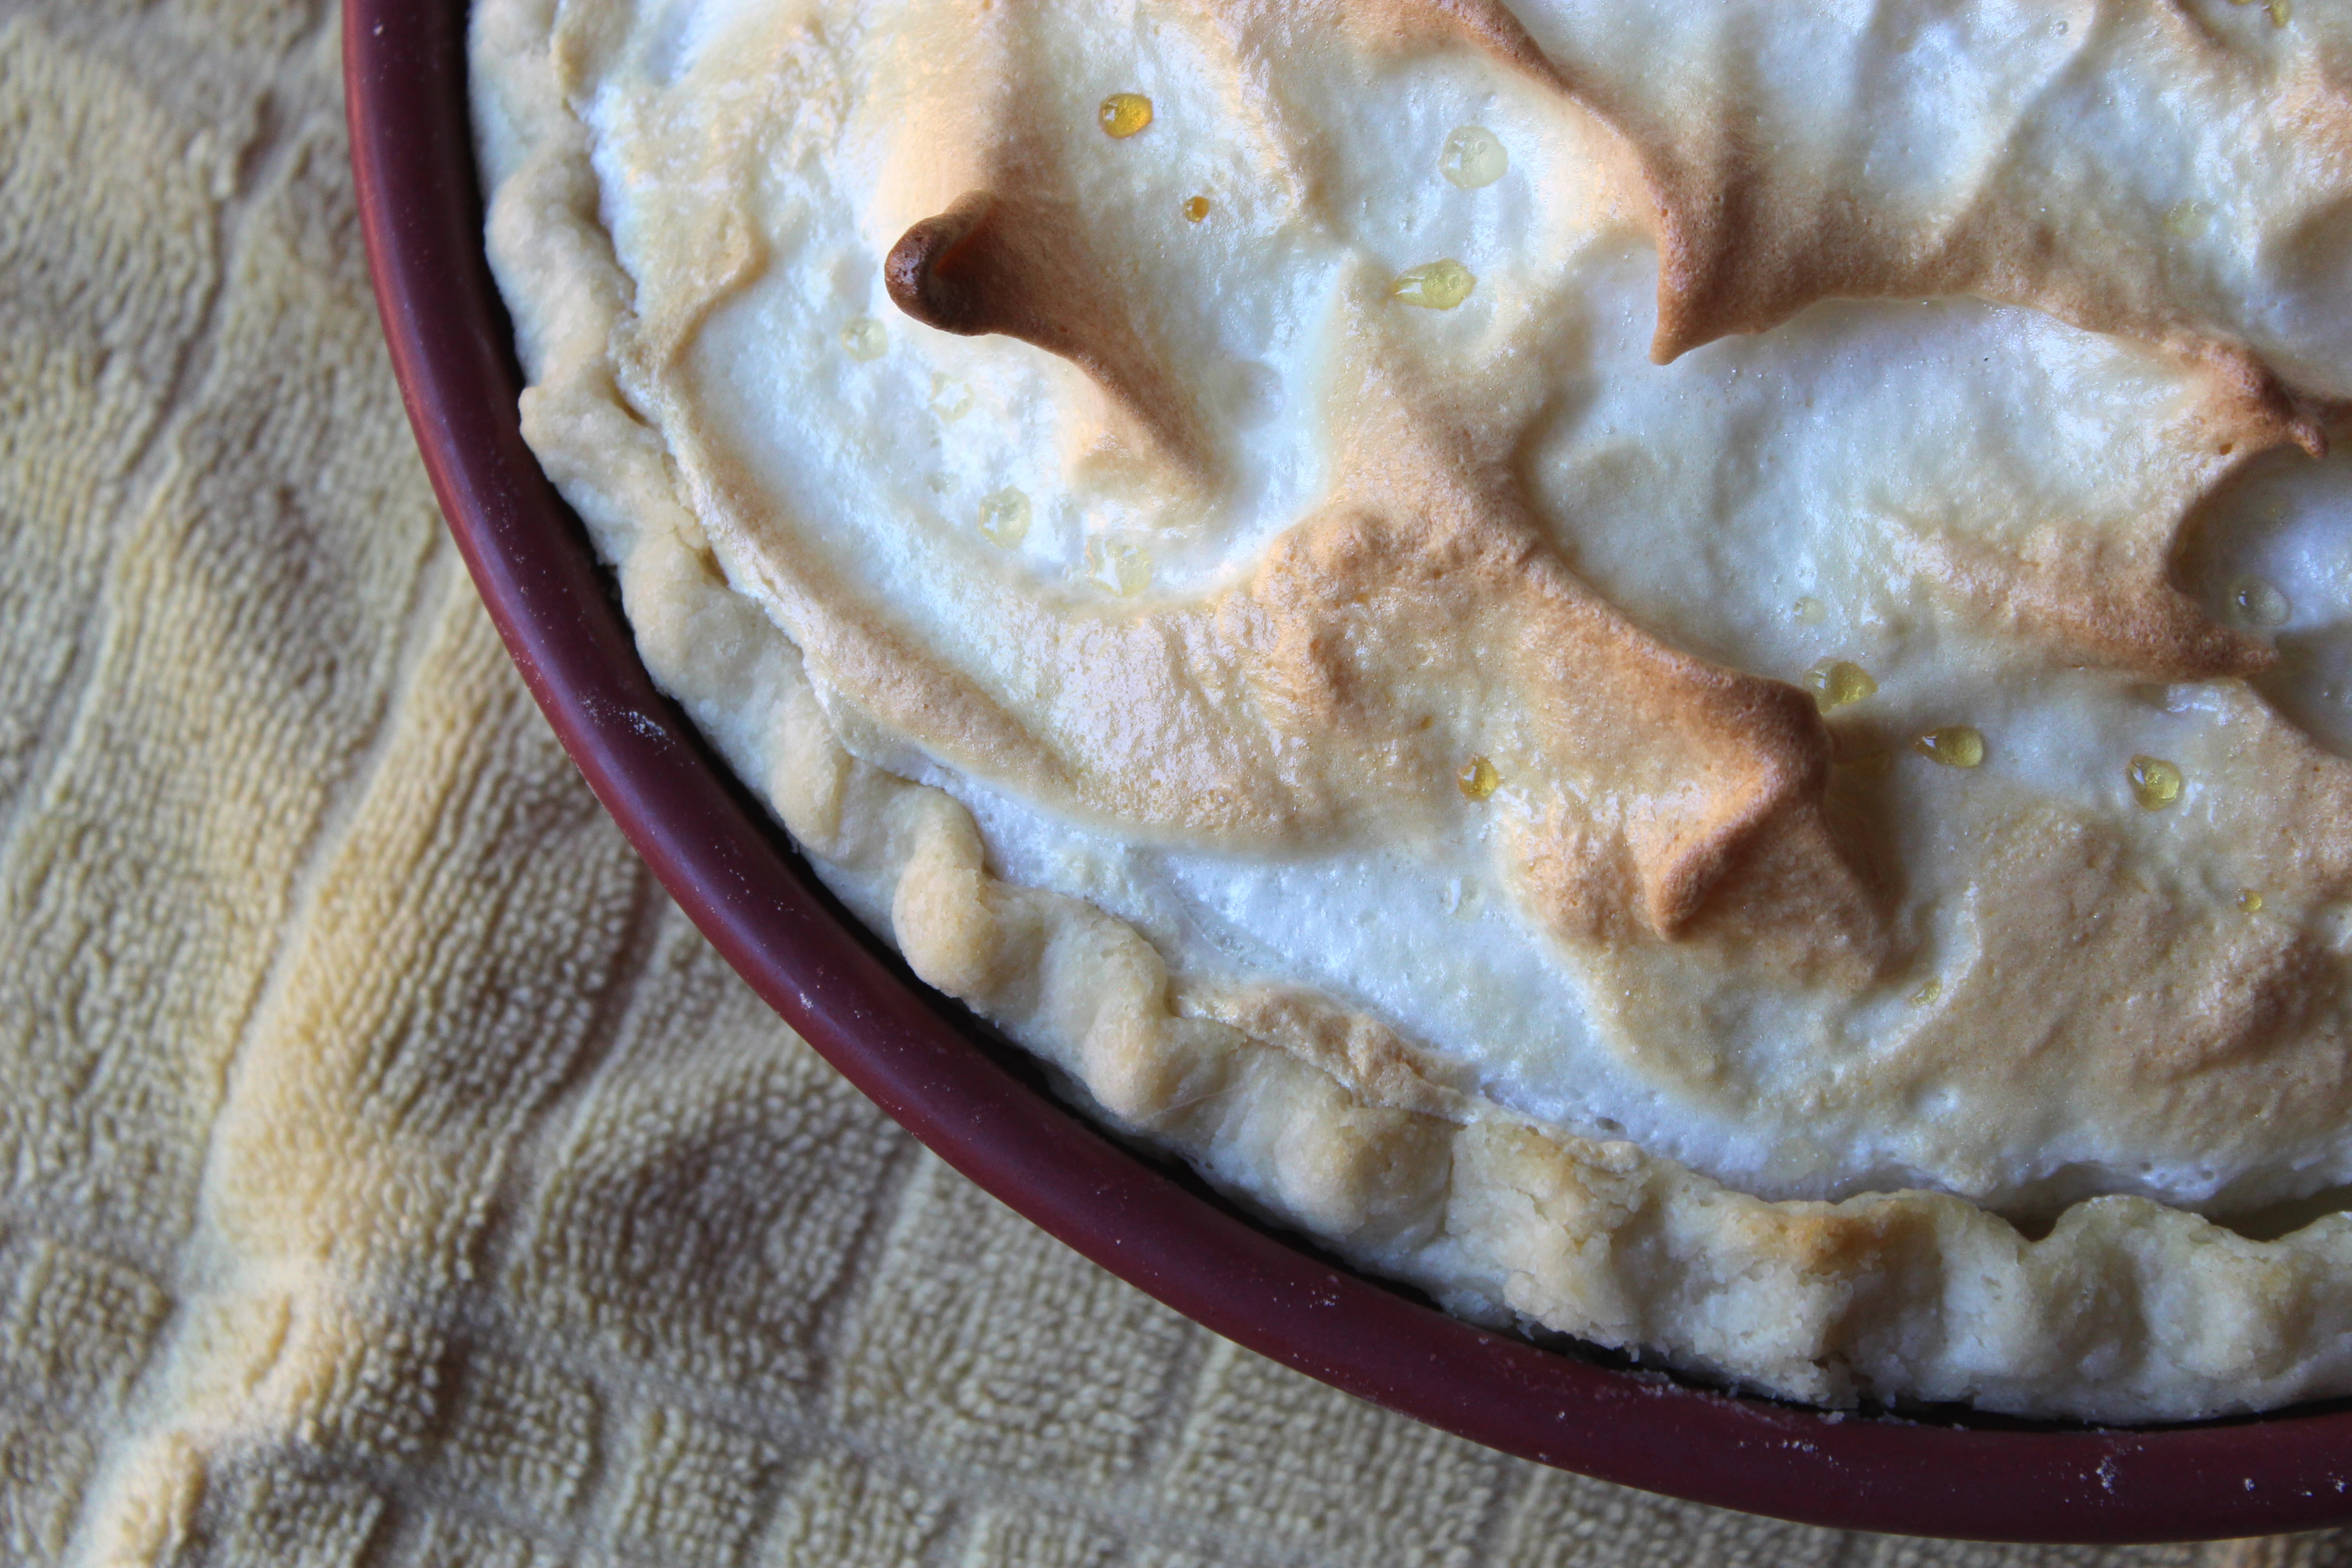
  14. Gently place the meringue over the hot filling, carefully sealing the edges completely. Swirl the meringue into peaks using a spatula or the back of a spoon.
  15. Bake for 10 minutes or until peaks of meringue are lightly browned.
  16. Cool at room temperature for about thirty minutes, and then place in the fridge for at least 3 hours before serving.

Lemon Meringue PieNotes

  • I don’t like long strings of zest in things, so I generally chop it pretty fine before adding it to anything.
  • Pricking the crust before baking helps keep it from shrinking, so don’t be afraid to stab excessively.
  • Egg whites whip best at room temperature, and make VERY certain there is no water in the bowl or on the whisk/beaters before starting.
  • It is very important to cook the filling well. If you don’t, it will look thick when you pour it in the crust, but end up as liquid after it chills. Make sure to keep stirring and heating for another 60 seconds after it boils.
  • The sooner you can get the meringue onto the hot filling, the less likely separation will occur later. (Mine always separates which drives me insane.)
  • Unfortunately, this pie will not keep long so invite some people over to help you finish it the day of baking. (It will keep one day in the fridge alright but after that the meringue doesn’t keep its light and fluffy consistency.

Honey Vanilla Greek Frozen Yogurt

Continuing my effort of finding some healthier evening desserts, I knew I needed a fast staple to replace (or more likely, supplement) my favorite French vanilla ice cream recipe. With the honey vanilla Greek yogurt being my favorite flavor, it only made sense to make a sweeter, frozen version as a slightly healthier ice cream alternative.

Honey Vanilla Greek Frozen Yogurt - closeupEven simpler than ice cream, this recipe takes only a few minutes of active preparation making it ideal to make while cleaning the kitchen (my usual method) or cooking dinner. It’s easy to serve and, to me, tastes like summer. While there is no getting around the fact that it’s frozen yogurt, I love the tangy but sweet combination. It definitely won’t be confused with ice cream, but it a wonderful addition to your frozen dessert collection.

I generally enjoy it plain, but is also delicious with fruit topping such as a handful of raspberries or a drizzle of strawberry syrup.

Honey Vanilla Greek Frozen YogurtHoney Vanilla Greek Frozen Yogurt - cup

Makes 4-5 cups

Ingredients

32 oz honey vanilla Greek yogurt
3/4 cup sugar

Directions

  1. Whisk yogurt and sugar together until thoroughly mixed.
  2. Chill in the fridge for half an hour, and then freeze according to your ice cream maker’s instructions. (Also place your freezer-safe bowl in the freezer during this time.)
  3. Transfer to a freezer-safe bowl, and allow two hours in the freezer before serving.

Honey Vanilla Greek Frozen YogurtNotes

  • I pretty much only buy the Greek Gods brand of Greek yogurt, but I imagine other brands will work just fine.
  • If, like me, you accidentally buy honey flavored yogurt instead of honey vanilla flavored yogurt, just add 2-3 tsp vanilla extract and carry on as usual.
  • You can use more or less sugar to taste, but I wouldn’t advise using less than 2/3 cup, as it could result in a much firmer texture that is hard to dish.

Strawberry-Rhubarb Pie

Growing up in Southeast Alaska doesn’t give a lot of edible gardening opportunities. One thing that grows surprisingly well, however, is rhubarb. Most people have trouble containing it and are constantly trying to pawn off stalks or plants on whoever will take them. Luckily, rhubarb is one of my favorite flavors. I am partial to the more tartly flavored jams and pies and rhubarb pairs well with a number of berries and other fruits. My favorite duos, however, are strawberry and raspberry.

Strawberry Rhubarb Pie

I basically live off our raspberry-rhubarb jam, and could eat strawberry-rhubarb pie for weeks without getting bored. With several bags of rhubarb in the freezer (courtesy of M’s parents in Oregon), and the need to use up my Costco supply of strawberries, a pie seemed in order. The tartness of rhubarb and the sweetness of strawberries, paired with just a hint of cinnamon, is fabulous on its own or with a side of vanilla ice cream. It keeps well in the fridge for nearly a week (it never lasts longer than that) and warms nicely in the microwave.

This pie would be a wonderful addition to a summer party or just your average evening, if you don’t want to share. (I wouldn’t blame you.)

Below find the recipe for a deep dish pie, along with my notes at the bottom. If you are using a regular-sized pie plate instead of deep dish, you may want to reduce to 4 cups rhubarb and 2-3 cups strawberries, to avoid having extra filling.

Deep Dish Strawberry-Rhubarb PieStrawberry Rhubarb Pie - Slice

Adapted from The Fiddlehead Cookbook

Ingredients

Pie crust for double-crust pie

4 1/2 cups rhubarb in 1/2″ slices
3-4 cups fresh strawberries, quartered

1/2 cup flour
1 1/3 cup sugar (or to taste)
1/2 tsp cinnamon

Directions

  1. Place rhubarb and strawberries in a large bowl.
  2. Whisk together dry ingredients in a small bowl.
  3. Preheat the oven to 400 degrees.
  4. Gently fold sugar mixture into the fruit until well mixed, and let sit for fifteen minutes.
  5. Pour filling into unbaked pie shell, mounding towards the center.
  6. Put on top crust and bake at 400 for 10 minutes.
  7. Reduce heat to 375 and bake for an additional 40-60 minutes, until juices are bubbling and rhubarb is tender.
  8. Let cool on the counter until pie plate can be safely picked up with bare hands, and then place in the fridge to store. Keeps well for a week in the fridge.

Strawberry Rhubarb Pie - EdgeNotes

  • If using frozen rhubarb, allow to thaw and drain while you make the pie crust and prepare everything else.
  • I used the full amount of sugar, but use more or less according to your preference.
  • I like to place a cookie sheet on the shelf below the pie in order to catch overflow when baking.
  • A deep dish pie plate will likely need the longer range of baking time, whereas a regular pie plate should be done closer to the short end.
  • If it looks runny when you pull it out of the oven, that’s okay. It will solidify some when it cools, especially in the fridge.

Strawberry Greek Frozen Yogurt

Summer weather has finally shown up in my neck of the woods, which means cold food will soon be a necessity. In an effort to make my (daily) frozen dessert not always be a serving of ice cream, I attempted frozen yogurt. The bountiful supply of strawberries at Costco led me towards a strawberry flavor, which always seems like a great summer treat.

Strawberry Frozen Yogurt This recipe is superbly easy and includes fresh strawberries to make use of your summer fruits. It’s not quite as creamy as ice cream (of course), but is much healthier and still has that delicious yogurt tang.

Strawberry Greek Frozen Yogurt

Makes 3-4 cups

Ingredients

1 (24 0z.) container Greek Gods Honey & Strawberry Greek Yogurt
3/4 cup sugar
2 cups fresh, whole strawberries

Directions

  1. Wash, hull, and then dice strawberries into small pieces. Lay on a paper towel to soak up the extra water.
  2. Mix yogurt and sugar in a bowl until thoroughly combined, then chill in the fridge for about 30 minutes.
  3. Put your strawberries is fridge to chill while you churn the yogurt mixture according to your ice cream maker’s instructions.
  4. In the last few minutes of churning, mash your strawberries slightly with a fork to release some of the juice, and pour into the yogurt. Let churn another 2-5 minutes or until thoroughly mixed. (Depending on how much you mashed the strawberries, the mixture will probably be very runny at this point; this is normal.)
  5. Transfer to a freezer safe bowl and place in the freezer for at least 3 hours or overnight.
  6. Set on the counter for 10 minutes, serve, and enjoy!

Strawberry Frozen Yogurt - cupNotes

  • The brand of yogurt might not be important, but Greek Gods is the only brand I buy so I can’t say for certain.
  • You can skip chilling the yogurt mixture in the fridge before churning, but don’t expect it to firm up a ton while churning. (It freezes fine in the freezer afterward.)
  • Thoroughly dry the strawberries because the extra water can make the yogurt a little icy. You can also opt not to mash the strawberries if you are concerned about the texture. The juice is what makes the yogurt a lovely pink color, but it’s not strictly necessary; you could also add a few drops of red food coloring instead but I preferred the natural coloring.
  • Mine was not “soft serve” right after churning but firmed up nicely in the freezer. Make sure you allow freezer time!
  • The strawberries freeze very hard so make sure to cut them small. Large frozen chunks can make the yogurt very difficult to serve (and are pretty cold on the teeth.)

Snickerdoodles

Last week I had every intention of presenting a recipe for lemon meringue pie. I made the pie on Wednesday and it looked great from the outside. However, when I cut a slice on Thursday in order to take pictures, I discovered I had actually created lemon meringue soup. It had great flavor, but was definitely nowhere near ready for the blog.

Onto Plan B: Cookies.

A few weeks ago M and I moved into a new place. We have a ton more space (including a garage!) and it’s been a great upgrade for us. I bribed a few friends to help us move the heavy furniture, as everyone does, by promising them cookies. One requested chocolate chip, and the other, his favorite snickerdoodles.Snickerdoodles

I was around 14 when I made snickerdoodles for the first time. They turned out huge and soft and perfectly round, with that classic snickerdoodle flavor. I have never quite been able to replicate this feat, but my current favorite recipe comes pretty close. No one turns them down, and in general it’s hard to eat fewer than six at one time. This recipe makes enough to share while keeping plenty for yourself.

I always think they look like donut holes at this stage.

Although they are a little more time-consuming than standard drop cookies, these snickerdoodles are well worth the extra effort. The recipe is below, with my preferred method for making them.

Snickerdoodles

Adapted from Brown Eyed Baker
Makes about 5 dozen

Ingredients

1 cup (224 g) unsalted butter, room temperature
1 1/2 cups (288 g) sugar

2 eggs
1 tsp vanilla

3 cups (360 g) flour
2 tsp cream of tartar
1 tsp baking soda
1/4 tsp salt

3 tbsp sugar
1 tbsp cinnamon

Snickerdoodles - stack

Directions

  1. In a large bowl, on medium-high speed, beat together butter and sugar until fluffy.
  2. Meanwhile, whisk together flour, cream of tartar, baking soda and salt in a separate bowl. Set aside.
  3. Beat the eggs into the butter mixture one at a time, combining fully after each addition.
  4. Beat in the vanilla.
  5. Slowly and gradually stir in the flour mixture, beating just until combined.
  6. Chill dough for about 30 minutes.
  7. Meanwhile, mix the remaining sugar and cinnamon in a shallow bowl.
  8. Scoop the dough into 1 tablespoon balls (I like to use a cookie scoop).
  9. Roll each ball in your hands (should be about 1″), and then in the sugar/cinnamon mixture.
  10. Chill the dough balls while you preheat the oven to 350°F.
  11. Line two cookie sheets with parchment paper or silicon mats, and place in the fridge while the oven preheats.
  12. Place the dough balls about two inches apart on a chilled cookie sheet and bake for 10 minutes. Let the cookies cool on the sheet for a couple of minutes before placing on a cooling rack.

Notes

  • Chill the cookie sheets and the dough balls between batches.
  • Store cookies in an airtight container and they will keep well for several days.