Broccoli Beef

Two days until July – I’m so excited! Why? You may ask. Well, for the month of June my challenge to myself was to give up bread (tortillas and pasta included) and peanut butter. Mainly to see if I could do it, because these items are basically life staples, and to help me branch out into different food.

Broccoli Beef {{Baking Bytes}}

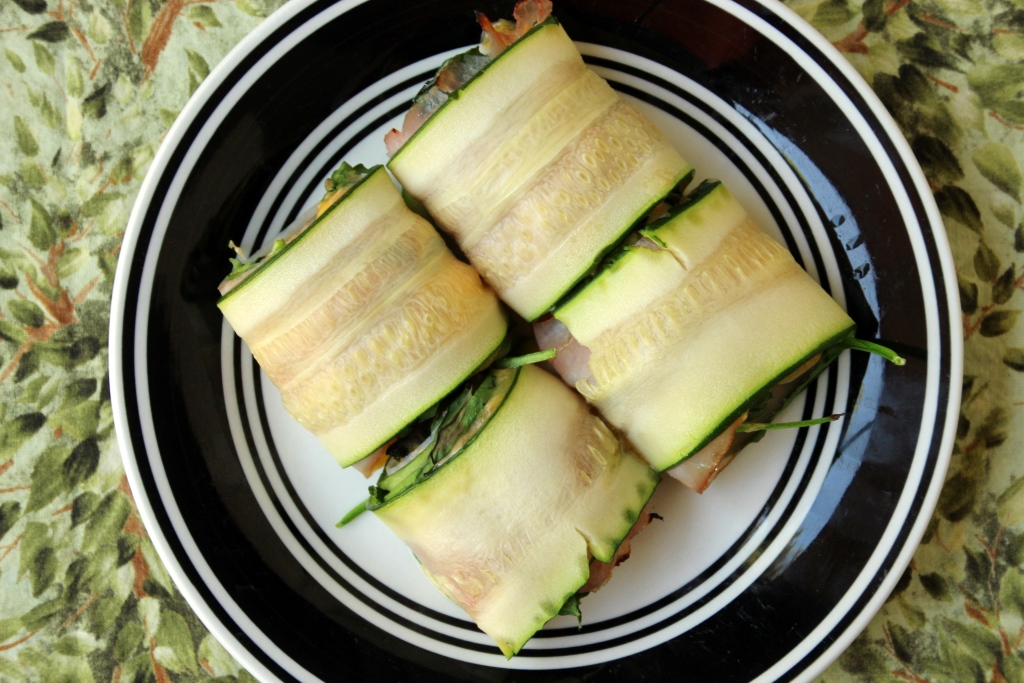
I did end up having to make some exceptions (I traveled a fair amount this month which makes it a lot harder to avoid bread, especially since I really don’t like to waste food unnecessarily) but overall it was a successful challenge. I am *super* looking forward to being able to use tortillas again for wraps, and to have peanut butter on a waffle, but it also helped me come up with some new favorites: quinoa bowls, baked sweet potatoes, and this broccoli beef dish.

Broccoli Beef {{Baking Bytes}}

Super easy since it’s made in the crock pot, this broccoli beef is just as good as takeout and not much more work. You could easily prep it all the night before and store it in the fridge (use a separate bowl, not your crock pot container), and dump it into the slow cooker in the morning. Add the final ingredients right when you get home, turn it to high, and you’ll have dinner ready to go within the hour while you unwind or do some chores or whatever else you need to do in the interim.

Broccoli Beef {{Baking Bytes}}

Amazing sauce, thinly sliced beef (or elk in my case), and veggies galore. Traditional broccoli beef is just that, broccoli and beef, but I like to add a bell pepper for extra veggies, extra flavor, and extra color. Although in full disclosure, I add bell peppers to basically all my entrees where it wouldn’t be weird. A double batch just fits in a 6-quart crock pot, so you can feed a crowd or put half in the freezer for another day.

Broccoli Beef {{Baking Bytes}}

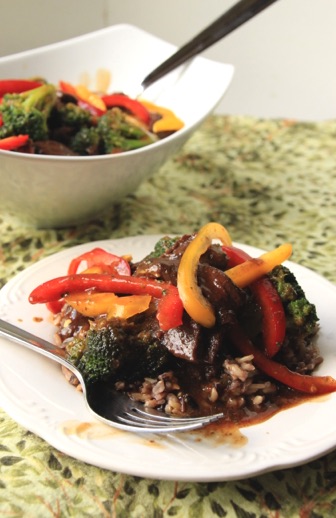
Goes great with a side of rice, quinoa, noodles, zoodles, or just enjoy it solo. It reheats well and is just as delicious on day 5 as it is fresh from the cooker. And if you finish the meat and veggies before the sauce, it works great as a condiment for rice or quinoa bowls.

Broccoli Beef {{Baking Bytes}}

Note: I have a hunch you can add the corn starch slurry at the beginning, and assuming it’s cooked on high for at least one hour near the end it should thicken as expected. However I have not yet had time to test this theory. Once I do, I’ll update here.

Broccoli Beef

Adapted from Le Creme de la Crumb
Makes about 3 quarts

Ingredients

1 cup beef broth (or 1 bouillon cube + 1 cup boiling water)
1/3-1/2 cup low sodium soy sauce
1/4-1/3 cup brown sugar (not packed)
1 Tbsp sesame oil
4 cloves garlic, minced
1/2 tsp red pepper flakes

1.5 lbs steak, slightly frozen

3 Tbsp cornstarch
1/4 cup cold water

1 lb broccoli
1 bell pepper, thinly sliced (optional)

Directions

  1. In a crock pot, whisk together broth, soy sauce, brown sugar, sesame oil, garlic, and pepper flakes.
  2. Thinly slice meat (this is easier if it’s still slightly frozen), and cut into 2″ pieces.
  3. Gently add meat to crock pot.
  4. Cook on low for 4-6 hours, or high for 2-3 hours.
  5. 1 hour before serving: Vigorously whisk or shake together corn starch and water. Stir into crock pot. Add broccoli and bell peppers, turn heat to high, and cook for another hour.
  6. Serve solo or with rice, quinoa, pasta, or your favorite grain.
  7. Refrigerate or freeze leftovers. Make a double batch if you like to have lots!

Easy Zucchini Rollups

A few weeks ago during a relaxed trip to Costco, one where I actually perused all the aisles (except the chips/drinks aisles…I never go down those), I noticed a Roasted Garlic & Chili Aioli sauce. (It was much cheaper at Costco, for the record.) It was low sugar and sounded delicious, so I took a chance and bought the two-pack on a whim. I figured if it was good I could keep one at home and one at work, and if it wasn’t, I’d just donate them both to work. Fortunately for me, it is amazing and I’ve been using it on all sorts of things.

Also a few weeks ago, I decided to give up bread and peanut butter for the month of June. With my marathon training I’ve gained a couple extra pounds and wanted to help myself ditch them a little sooner. Bread and peanut butter are both life staples for me, and I figured if I just gave up one I would end up over-compensating with the other, so ditching both seemed optimal. Terrible, but optimal.

Marathoner!

I completed my marathon on Saturday (Horray! I made it!) and will be cutting my miles back a bit to a more manageable weekly schedule. I have a 5k on Saturday and a half (probably) in mid-July, so that’ll help keep up the schedule, just without those crazy 20-milers. I did make a planned exception for bread on race day (huckleberry stuffed French toast and a Monte Cristo for brunch…so good) but otherwise I’ve been really good about my breadless life. Mostly been doing scrambled eggs or a modified version of my favorite green smoothie1 for breakfast, lettuce wraps for lunch, and quinoa bowls or crock pot meals for dinner. The aforementioned aioli has been just fantastic for adding flavor and a little kick to those wraps and quinoa bowls.

Easy Zucchini Rollups {{Baking Bytes}}

Another favorite lunch are these zucchini rollups. They are super easy and only take a few minutes to prepare, which makes them great for both during work and after. I like to broil mine for a couple minutes (we have a toaster oven at work) for melty cheese, but you can absolutely eat them cold and crunchy as well.

Thin zucchini (use a mandolin, trust me) is topped with whatever you want, then rolled up into a tasty wannabe sandwich. My go-to concoction is listed below, but really you can use almost anything. Meat-lover? Use extra slices or multiple varieties. Vegetarian? Nix the meat and add extra veggies. Vegan? Sub hummus or pesto for the aioli, ditch the meat and cheese, and load up on leafy greens, peppers, mushrooms, or whatever else you’re in to. Savory cream cheeses are delightful as a condiment (you can ditch the regular cheese, or not), basically any cheese will work as long as it’s sliced thinly or a soft cheese, and you can mix it up with ham, turkey, roast beef, pepperoni, or whatever your favorite sliced meat is.

Easy Zucchini Rollups {{Baking Bytes}}

For extra crunch or to up the veggie factor, thinly sliced bell peppers, carrots, onion, extra zucchini, cucumber, or whatever you have lying around will work just great. Cut it to the width of your zucchini slices and you are good to go. If you are adding sliced or shredded items, it works best to add them on top of your condiment to kind of glue everything together. Add a couple of layers of spinach, kale, chard, or whatever you have lying around and you have a tasty and well-rounded meal, easily tailored to your preferences for taste and portion sizing.

I find the zucchini slices will keep in the fridge for at least a week if they are submerged in water, so you can slice and dice all your veggies ahead of time to speed up the preparation process when you’re ready to make them. Use as little or as much of each topping as you like, just leave a couple of inches of one end empty so it’ll stay rolled up. However, if, like me, you get a bit overzealous sometimes, you can poke a toothpick through to secure them.

Easy Zucchini Rollups {{Baking Bytes}}

Great for lunch, dinner, or even as an appetizer, these zucchini rollups are a delicious and healthy (and low carb, and can be gluten-free, if you’re into that) option to have in the repertoire. I’ve not tried it, but I am sure they would keep in the fridge for a few hours after being assembled if you need to make them ahead of time.

Give them a try and be sure to report back with your favorite flavor combinations!

Easy Zucchini Rollups

Ingredients

1 large zucchini
Cheese, thinly sliced (I used cheddar)
Meat, thinly sliced (I used deli ham)
Aioli sauce (or condiment of choice)
Spinach

Topping ideas: thinly sliced bell pepper, julienne-cut carrots or zucchini, any leafy greens, cream cheese, pesto, honey mustard, sliced almonds, hummus, etc

Directions

  1. Use a mandolin or a lot of patience to very thinly slice a zucchini. If it is too thick they will just break instead of roll. (I used the thinnest setting on my mandolin.) Store slices submerged in water in the fridge until ready to use.
  2. Start the broiler on your oven and line a baking sheet with parchment paper.
  3. Press zucchini slices with a paper towel to remove excess moisture, and lay gently on the baking sheet.
  4. Layer zucchini with meat, cheese, aioli, and spinach (and any additional toppings), leaving about 2″ of the wider end completely empty.
  5. Gently roll from the filled end, securing with a toothpick if necessary (mainly depends on how thick your toppings are.)
  6. Broil 1-2 minutes, until cheese is melted. Note: it is likely that your paper and toothpicks will char, but the rollups will be perfect.
  7. Enjoy immediately!

Notes

Made as said in the recipe except substitute 3Tbsp PBfit for peanut butter (another Costco whim), use plain Greek yogurt, and 1/2 cup milk. I also add 2 Tbsp chia seeds to 5 Tbsp water, let sit until gelled, and add that too. I also freeze and crush my spinach ahead of time so I can fit in closer to 1.5 cups in my little blender, with the added benefit that I don’t have to blend things in two stages to make sure it’s finely pureed.

[Slow-Cooker] Enchilada Quinoa

On the off chance you were intending to stow your slow cooker for the summer, I am here to stop you. Plenty of fantastic summer meals can be made in your handy-dandy crock pot, starting with this one.

A few weeks ago I was at Costco, my favorite store, and bought a rather large bag of quinoa on somewhat of a whim. Quinoa is trendy and healthy and I’ve seen many delightful looking recipes on the internet I thought looked worth a try. Of course I promptly left the bag unopened for nearly a month, like I do, but I broke the ice with this enchilada quinoa concoction.

[Slow cooker] Enchilada Quinoa {{Baking Bytes}}

I came across this recipe on Pinterest (of course) and thought it looked delicious, healthy, easy, and versatile. I was right on all accounts. Other than browning some meat and chopping some veggies, it requires little effort and not much hands-on time. As you may have observed, I am all about the easy meals. Even better, this makes a bunch so you have lots of leftovers or enough to feed a crowd.

[Slow cooker] Enchilada Quinoa {{Baking Bytes}}

Great enchilada flavor, with more-than-meat texture afforded by the quinoa, this is a fantastic way to get your Mexican fix without making tacos again. (I love tacos, but even they can get repetitive.) Black beans and bell peppers add some extra flair, and jalopeños would blend nicely if you’re into that sort of thing. If you want to kick up the flavor, feel free to stir in some salsa at any time. It is a great meal on its own, especially garnished with your favorite taco toppings like cheese and lettuce (or avocado, I guess), and a pretty well-rounded one at that.

[Slow cooker] Enchilada Quinoa {{Baking Bytes}}

But just in case you get bored of the bowl situation, it also makes a fantastic filling. Add a tortilla and you have a new twist on tacos. Bake or fry them and you have some great burritos. Rolled thinner and baked and you have delightful taquitos. Pour some extra sauce over them before baking and turn those taquitos into enchiladas. So many options! I’m sure you’ll have no trouble putting this recipe to good use.

[Slow-Cooker] Enchilada Quinoa

Adapted from Bobbi’s Kozy Kitchen
Makes about 3 quarts

Ingredients

olive oil
1-1.5 lbs lean ground meat (I used deer)
1 medium onion, diced
4 cloves garlic, minced

2 cups uncooked quinoa, rinsed
2 cups frozen corn
1-2 jalopeños, diced (optional, I didn’t add any)
1 (15-oz) can black beans, rinsed
1 (15-oz) can diced tomatoes (I used a variety with chili peppers)
1 (10-oz) can enchilada sauce
1 cup water
2 Tbsp chili powder
1 Tbsp cumin
2 tsp coriander

2 bell peppers, diced

optional toppings: shredded cheese, diced lettuce, sour cream, salsa, etc

Directions

  1. In a large pan, heat a splash of oil until pan is warm. Add meat and sauté until it is about halfway browned. Add onion and garlic, and continue to sauté until meat is completely browned. Drain (if necessary) and add to slow cooker.
  2. Add all remaining ingredients1 and stir until well combined. Cook on high for about 3 hours, or until all the liquid has been absorbed.
  3. Stir everything again, adding additional seasoning if necessary.
  4. Serve hot, with your favorite toppings. Also great as a taco or burrito filling, or baked into taquitos.

Notes

If you’re around, you can wait until the last 30 minutes to add the bell pepper so it retains a little crunch, but it’s not necessary.

Smoked Salmon and Spinach Scrambled Eggs

I recently went back to Alaska for a long weekend to see my family and celebrate my aunt’s birthday with a race and a camping trip. Since I needed 15 miles for my marathon training, I “warmed up” with 8.8 miles before running the 10k, which was a lot of fun. It didn’t even rain the whole time. The camping trip followed the next day (we camped in a cabin, in case you were appalled at the idea of camping in winter in Alaska) and she celebrated properly by having the adventure catered, which was awesome. Unfortunately for her, the caterer assumed she was feeding 7-10 Dwayne Johnsons instead of 7-10 normal-sized women, and gave her a rather mind-blowingly massive amount of food. Luckily for me, that means I came back to Bozeman with some of the extra smoked salmon – yum!

Smoked Salmon & Spinach Scrambled Eggs {{Baking Bytes}}The following weekend I needed to run 17 miles for my marathon training – my longest run to date. I wasn’t really concerned about this until I actually started running. Oh boy. It was one of those runs where the first mile was hard and every mile after that just got harder. Hopefully it was just an off day and this week’s 20-mile goes much more smoothly. In any case, I eventually made it through those 17 miles and back home, but I was pretty freaking exhausted.

Smoked Salmon & Spinach Scrambled Eggs {{Baking Bytes}}

Fortunately I was able to reward myself with smoked salmon and scrambled eggs! Packed with protein and smokey salmon flavor, this was a great way to recuperate after an arduous adventure. The spinach adds some extra nutrients and great flavor, as well as some color for presentation. (Remember, you do eat prettiness.) Superbly filling, slightly decadent, and requiring minimal brainpower, this is possibly the perfect recovery meal. I definitely encourage all you distance runners out there to try it! (Or if salmon isn’t your thing, you can always give my veggie scramble a try instead.)

Smoked Salmon & Spinach Scrambled Eggs {{Baking Bytes}}This is a super easy meal and is equally fantastic by itself, served with toast, rolled up in a tortilla, or as the inside of a bagel sandwich. Tons of options depending on your mood and how hungry you are. Feel free to add a few tablespoons of shredded cheese for extra flair, although it’s certainly not necessary.

Smoked Salmon & Spinach Scrambled Eggs {{Baking Bytes}}

With salmon season coming along soon I hope you’ll be able to give this a try. Or maybe you need to clear out last year’s frozen supply to make room for new stuff. Either way, this is an awesome way to have smoked salmon for breakfast (or lunch, in my case.)

And either way, I highly recommend following this meal with reading a book outside in the sunshine.

Smoked Salmon and Spinach Scrambled Eggs
Makes 1 serving

Ingredients

olive oil
1/2 cup fresh chopped spinach
1/4 – 1/3 cup diced smoked salmon
seasoning, to taste (optional, I use 1/4 tsp steak seasoning)

2 eggs
2 Tbsp milk (optional)

Directions

  1. Heat a splash of oil in a small frying pan over medium heat until it thins and is easy to swirl in the pan.
  2. Add salmon and spinach and sauté for 2-3 minutes, stirring often, until salmon is heated through and spinach is wilted.
  3. Meanwhile, beat eggs and milk in a small bowl until combined.
  4. Add eggs to frying pan and use a spatula to gently stir them until cooked through.
  5. Serve immediately, solo or with a side of toast and coffee. Also great wrapped up in a tortilla or as a bagel breakfast sandwich.

Secret Veggie Spaghetti Sauce & Italian Meatballs (and Roasted Spaghetti Squash)

Shortly after I got my snazzy immersion blender I came across a recipe for veggie-packed spaghetti sauce. It was made in the crock pot, which sounded awesome, but as someone who doesn’t like crazy chunky sauce I wasn’t super psyched about the amount of diced vegetables packed into it, mainly for textural reasons. Immersion blender to the rescue!

Secret Veggie Spaghetti Sauce & Italian Meatballs {{Baking Bytes}}

I tweaked the recipe to use vegetables I actually like (not a fan of mushrooms or eggplant, sorry) and made it on the stove so I could puree some of it before adding the things I wanted to stay whole. You can easily add or remove items to suit your preferences, next time I will definitely add sliced olives. M has such a strong hatred of them I forget I can add them when he’s not around. I think a couple handfuls of spinach added to the pureed mixture would be great also.

Secret Veggie Spaghetti Sauce & Italian Meatballs {{Baking Bytes}}

With veggies secretly packed into what a appears to be a normal spaghetti sauce, this is a great way to trick your kids (or yourself) into eating some extras at dinner time. I will perhaps use a slightly smaller head of cauliflower in the future (mine was more medium than small) but overall it turned out fantastic. Tomatoes and spices galore, with some diced red bell peppers for variety. If you leave the sauce meatless it’s a great vegan option, but if you’re of a more carnivorous persuasion, read on.

Because I was feeling particularly ambitious that weekend, I also made Italian meatballs. Extra juicy and perfectly spiced, they were wonderful with ground elk but I’m sure ground beef would be delicious also. This was a super easy recipe that would pair well with any sauce, even a jarred version, just make sure they have time to simmer in the sauce for about 15 minutes to ensure they are cooked through. Or if you are making them to freeze, turn the heat down on your frying pan, add a lid, and steam them for several minutes. For an easier meat option, skip the meatballs and add a pound or two (it makes a lot of sauce) of your favorite ground meat, already browned, during the final simmering step. You should have enough to feed the whole family and probably still put some in the freeze for later.

Secret Veggie Spaghetti Sauce & Italian Meatballs {{Baking Bytes}}While pureeing it can be quite thick so have patience during this step; other than that it’s just a matter of chopping vegetables and opening some cans – super easy. Make a batch for dinner, put half in the freezer, and you’ll have homemade sauce ready to go on a day you don’t feel much like cooking. Serve with roasted spaghetti squash (directions below) or your favorite pasta, with freshly grated Parmesan and pepper, for a delicious and healthy meal.

Secret Veggie Spaghetti Sauce

Inspired by Smile Sandwich
Makes a lot

Ingredients

2 Tbsp olive oil
1 medium onion, finely diced
1 small head cauliflower, finely diced
1 large zucchini, finely diced
2 cloves garlic, minced

29 oz can + 15 oz can tomato sauce
14.5 oz can Italian stewed tomatoes
2, 6oz cans tomato paste

2 bell peppers, diced
14.5 oz can Italian diced tomatoes
2-3 Tbsp Italian seasoning
salt and pepper, to taste

Directions

  1. Pour oil into a large pot (8 quarts or more) and heat over medium heat until hot.
  2. Add onion, cauliflower, zucchini, and garlic, and saute until onion is softened and translucent.
  3. (If you’re serving this with spaghetti squash, start it roasting now.)
  4. Add tomato sauce, tomato paste, and stewed tomatoes. Increase heat slightly, and simmer until vegetables are softened.
  5. Optional but recommended: puree sauce using an immersion blender until reasonably smooth.
  6. Add diced tomatoes, bell pepper, spices, (and browned meat or meatballs, if using) and simmer on low heat for about 15 minutes. Do a taste test after about 5 minutes, and add more spices if necessary. I added around 3 tablespoons of seasoning but depending on your veggies and your taste preferences, more or less might be appropriate.
  7. Serve with your favorite pasta or spaghetti squash.

Italian Meatballs

Adapted from Recipe Tin Eats
Makes about 2 dozen

Ingredients

2 slices white bread, crusts removed
1 medium onion, grated

1.5 lbs ground elk (or beef)
1 egg
1 Tbsp Italian seasonings
1/4 cup Parmesan, freshly grated
1 tsp salt
1/4 tsp pepper

2 Tbsp olive oil

Directions

  1. Tear bread into small pieces and place in a large bowl. Add onion and stir until well mixed and bread is completely wet.
  2. Add remaining ingredients and mix by hand until completely combined.
  3. Scoop 2 tablespoons at a time on to a plate or cutting board, then roll each dollop into a ball.
  4. Heat olive oil in a large non-stick frying pan over medium heat.
  5. Gently add meatballs and fry, turning gently, until nicely browned on all sides (pro tip: this is easier in two batches).
  6. Add meatballs (and drippings, if desired) to your spaghetti sauce and simmer gently for about 15 minutes, until meatballs are heated through.
  7. Serve with sauce atop your favorite pasta or spaghetti squash, with extra freshly grated pepper and Parmesan.

Roasted Spaghetti Squash

Ingredients

Spaghetti squash
Olive oil

Directions

  1. Preheat oven to 450 degrees Fahrenheit.
  2. Halve squash and remove seeds. Coat flesh lightly with olive oil.
  3. Bake for about 40 minutes, or until squash can be easily pierced with a fork.
  4. Let cool for a few minutes, then scoop from skins, fluff with a fork, and serve hot.
  5. Top with additional olive oil, butter, or your favorite pasta sauce.