Loaded Cauliflower Casserole

Sometimes during my questionably numerous hours on the internet, I come across “healthified” recipes that look pretty good, but still make me wonder why you wouldn’t just make the original.

This is one of those recipes.

Loaded Cauliflower Casserole {{Baking Bytes}}

I’ll admit, I made it mostly out of curiosity. Unlike many modern Americans, I am not afraid of potatoes. In fact, potatoes themselves are quite healthy for you, and can be an excellent source of nutrients. Sure, they are pretty high carb, but I’ve never paid much attention to carbs so it doesn’t concern me. Potatoes get a bad rap but it’s not the vegetable that is the problem, it’s how we prepare it: French fries are clearly unhealthy, but then of course we like to pile on loads of salt, cheese, chili, et cetera, just to really make sure we’re not benefiting at all. Mashed potatoes are typically made with loads of butter and cream and various other dairy products that add tons of fat and unnecessary calories, along with their delicious, wonderful flavors. Baked potatoes, we say, those are healthy! And yes they are…until we add the toppings.

Whoops.

Loaded Cauliflower Casserole {{Baking Bytes}}

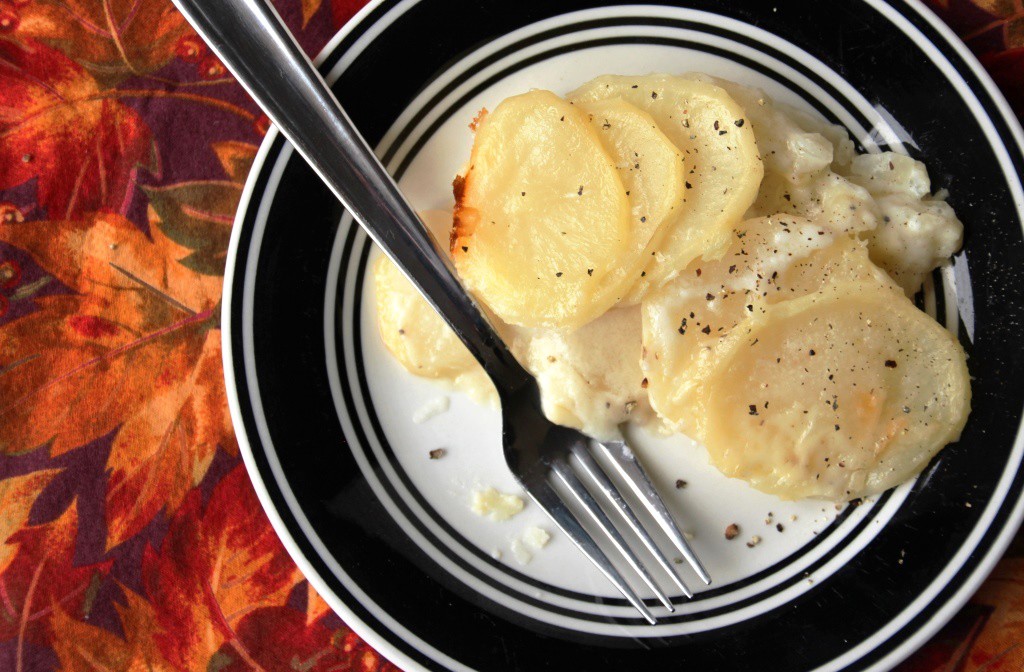
This particular recipe kinda makes me giggle because the things that make potatoes unhealthy are still quite present in here, whereas the potatoes themselves have been substituted with cauliflower. I vastly cut down the additions from the original, and even made it a second time to cut them down some more, but I’m still not sure I’d consider it a truly healthy side dish.

In any case, it is quite delicious, and if you’re into the low-carb situation, maybe it’ll be great for you. It probably won’t become a staple around here, but it’s a great way to spice up an otherwise familiar palate. Or sneak some cauliflower into picky eaters.Loaded Cauliflower Casserole {{Baking Bytes}}

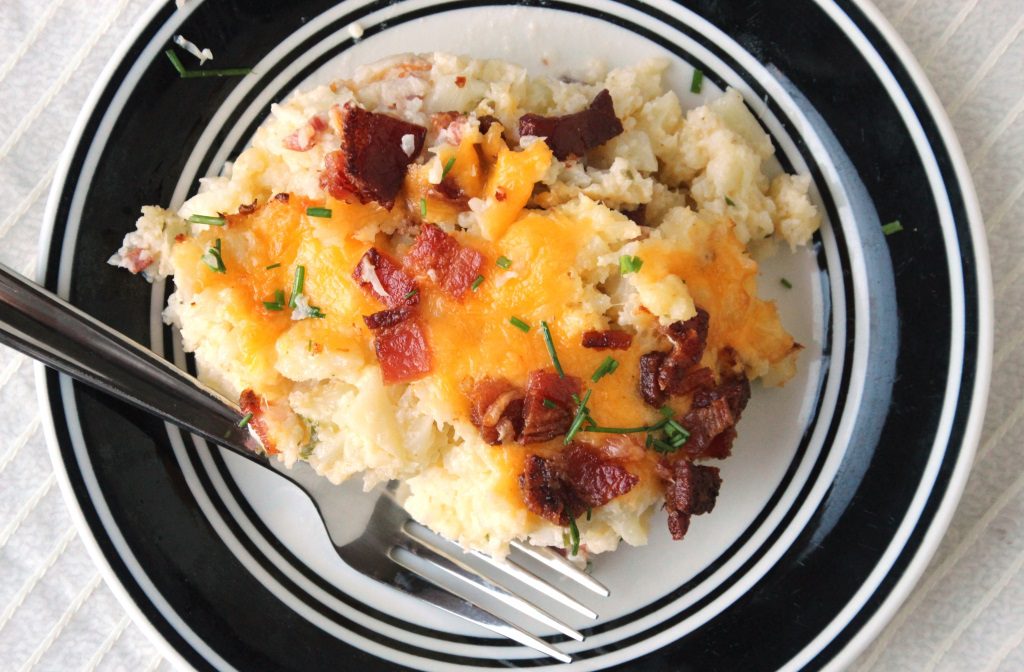
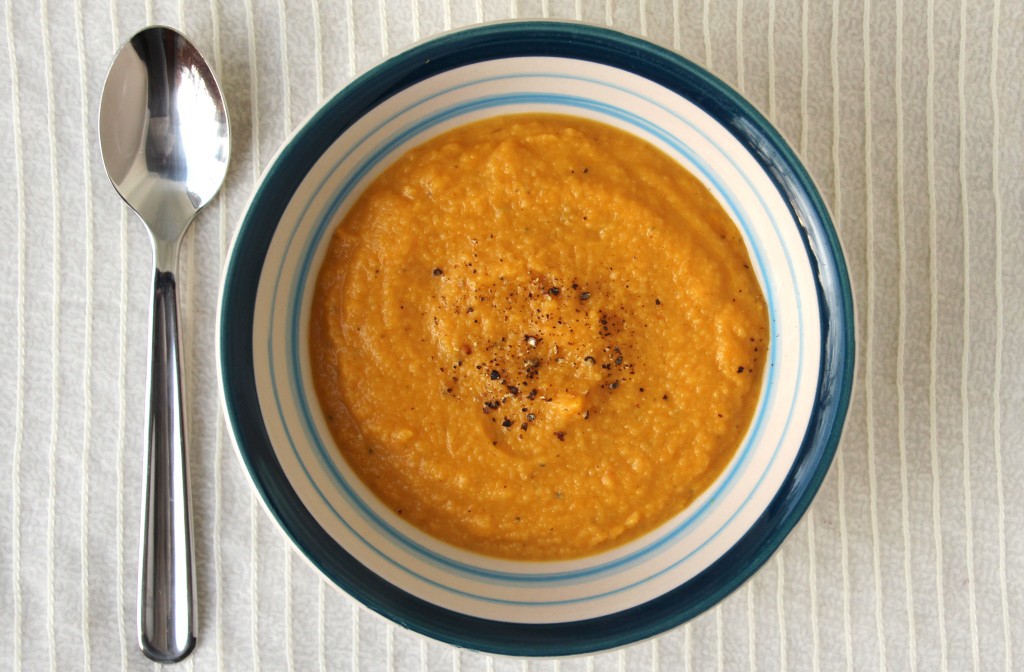
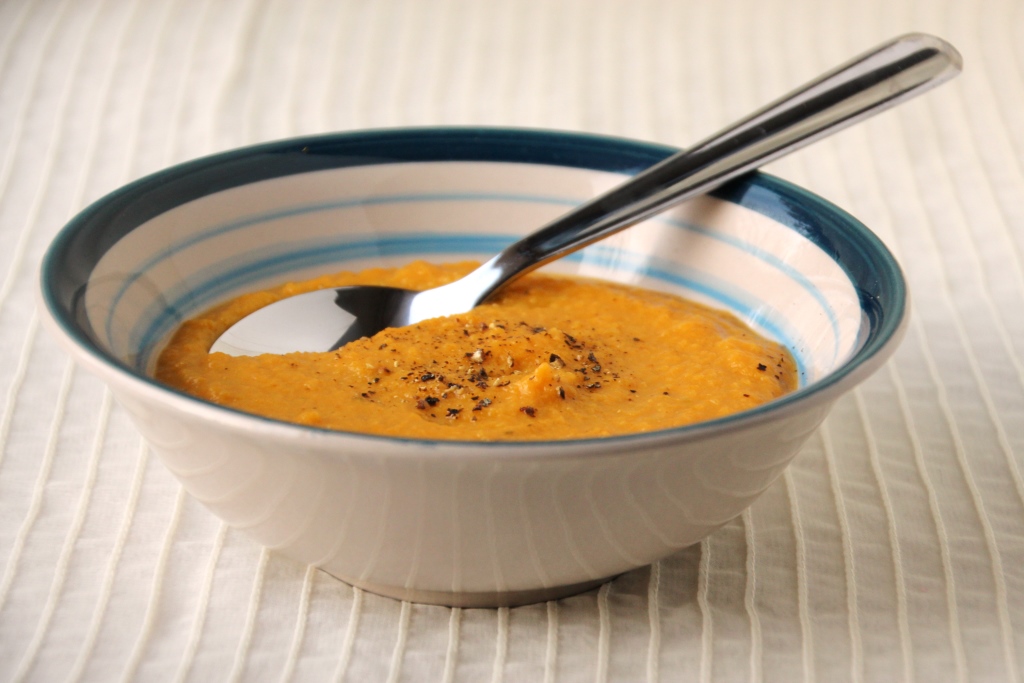
Creamy and cheesy and optionally topped with bacon, it has a texture like slightly lighter mashed potatoes and all the fun flavors that go with them. It makes for a great side dish and could easily be made vegetarian simply by nixing the bacon. The second time I made it without bacon and it was excellent as well.

Although I likely won’t be making it weekly, or even monthly, I did really enjoy the final product and it was a fun way to eat cauliflower. It also reheated nicely which is always a pleasant surprise. Hope you enjoy it!

Loaded Cauliflower Casserole {{Baking Bytes}}

Loaded Cauliflower Casserole

Adapted from Calamity Jayne
Makes one 8×8 dish (6-8 servings)

Ingredients

2 lbs cauliflower, diced

1/3 cup sour cream (full fat preferred)
2 cups grated cheese, divided (I used cheddar)
salt and pepper, to taste (I used about 1/2 and 1 tsp, respectively)

optional toppings: 3-4 slices crumbled bacon, 2 Tbsp minced chives

Directions

  1. In a large pot, boil cauliflower until softened, about ten minutes.
  2. Preheat oven to 425 degrees Fahrenheit. Spray an 8×8″ baking dish with cooking spray, set aside.
  3. Drain completely and return to pot. Mash or puree into desired texture. I used an immersion blender to puree mine completely in order to mimic mashed potatoes.
  4. Return pot to stove over medium heat, and cook at least 5 minutes longer (stirring constantly) to evaporate excess water. Remove from heat.
  5. Add sour cream and 1 cup of cheese, and stir until completely combined. Salt and pepper to taste, making sure it’s well mixed.
  6. Spread cauliflower mixture into prepared baking dish, and top with remaining cheese (and bacon, if using.)
  7. Bake for about 20 minutes, until cheese is melted and cauliflower is bubbling. It might look kind of watery, but don’t worry, that’s normal.
  8. Let cool on the counter for about 5 minutes before serving, then top with chives (optional) and enjoy.

Notes

In my opinion this step is paramount. Nothing is worse than watery mashed potatoes and this casserole is no different. I recommend tasting a couple of times, and keep going until the cauliflower doesn’t just taste of water, especially if you pureed it.

[Slow-Cooker] Enchilada Quinoa

On the off chance you were intending to stow your slow cooker for the summer, I am here to stop you. Plenty of fantastic summer meals can be made in your handy-dandy crock pot, starting with this one.

A few weeks ago I was at Costco, my favorite store, and bought a rather large bag of quinoa on somewhat of a whim. Quinoa is trendy and healthy and I’ve seen many delightful looking recipes on the internet I thought looked worth a try. Of course I promptly left the bag unopened for nearly a month, like I do, but I broke the ice with this enchilada quinoa concoction.

[Slow cooker] Enchilada Quinoa {{Baking Bytes}}

I came across this recipe on Pinterest (of course) and thought it looked delicious, healthy, easy, and versatile. I was right on all accounts. Other than browning some meat and chopping some veggies, it requires little effort and not much hands-on time. As you may have observed, I am all about the easy meals. Even better, this makes a bunch so you have lots of leftovers or enough to feed a crowd.

[Slow cooker] Enchilada Quinoa {{Baking Bytes}}

Great enchilada flavor, with more-than-meat texture afforded by the quinoa, this is a fantastic way to get your Mexican fix without making tacos again. (I love tacos, but even they can get repetitive.) Black beans and bell peppers add some extra flair, and jalopeños would blend nicely if you’re into that sort of thing. If you want to kick up the flavor, feel free to stir in some salsa at any time. It is a great meal on its own, especially garnished with your favorite taco toppings like cheese and lettuce (or avocado, I guess), and a pretty well-rounded one at that.

[Slow cooker] Enchilada Quinoa {{Baking Bytes}}

But just in case you get bored of the bowl situation, it also makes a fantastic filling. Add a tortilla and you have a new twist on tacos. Bake or fry them and you have some great burritos. Rolled thinner and baked and you have delightful taquitos. Pour some extra sauce over them before baking and turn those taquitos into enchiladas. So many options! I’m sure you’ll have no trouble putting this recipe to good use.

[Slow-Cooker] Enchilada Quinoa

Adapted from Bobbi’s Kozy Kitchen
Makes about 3 quarts

Ingredients

olive oil
1-1.5 lbs lean ground meat (I used deer)
1 medium onion, diced
4 cloves garlic, minced

2 cups uncooked quinoa, rinsed
2 cups frozen corn
1-2 jalopeños, diced (optional, I didn’t add any)
1 (15-oz) can black beans, rinsed
1 (15-oz) can diced tomatoes (I used a variety with chili peppers)
1 (10-oz) can enchilada sauce
1 cup water
2 Tbsp chili powder
1 Tbsp cumin
2 tsp coriander

2 bell peppers, diced

optional toppings: shredded cheese, diced lettuce, sour cream, salsa, etc

Directions

  1. In a large pan, heat a splash of oil until pan is warm. Add meat and sauté until it is about halfway browned. Add onion and garlic, and continue to sauté until meat is completely browned. Drain (if necessary) and add to slow cooker.
  2. Add all remaining ingredients1 and stir until well combined. Cook on high for about 3 hours, or until all the liquid has been absorbed.
  3. Stir everything again, adding additional seasoning if necessary.
  4. Serve hot, with your favorite toppings. Also great as a taco or burrito filling, or baked into taquitos.

Notes

If you’re around, you can wait until the last 30 minutes to add the bell pepper so it retains a little crunch, but it’s not necessary.

Apple Pumpkin Roasted Butternut Squash Soup

Perhaps after the overwhelming feasting of Super Bowl Sunday and Valentine’s Day you are ready for something a bit more on the healthy side. Or maybe you wisely skipped all that but are always on the lookout for new recipes. Look no further! Today I have a wonderful healthy and vegetarian (optionally vegan) recipe to share with you all.

Apple Pumpkin Roasted Butternut Squash Soup {{Baking Bytes}}

I’d been eyeing soups like these for a while but only a few weeks ago bit the bullet and bought an immersion blender. Turns out they are awesome and you should absolutely get one. If it’s not in the budget or cupboard space doesn’t allow, you can make do with a food processor or high-end blender, but for real an immersion blender is the way to go. I ordered mine from Amazon (no I’m not getting paid for this, I just love it) and it is fantastic. I’m sure I’ll be using it often, which is good because I haven’t quite found a cupboard to store it in.

Regardless, soup. Butternut squash is always rampant in the winter but until this year I’d never actually cooked with it. Turns out that like spaghetti squash, it’s an incredibly easy option. After roasting, it’s delicious simply mashed with a little butter and salt and pepper, and even more amazing in more complex recipes like this soup.

Apple Pumpkin Roasted Butternut Squash Soup {{Baking Bytes}}

Squash and pumpkin bolstered slightly with the sweetness of apples are mixed with vegetable stock and spices for a wonderful savory entrée. An optional addition of heavy cream makes it an extra amazing experience but it’s also delicious without. Either way, the slightly sweet vegetables with a little spiciness is an excellent combination. With everything puréed together, the flavors are perfectly blended into a simple course that easy to pair with many sides.

Apple Pumpkin Roasted Butternut Squash Soup {{Baking Bytes}}

This recipe is vegetarian as is, and can be made vegan by omitting the cream or substituting your favorite non-dairy option. If you’re neither of those things, serve with some crumbled bacon for extra flair, or just to appease the carnivores in the family.

Since the oven will already be hot from roasting the squash, a batch of roasted Brussels sprouts makes a perfect side dish to round out a very colorful meal. Even better, this soup reheats nicely either on the stove or in the microwave, which is great for the abundant leftovers I hope you have.

Apple Pumpkin Roasted Butternut Squash Soup

Adapted from Smile Sandwich
Makes about 2 quarts

Ingredients

1 medium to large butternut squash

1 medium onion
2 apples
3 cloves garlic
olive oil

32 oz vegetable (or chicken) stock
1  cup pumpkin puree
1 tsp ginger
1 tsp salt
1/2 tsp Thyme
1/2 tsp pepper
1/4 tsp red pepper flakes

1/2 cup cream (optional)

Directions

  1. Preheat oven to 400 degrees Fahrenheit. Line a baking sheets with foil or a silicon mat.
  2. Cut squash in half (the long way) and remove the seeds. Coat lightly with olive oil and place on baking sheet.
  3. Roast for 40-50 minutes, or until squash is easily pierced with a fork.
  4. Meanwhile, dice onion, apples, and garlic. (I also like to pre-measure my spices into a small cup and then clean up the kitchen at this time, but that’s totally up to you.)
  5. When the squash has about 15 minutes left, heat a few tablespoons of olive oil in a large pot over medium heat.
  6. Add onion, apple, and garlic and saute until they are softened, about 10 minutes.
  7. Stir in spices, pumpkin puree, and vegetable stock and continue cooking while you finish the squash. (If you pre-cooked your squash, you can just skip straight to step 9.)
  8. When the squash is cooked, remove from oven and carefully scoop out the flesh from the skin. (You may want to wait about ten minutes for them to cool down a little, and/or use a heat-proof glove).
  9. Add squash to the pot, bring soup to a boil, and simmer for about 20 minutes.
  10. Remove from heat and add the cream, if desired. Use an immersion blender to completely puree the soup. Taste and up the spices a little, if desired.
  11. Serve hot with freshly ground pepper on top. Refrigerate leftovers.

Roasted Brussels Sprouts

And we’re back on schedule! …for now. No promises but I’ll do my best to maintain the bi-weekly posts. I certainly have enough planned it’s just a matter of having enough daylight to work with; it’s a bit of a struggle when I get home from work and it’s already dark.

Excuses aside, this week I have a fantastic and easy side dish you’re sure to love. With a 2-pound bag of Brussels sprouts all to myself,  I knew I needed to eat them right quick. I remembered Pinning a recipe for a roasted version a few weeks ago and thought I would finally give it a try. My main aversion to roasting vegetables is that they often require upwards of half an hour in the oven and I rarely want to wait that long to eat things, but this recipe called for just twenty minutes which seemed like something I could handle.

Garlic Roasted Brussels Sprouts {{Baking Bytes}}

For making these sprouts, the most time-consuming part was trimming and halving them, mainly because I’d already had them a week and they were starting to brown, and also because produce from Costco tends to be gigantic and this batch was no exception. In any case, I tossed them in the oil concoction and put them in the oven, and 25 minutes later had a delicious, healthy, and easy side dish. As a bonus it made enough to last me several days.

IMG_0552

Roasted veggies are much less likely to be bitter and the added seasonings give these a little something extra. Garlic and salt go with pretty much anything and some red pepper flakes add a slight kick. If you’re bigger into the spicy thing, add some more flakes or a dash of cayenne pepper to suit your preferences.

IMG_0556

I enjoyed this recipe even more than anticipated and I hope you do too. An easy recipe that feeds the whole family and even reheats well if you have extras. These went great with the scalloped potatoes from last week and are definitely something I’ll be adding to the dinner rotation. I look forward to trying it with broccoli also – I’m sure it’ll be fantastic.

Roasted Brussels Sprouts

Adapted from South Your Mouth
Makes 4-6 servings

Ingredients

2 lbs Brussels sprouts, washed and dry

1/4 cup olive oil
4 cloves garlic, minced
1 tsp sea salt
1/2 tsp red pepper flakes

Directions

  1. Preheat oven to 400 degrees Fahrenheit. Line a large baking sheets with a silicon mat or parchment paper. (Not strictly necessary but easier to clean up later.)
  2. Trim sprouts and cut in half if they are larger than about one inch in diameter.
  3. In a large bowl, combine sprouts, oil, garlic, salt, and red pepper flakes. Stir with a rubber spatula until sprouts are well coated with the oil mixture. (This is why the sprouts should be dry.)
  4. Spread in one layer on prepared baking sheet, and bake for 18-25 minutes, until sprouts are tender with some light charring, as desired. The time will vary depending on the size of your sprouts and how you lined your pan, so check every few minutes until you like what you see.
  5. Serve immediately and refrigerate any leftovers.

Classic Scalloped Potatoes

Hello, hello. Apologies for being a week late; between getting back in to the swing of work life and M leaving town last week, it’s been a busy start to the year. A few weeks in I am finally getting caught up and ready to work on some fun projects this year, both with food and other crafts. I’m also intending to run my first full marathon in June, dependent on how well my training plan meshes with ski season. There are tons of marathons all year so I can always delay a month or so if needed.

In any case, with M leaving on Monday and the snow hitting on Saturday, I felt some comfort food was in order. M’s parents generously gifted me a very nice mandolin food slicer for Christmas so scalloped potatoes seemed the obvious choice.

Classic Scalloped Potatoes {{Baking Bytes}}

As a kid, scalloped potatoes were always one of my most favorite foods and probably one of the most-requested items each time I came home from college. Warm, and creamy, I could eat them for days and not get bored. They always remind me of family and cozy evenings and often made an appearance for Christmas dinner. Hand slicing potatoes was too much of a deterrent for me to make them on my own, but with a mandolin they are easy-peasy.

Classic Scalloped Potatoes {{Baking Bytes}}

With just a few simple ingredients they are not going to open a whole new world of flavors, but they are a delicious side dish (or entrée, if you’re me) and coordinate nicely with almost anything. This recipe is straight from the Better Homes & Gardens Cookbook, one of the few I ever manage to use in lieu of the internet.

Classic Scalloped Potatoes {{Baking Bytes}}

If it isn’t already, this recipe is sure to become a staple in your household; I know it is in mine. If you have several mouths to feed, this recipe can easily be doubled and baked in a 9×13″ dish instead – this is the way my mom always made it.

Classic Scalloped Potatoes

Borrowed from The Better Homes & Gardens Cookbook
Makes 4 servings

Ingredients

3 medium potatoes, peeled and rinsed

1/4 cup finely chopped onion
2 Tbsp butter

2 Tbsp flour
1/2 tsp salt
1/8 tsp (a dash) of pepper

1 1/4 cup milk

Directions

  1. Preheat oven to 350 degrees Fahrenheit and grease an 8×8″ baking dish. Set aside.
  2. Thinly slice potatoes using a mandolin or a knife and a lot of patience. Place half the potatoes in the prepared dish.
  3. In a medium saucepan, heat butter over medium-high until melted. Add onion and cook until tender and mostly translucent.
  4. Stir in flour, salt, and pepper, then add milk all at once.
  5. Continue cooking and stirring until mixture bubbles and thickens. Remove from heat.
  6. Pour half of the sauce over the potatoes, then repeat with remaining potatoes and sauce. Make sure mixture is evenly spread in the baking dish.
  7. Cover with foil and bake for 35 minutes. Remove foil and continue to bake until potatoes are tender and a little browned on top, about 30 minutes.
  8. Let rest on the counter for 5 minutes, then serve hot, topping with a little extra freshly ground pepper, if desired.
  9. If you have leftovers, they keep well in the fridge for several days.