Veggie Soup

Now that I’ve been back about a week, I’m finally starting to feel back to normal. Three weeks of travel and socializing was pretty rough on this introvert and some peace and quiet over the weekend did a world of good. I got back to baking with pumpkin pie and pumpkin bread, and then figured I should make something for dinner also. With snow in the forecast this week (!) a batch of soup was definitely in order.

Veggie Soup {{Baking Bytes}}

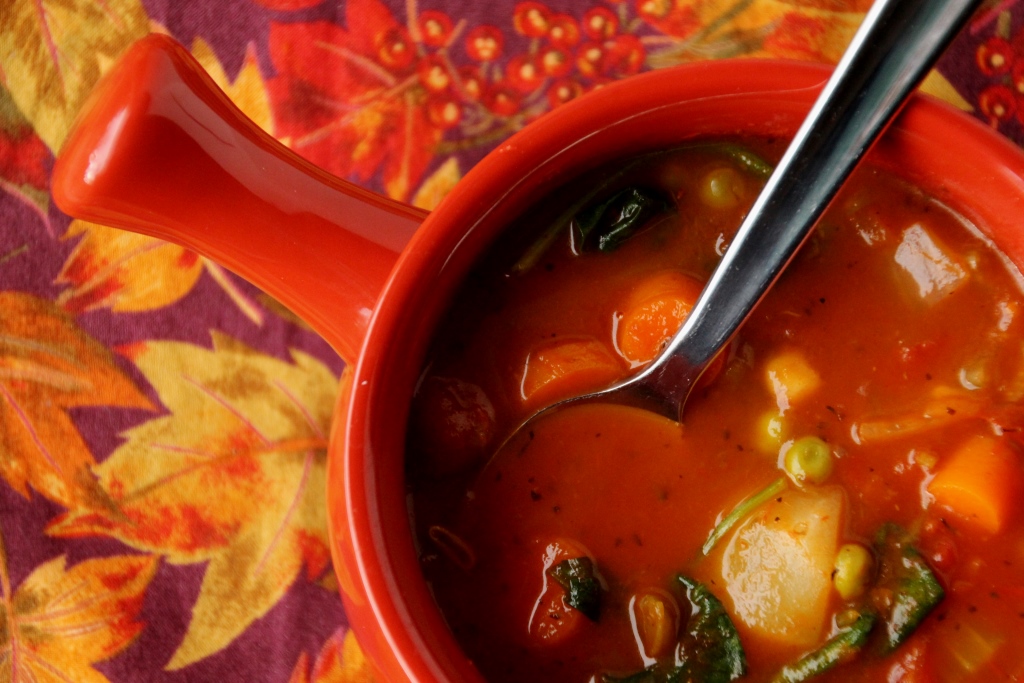
While traveling I ate a ton of delicious but not exactly healthy things, so now that I’m back I’m trying to do a little better in the eating department. While skimming Pinterest (like ya do) I whizzed passed a vegetable soup recipe that looked great. I didn’t really follow it so much as use it as a guideline, but I always appreciate the inspiration. Vegetable stock and spaghetti sauce make a yummy broth filled with whatever veggies suit your fancy. I threw in potatoes, celery (since we had some around), carrots, zucchini, bell pepper, green beans, corn, and peas, but you can easily tailor it to your preferences or to your supplies on hand. Pretty hard to go wrong here so just chop some fresh or throw in some canned/frozen options and you’re good to go.

Veggie Soup {{Baking Bytes}}

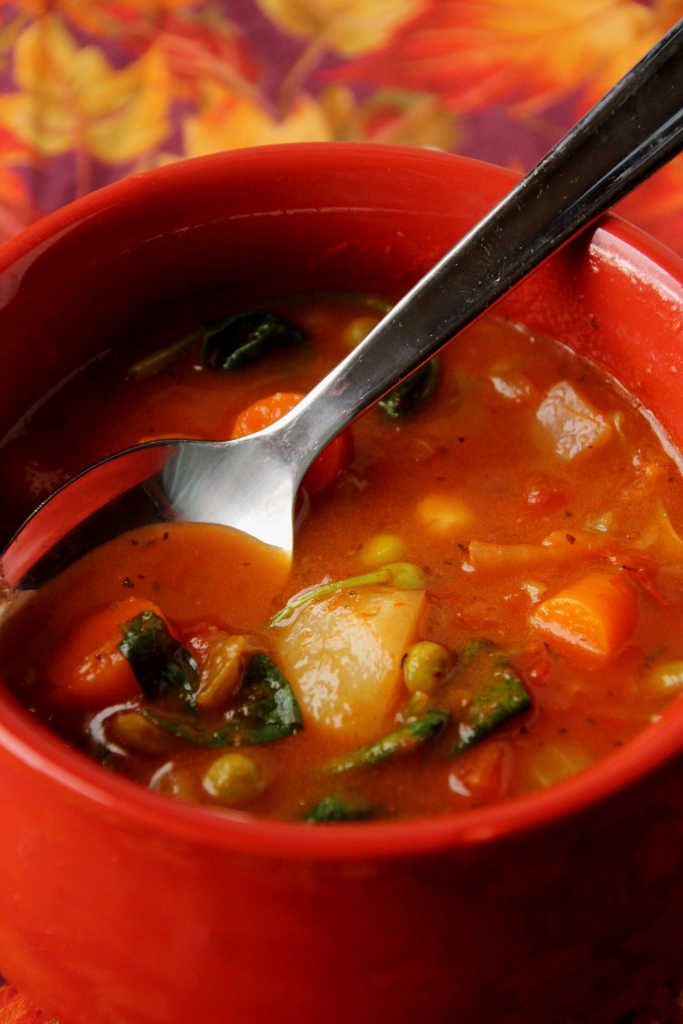
I didn’t spice mine a ton, but I did throw in a few. I put some guideline measurements for the beginners but if you’re a practiced soup chef feel free to change them up. Don’t be intimidated by the long ingredients list, it’s a super easy recipe.

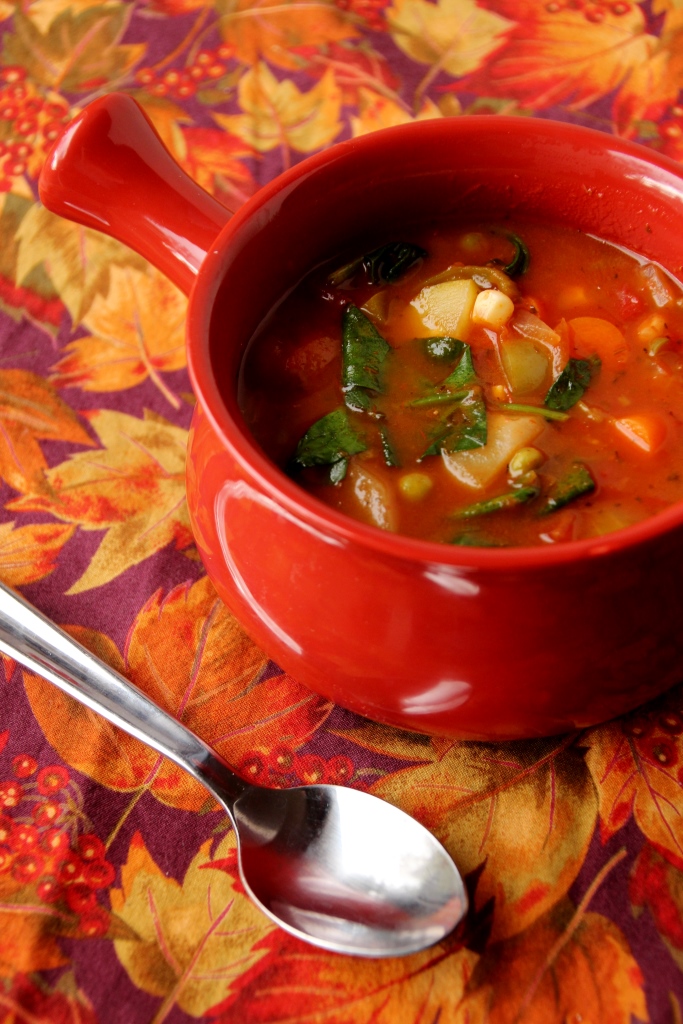
This is a great vegetarian option for a cool fall day, and maybe the rest of the week since it makes a ton. If you’re wanting to make it more carnivore-friendly, brown up a pound (more or less) of your favorite ground or diced meat and throw it in when you add the broth. Enjoy!

Veggie Soup {{Baking Bytes}}

Veggie Soup

Inspired by Cooking Classy

Makes a lot (4-5 quarts)

Ingredients

3 Tbsp olive oil
1 medium onion, diced
4 stalks celery, chopped
6 medium carrots, chopped
4 cloves garlic, minced

5 medium potatoes, diced
1 bell pepper, chopped
1 medium zucchini, chopped
2 cans diced tomatoes
24 oz spaghetti sauce
32 oz vegetable stock (low sodium)

2 tsp thyme
2 tsp Italian seasonings
1 tsp oregano
1 tsp chili powder
salt and pepper, to taste

1 cup/can green beans
2 cups frozen peas
1 cup frozen corn
1-2 handfuls fresh spinach

Directions

  1. In a large pot over medium heat, add oil, onion, celery, carrots, and garlic. Saute for 3-4 minutes.
  2. Add potatoes, bell peppers, zucchini, tomatoes (no need to drain), and spaghetti sauce. Gently pour in vegetable stock, add spices, and stir to combine.
  3. Bring to a boil then cover and reduce heat to a simmer and allow to cook until potatoes are soft, about 30 minutes.
  4. Add green beans (drained, if using canned), peas, corn, and spinach, then simmer for another 5 minutes or until ready to eat.
  5. Serve hot, goes great with corn bread!

Pumpkin Pie Jack-o-lanterns

Fall actually hit Montana while I was gone so I woke up to frost this morning for my bike ride to work. It was glorious. I just returned from my whirlwind half marathon tour yesterday so I am pretty tired, but very glad to be home. Three great races and lots of fun seeing new places and old faces in all four Lower 48 timezones. This week I have a bonus post for you! I actually thought of this idea last year, but never got around to implementing it, so I decided I should definitely get it done this year.

Pumpkin Jack-o-lantern Mini Pies {{Baking Bytes}}

Pumpkin pie is one of my favorite pies and I will happily eat it all year round. Unfortunately M doesn’t super care for it so mostly I just make it in the fall when I don’t mind having it for breakfast all week (yum). It’s a traditional dessert this time of year, which can be boring (according to some) so I thought I’d try giving it a new package.

Pumpkin Jack-o-lantern Mini Pies {{Baking Bytes}}

I used my normal pie crust recipe and pie filling recipe, and then used mason jar rings to form little pies. The jack-o-lantern faces make them great for Halloween but with a different decoration (like the leaf cutouts below) they’d be great for any fall potluck. They are way easier to serve and eat which makes them great for when you aren’t having a sit down dinner. They do have a high crust to filling ratio, so make sure you use a crust recipe that you like; I have mine linked below if you don’t already have a favorite.

Pumpkin Jack-o-lantern Mini Pies {{Baking Bytes}}

They are a little time consuming, especially if you cut out faces, but not difficult and I’d say pretty beginner friendly. I got 9 out of my recipe but that could vary based on how thin you roll your crust and how many times you are able to reuse the scraps. (I wouldn’t recommend more than once or twice as the dough gets very tough the more you handle it. Tip: you can drip a little extra water to help the scraps stick together again to re-roll.)

Pumpkin Jack-o-lantern Mini Pies {{Baking Bytes}}

Your usual pumpkin filling, yummy pie crust, and a dusting of cinnamon sugar makes a great treat that’s easy to portion control and is a wonderful whipped cream vessel. The cuteness is an added perk. =)

If you need a dessert for your Halloween parties this weekend, give these a try.

Pumpkin Pie Jack-o-lanterns

Makes about 8 double-crust handpies

Ingredients

Pastry for double-crust pie

1/3 cup sugar
1/2 tsp ground cinnamon
1/4 tsp salt
pinch ground cloves

1 egg
1 cup pumpkin puree
1/4 cup heavy whipping cream

cinnamon & sugar mixture (optional)

Other Supplies

8+ wide-mouth jar rings
1 small-mouth jar ring with lid
1/4 cup of water or one egg white

Directions

  1. Line a cookie sheet with a silicon mat or parchment paper. Preheat your oven to 350 degrees Fahrenheit (or wait a bit since some of these steps can be time-consuming.)
  2. Whisk together sugar, spices, and salt in a medium bowl.
  3. Stir in egg, pumpkin, and whipping cream until combined. Set aside.
  4. Take half of your crust pastry and roll it out slightly thinner than you normally would. Use a 4″ biscuit cutter to cut out as many rounds as possible. Repeat with remaining pastry.
  5. For jack-o-lanterns, cut faces into half of the unbaked pie crust circles. (Totally optional, of course.)
  6. Place appropriate number of wide-mouth jar rings (not lids!) upside-down on your prepared baking sheet and spray with cooking spray. Set aside. (Preheat your oven to 350 degrees Fahrenheit if you haven’t already.)
  7. Using the small jar ring with lid inside, gently place one pie crust circle on top of it (yes it will hang over the sides, that’s important.)
  8. Carefully spoon about 3 tablespoons of the pumpkin mixture into the center of the pie crust, such that it is contained by the jar lid ring.
  9. Brush the circumference of the circle with water or egg white, and top with one of your jack-o-lantern faces, pressing the edges together to seal completely.
  10. Gently remove the sealed pie from the small ring/lid and transfer to one of the wide-mouth rings such that it is centered and the edges are supported by the ring. Your pumpkin may overflow a little, but with practice you’ll get better.
  11. Repeat steps 7-11 with remaining pastry and pumpkin mixture. If you have a decent amount of pumpkin mixture remaining, pour it into a (sprayed) ramekin or small glass baking dish and bake the same as the pies.
  12. If desired, sprinkle cinnamon & sugar mixture over the pies (I do this with pretty much all my pies), then bake for 30-40 minutes, or until a small knife inserted into the pumpkin mixture comes out clean.
  13. Let cool completely, then serve with whipped cream.

Cardamom Carrot Cupcakes

Hello all you fine people, hope your October is going splendidly. I have finished two of three half marathons for the month (in Victoria, BC and Chattanooga, TN) and am currently spending the week in Iowa for work before heading to Oregon for my final race. Quite the trip seeing several friends and doing all the races, but I’m sure I’ll be glad to be home next week.

Cardamom Carrot Cupcakes {{Baking Bytes}}

In any case, I’ve gone back to my usual sugary treats and have a lovely cupcake recipe for you today. During the month of September I gave up foods with added sugar (which was awful and I’ll probably never do that again) and so the first weekend of October I went a little crazy with the baking and made pumpkin bread, these cupcakes, and a surprise bonus post for next week. (Spoiler: it involves pumpkin.) I used new mini loaf pans for the pumpkin bread and they worked fantastically. (These pans, if you’re curious.)

Cardamom Carrot Cupcakes {{Baking Bytes}}

I’d been wanting to make these cupcakes for awhile now, but carrot always feels like fall to me so I put it off all summer long. Although the original recipe is not spiced, I used spices from another Cupcake Project recipe I’d made several years ago. I’d enjoyed the latter recipe greatly but with the multitude of flavors going on it was just a bit overwhelming for me. When she posted her “spring” version earlier this year, it seemed much more my speed.

Cardamom Carrot Cupcakes {{Baking Bytes}}

A light carrot and honey flavor enhanced with a few fall spices makes for a wonderful and somewhat unique flavor. The texture of the cupcake is fantastic and they rose perfectly for me which is always a nice surprise. Also, I tried out these cupcake liners I bought at Costco earlier this year and they are AMAZING. They unwrap from the cupcake with absolutely zero sticking which I was extremely excited about. Cannot recommend them enough.

Cardamom Carrot Cupcakes {{Baking Bytes}}

In any case, if you’re looking for a fall treat that is maybe a little different from the norm, these are the cupcakes for you. I decided to pair them with the frosting from the original recipe because it is incredible and a totally different flavor from the usual maple and cinnamon of the season.

Cardamom Carrot Cupcakes {{Baking Bytes}}

I hope you enjoy the concoction or use the recipes to create your own. And also check back next week for a fun Halloween idea.

Cardamom Carrot Cupcakes

Adapted from Cupcake Project
Makes about 18 cupcakes

Ingredients

1 3/4 cup all-purpose flour
1 tsp cinnamon
1/2 tsp cardamom
1 tsp baking powder
3/4 tsp baking soda
1/2 tsp salt

1/2 cup honey
1/2 cup unsalted butter, room temp

2 eggs

1/4 cup lemon juice

1 cup finely chopped carrots
1/4 cup finely chopped crystallized ginger

Directions

  1. Preheat oven to 350 degrees Fahrenheit. Line 18 cupcake wells with paper liners and set aside.
  2. In a medium bowl, whisk together flour, spices, baking powder, baking soda, and salt.
  3. Mix in honey and butter (yes, by hand) until completely combined.
  4. Stir in eggs one at a time, then add lemon juice.
  5. Fold in carrots and crystallized ginger.
  6. Fill each cupcake well with about 1/4 cup of batter, and bake 20 minutes. Tops should spring back when pressed gently.
  7. Let cool completely, then frost as desired.

Cardamom Cream Cheese Frosting

Borrowed from Cupcake Project
Frosts 14-20 cupcakes

Ingredients

8 oz cream cheese, room temperature
1/4 cup unsalted butter, room temperature

3 cups powdered sugar
2 tsp cardamom
1 tsp vanilla

Directions

  1. Using an electric mixer, beat cream cheese and butter until light and fluffy. This will take a couple of minutes.
  2. Gently stir in powdered sugar one cup at a time, adding more or less if you prefer a stiffer or looser frosting, respectively.
  3. Beat in cardamom and vanilla until completely combined and mixture is fluffy again, about 30 seconds.
  4. Spread or pipe onto cooled cupcakes and enjoy.

Lasagna Roll-ups

It seems that fall may be on the way here, just in time for me to leave. Heading out this Friday for over two weeks of traveling and running three half marathons. If I can’t walk when I get home, you’ll know why.

Traditionally October is full of pumpkin delicacies prancing across the internet in overwhelming numbers, so I thought this year I’d start off with something a little less obvious. I saw this recipe on Pinterest (as usual) and thought it looked like a fantastic idea. Pre-portioned and easy to serve, it’s a great recipe for a family dinner as well as a potluck scenario. Even better, it can be prepared ahead and baked the next day to cut down on prep time for busy weeknights.

Lasagna Roll-ups {{Baking Bytes}}

For my first attempt I followed the original recipe as written; although it was good, it was a bit too “skinny” tasting for our preferences. M requested at least “twice as much meat and probably four times the cheese” so I made some adjustments for my next round. With cheesy goodness abound it went over much better. If you’re looking for a bit healthier option, maybe you want to head over to the original linked below, but if you like gooey and cheesy you’re definitely in the right place. It’s easily made vegetarian by just not adding meat or by subbing zucchini or mushrooms or whatever you like.

Preparing them is a bit time-consuming but I expect not more so than regular lasagna and possibly less. Having never made lasagna from scratch I can’t actually confirm this, but it seems plausible. And the hassle you save serving it (especially to a crowd) is easily worth a few extra minutes of prep time.

Lasagna Roll-ups {{Baking Bytes}}

Melty mozzarella, parmesan, and ricotta meld with the spinach and meat for a melt-in-your-mouth experience. Serve with a side salad and/or a vegetable for a well-rounded meal. Or don’t. I’m not your mother.

Lasagna Roll-ups

Adapted from The Girl Who Ate Everything
Makes 12 roll-ups

Ingredients

12 lasagna noodles
12 oz ground or diced meat (optional; I used hot Italian sausage)

10 oz chopped spinach (see note)
15 oz ricotta cheese
2 cups + 1/2 cup grated mozzarella cheese, divided
1/2 cup + 1/2 cup grated parmesan cheese, divided
1 egg
1 clove garlic, minced
1 tsp dried Italian seasoning
salt and pepper, to taste

32 oz spaghetti or other tomato sauce

Directions

  1. Pour about 1/2 cup of spaghetti sauce in the bottom of a 9×13″ baking dish.
  2. Cook lasagna noodles according to package directions.
  3. If using meat, sauté it with a little olive oil over medium heat until browned. You can add the garlic here too if you want.
  4. In a large bowl, mix spinach, ricotta, 2 cups mozzarella, 1/2 parmesan, egg, garlic, seasonings, and meat until well combined.
  5. Put several paper towels on the counter and gently lay cooked noodles on top. Gently pat the tops dry with an additional towel.
  6. Divide cheese mixture between noodles (about 3/4 cup per noodle) and gently spread it evenly across the entire noodle.
  7. Drizzle a couple of tablespoons of sauce on top of the cheese mixture.
  8. Gently roll up a noodle, not too tightly, and place seam-side down in the pan.  The paper towel might stick a little but it pulled off easily with no reside for me. Repeat with remaining noodles.
  9. Pour remaining sauce over lasagna rolls and sprinkle with remaining cheese.
  10. Cover loosely with foil. (You can refrigerate it at this point if you want to bake it the next day.)
  11. Bake at 350 degrees Fahrenheit for about 1 hour (no need to preheat the oven), removing foil for about the last 10 minutes so the cheese will brown a little.
  12. Let rest a few minutes, then serve hot.

Notes

I used frozen spinach both times. If you do, make sure it’s completely thawed and you squeeze as much water out as possible. Fresh spinach should also work fine so I will likely use that in the future. I also accidentally added 16 oz the second time and it was still yummy, although perhaps a bit more spinach-y than I personally prefer.

Baked Beef & Bean Taquitos

Hi friends, hope your September is going well. I’ve got an easy entrée here for you today so I’ll get right to it. Taquitos are something we ate fairly regularly when I was a kid, although they were usually the kind out of a box because I wasn’t much into cooking back then. This recipe is an easy dinner as well as a delicious one, and you can easily tailor the filling and the tortilla texture to suit your preferences.

Baked Beef & Bean Taquitos {{Baking Bytes}}

Ground beef (or deer, in my case) seasoned with salsa and chili powder and mixed with black beans and bell pepper includes some extra vegetables while being a very filling and rounded meal. Goes great with a side salad and/or fruit or they’re excellent just on their own. Tailor the heat by using a hotter salsa in the filling or let people dip their own if you have vastly different spice tolerances in the family. You could also chop up a jalapeno in there if you’re in to that sort of thing.

Baked Beef & Bean Taquitos {{Baking Bytes}}

As for the outside, you only need bake them until they’re as crunchy as you prefer. Since the filling is already cooked the only oven goal is to bake the tortilla slightly. I did mine about 15 minutes because they cook a little slower on a silicon mat and I was aiming for them to be firm enough to pick up and dip, without getting too brown on the outside.

Baked Beef & Bean Taquitos {{Baking Bytes}}

These are a great way to switch it up without a ton of extra work, and much easier to eat than tacos. They also work great as leftovers for an easily packable lunch or a convenient dinner. Heat them in the microwave if you’re in a hurry and don’t mind a soft tortilla, or over medium-low heat on the stove if you’re looking for the crunchy exterior.

Baked Beef & Bean Taquitos {{Baking Bytes}}

If you’re wanting a quick meal for mid-week, you could probably do everything except bake them the night before, and then just pop them in the oven when you get home. Keep in mind they will probably need a little longer to bake in order to make sure they are heated all the way through. It also works well to only make the filling ahead of time, and then heat it slightly and fill the taquitos while the oven is preheating.

Baked Beef & Bean Taquitos {{Baking Bytes}}

I’m sure these will become a new staple in our house, and I hope you enjoy them too. If you have any variations, I’d love to hear about them!

Baked Beef & Bean Taquitos

Adapted from Just a Pinch
Makes about 15

Ingredients

1 small onion, chopped finely
1 Tbsp canola oil
1 clove garlic, minced

1 lb ground beef (or deer, or whatever)

1 bell pepper, diced

1 can (15 oz) black beans, rinsed
1 cup salsa
2-3 tsp chili powder
salt and pepper, to taste

1 package (about 20) 6″ flour (or corn) tortillas, room temperature2

Directions

  1. In a large frying pan, combine oil, onion, and garlic. Saute over medium heat for 3-5 minutes, or until onion starts to soften.
  2. Add the ground meat and continue to saute until it’s nearly all browned.
  3. Add bell pepper and saute until the meat is completed cooked.
  4. Add remaining ingredients, reduce heat to low, and simmer gently for about ten minutes, or until mixture is hot.
  5. Meanwhile, heat oven to 400 degrees Fahrenheit and line a baking sheet with parchment paper or a silicon mat.
  6. When filling is hot, place about 1/4 cup in a tortilla and roll it up as tightly as you can without burning your fingertips. Place seam-side down on prepared baking sheet. Repeat until you run out of filling or tortillas.
  7. Brush lightly with canola oil (optional) and bake for 8-20 minutes, until desired level of crunchiness is met.
  8. Serve immediately with your favorite sour cream and salsa.

Notes

The salsa flavor is fairly prominent so make sure you use one you like!

I prefer flour tortillas but corn would work just fine. They will be much easier to roll if they are room temp, so if you normally keep yours in the refrigerator be sure to put them on the counter that morning, or heat them briefly in the microwave or on the stove before you start.

I doubled the batch so I’d have lots and it worked great to have leftovers.