Gouda & Brussels Grilled Cheese

Like most lactose-tolerant Americans, cheese is a pretty large staple in my diet. The discovery of the Costco cheese selection entailing far more than my standard Tillamook cheddar has done nothing but enable this addition, but I’m not sad about it. Gouda, specifically smoked Gouda, is one of my favorites and I purchase it nearly as often as I do medium cheddar. The smokiness is perfect with burgers and sandwiches and as a snack, and it never takes us long to go through the pretty heft block.

Brussels & Gouda Grilled Cheese {{Baking Bytes}}

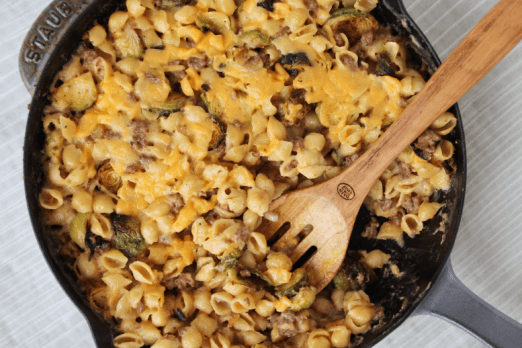
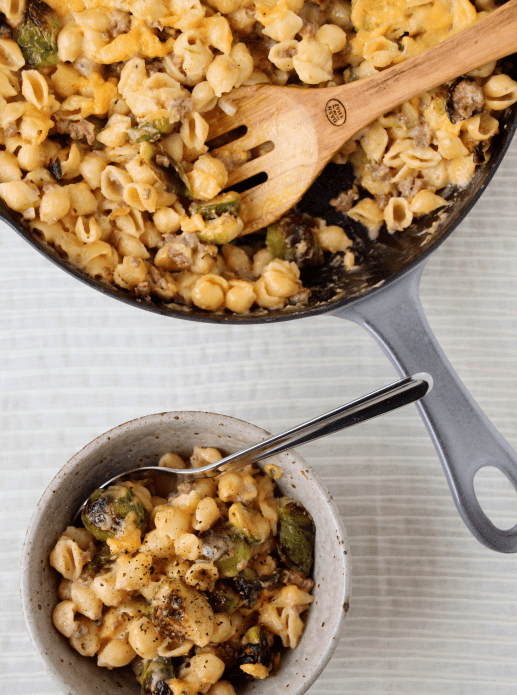
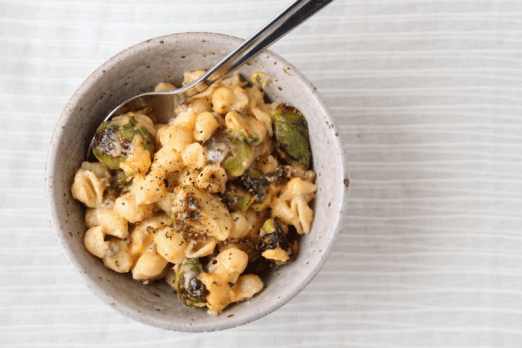
The Brussels mac & cheese from a few weeks ago combined three of my favorite things: Gouda, Brussels sprouts, and carbs. Although I decided not to do a grilled cheese series this year, I felt this combination would be perfect for celebrating National Grilled Cheese Day, which is this coming Friday.

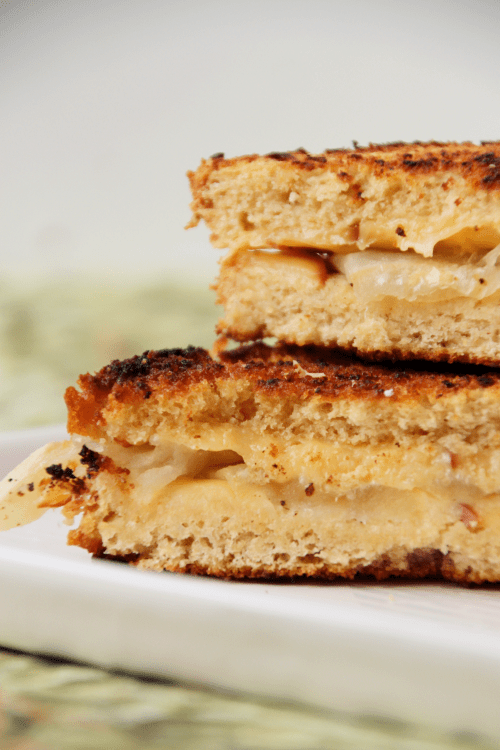
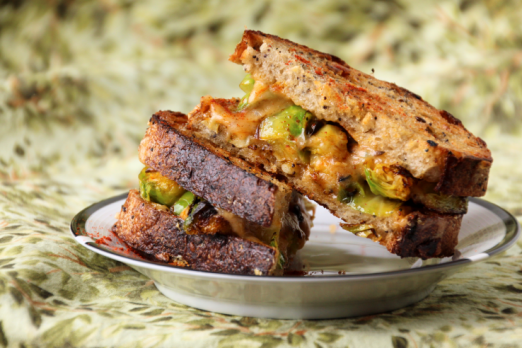
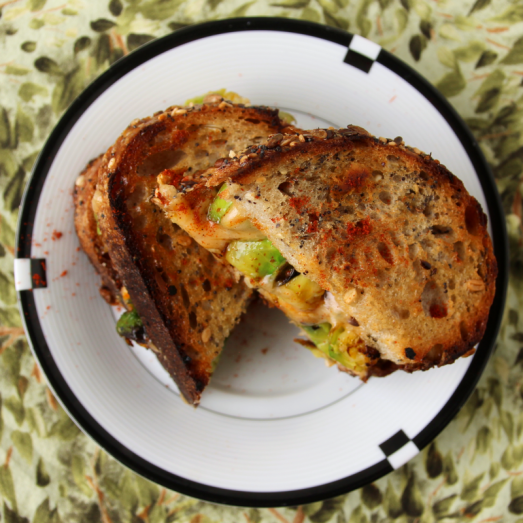
Garlic Brussels sprouts and smokey Gouda are possibly my favorite combination to-date and the veggies adds a smidge of health to this delightful meal. Gooey Gouda and crispy bread are always a lovely textural juxtaposition and this sandwich is no exception. I opted to use a few of my favorite Olivelle products in my creation but if your kitchen is not stocked with 2/3 of their store the standard versions work just great.

Brussels & Gouda Grilled Cheese {{Baking Bytes}}

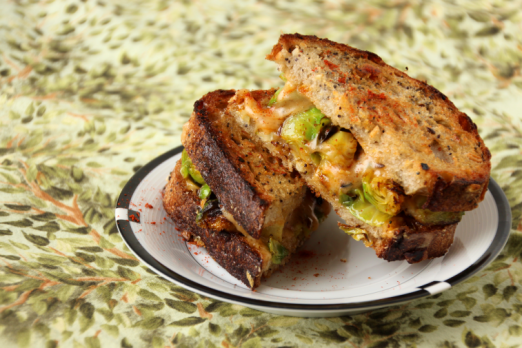
A little paprika adds a nice punch to the flavors without overpowering anything, but you can adjust up or down as preferred. With all the rich insides I kept my bread neutral and used my favorite seeded bread from a local bakery, On the Rise Bread Co. This robust wheat bread complemented everything nicely without being too complicated, and I’d recommend a similarly neutral whole wheat bread for this particular sandwich. For the meat-centric folks, some chopped bacon would go well, although I found it to be plenty delicious in its inherently vegetarian state.

Brussels & Gouda Grilled Cheese {{Baking Bytes}}

My loaf was fairly narrow so you may need to adjust the sprouts and cheese accordingly if your slices are larger. In my opinion extra sautéed Brussels sprouts are not a problem so just add an extra to your pan and you’ll have a small appetizer of the leftovers that don’t fit.

If you’re cooking for a crowd, you can roast the Brussels in the oven and then cook the sandwiches in a bigger pan or griddle to get more done at once. With just one sandwich I didn’t want to turn on the oven but for a family it’s probably worth it to streamline the process.

Brussels & Gouda Grilled Cheese


Celebrate National Grilled Cheese Day this Friday with a fancy sandwich and take a classic up a notch. Brussels or Gouda not your thing? Check out some of my other options like Beet & Feta or Huckle-bacon Brie!

Gouda & Brussels Grilled Cheese

Makes one sandwich

Ingredients

1 Tbsp (Caramelized Garlic) olive oil, divided
3-4 Brussels sprouts, trimmed and quartered
1 clove garlic, minced
1/2 Tbsp minced red or yellow onion
1/4 tsp smoked paprika, to taste
pinch of (Hickory Smoked) sea salt, to taste

2 slices neutral wheat bread (I used On the Rise Seeded)
1/3 cup shredded smoked Gouda, to taste

Directions

  1. Add 2 tsp oil to medium pan over medium-high heat. When the oil is shimmering, add the Brussels, garlic, onion, salt, and paprika.
  2. Sauté until Brussels are cooked through and lightly browned. Remove to a plate and set aside.
  3. Reduce to medium-low and heat remaining oil.
  4. Top one slice of bread with 1/3 of the cheese, sprouts, and another 1/3 of the cheese. Top the other bread slice with the remaining cheese.
  5. Transfer both slices open-face style to the pan. Cover with a lid and cook until bread is lightly browned.
  6. Flip the cheese bread atop top sprouts and cook an addition 30-60 seconds on each side to allow the filling to stick together.
  7. Serve immediately, optionally  topped with an additional sprinkle of paprika.

Advertisement

Roasted Brussels Sprouts Mac & Cheese

Macaroni and cheese, for me, is the epitome of comfort food. Hot, cheesy, and nostalgic, it’s something my mouth would happily every day. Typically, however, it’s not a particularly healthy meal so I don’t make it often. I have my childhood favorite, the Gruyere version already on here, but when I saw this slightly lighter and more vegetable-forward recipe I knew I had to try it.

Roasted Brussels Sprouts Mac & Cheese {{Baking Bytes}}

Brussels sprouts are one of my favorite vegetables and since they go so well with everything, I knew they’d be an excellent addition to mac and cheese. Using this opportunity to christen the cast iron skillet I got on Black Friday, I made a few adjustments ended up with a recipe I might like even more than the one I grew up with.

Since I prefer the crispiness and light charring from the oven, I opted to roast my sprouts separately. This not only maintains the flavor profile I prefer, but allows you to make the streamline the process a little bit since you can start the sauce while they are baking. Cut them into bite-sized pieces (probably halves or quarters) and they will bake quite promptly.

Roasted Brussels Sprouts Mac & Cheese {{Baking Bytes}}

With some homemade venison & pork Italian sausage in the freezer, and smoked Gouda in the fridge (thanks, Costco), I opted to incorporate both into this recipe. I love the creaminess of Gouda and the smokiness blends perfectly with the sausage. My version has a little kick, so with a bit of paprika added to the sauce the whole thing comes together very creamy and just a little spicy. The roasted sprouts bring a little color, a complementary flavor, and an extra nutrient boost to the whole dish.

Roasted Brussels Sprouts Mac & Cheese {{Baking Bytes}}

Despite being slightly lightened with the use of almond milk, the sauce is still thick and creamy, just the way I like it. You can make your own with different spices, or keep it simple with just salt and pepper. I didn’t add any in this round, but I think some baby spinach would stir in nicely.

I topped mine with additional cheese and popped it under the broiler, but if I’m honest this step really didn’t feel necessary. You do you, but if you are crunched for time it’s 100% okay to skip it. (I will probably skip it in the future.) Alternatively, if you’re a die-hard crumb topping fan, you can finish the dish with that instead.

Brussels_mac_and_cheese2

The whole thing comes together in about 30 minutes, which makes it just as great for weeknights as it is for meal-prep days. If you have leftovers, it reheats great in the microwave with a splash of extra milk, remembering to stir a couple times to keep it creamy.

Roasted Brussels Sprouts Mac & Cheese {{Baking Bytes}}

PS – This recipe is easily made vegetarian; just skip the sausage and use 2 Tbsp butter or olive oil for the sauce instead.

Roasted Brussels Sprouts Mac & Cheese

Adapted from Ambitious Kitchen
Serves 4-6

Ingredients

8 ounces pasta of choice

1 lb Brussels sprouts, halved or quartered
2 Tbsp olive oil
1/2 tsp garlic powder
salt and freshly ground pepper, to taste

1/2 lb Italian sausage
2 cloves garlic, minced
1/4 whole wheat flour (or all-purpose)
2 cups milk (or unsweetened substitute, I used almond)
6 oz smoked Gouda, shredded (or cheese of choice)
1 tsp (smoked) paprika

optional toppings
2 oz smoked Gouda, shredded
freshly ground pepper

Directions

  1. Preheat oven to 400 degrees.
  2. On a baking sheet, add 2 Tbsp oil, garlic powder, and Brussels sprouts. Use your hands to toss until sprouts are well coated, then spread evenly on the pan.
  3. Bake 20-25 minutes, to desired crispiness. Set aside.
  4. Meanwhile, boil noodles to al dente according to your pasta’s directions. Drain and set aside.
  5. Also meanwhile, in an oven-safe skillet over medium heat, cook the sausage until browned. Remove the sausage to a paper towel and drain all but 2 Tbsp of the oils.
  6. Add garlic and sauté until fragrant.
  7. Whisk in the flour and continue to cook until a paste forms, about 30 seconds.
  8. Slowly stream in the milk, whisking constantly until smooth, then add the paprika.
  9. Increase the heat and bring to a boil, then reduce back to medium and simmer until sauce thickens, stirring occasionally.
  10. When the sauce has thickened like a gravy, stir in the cheese until completely melted. (Depending on the type of cheese, this can take a bit; cheddar melts much faster than Gouda.) Add additional spices as desired.
  11. Fold in the Brussels sprouts, sausage, and pasta until well mixed.
  12. Serve as is, or top with additional shredded cheese and broil until melted and golden.

Notes

Would also be great with some sautéed or fried spinach!

To reheat leftovers, add a splash of additional milk and heat in the microwave, stirring every minute or so, until creamy and hot.

Apple Gouda Grilled Cheese

Welcome to April! Remember when I said Montana springs are a bit wintery? It is literally 12 degrees as I write this (Fahrenheit, in case you’re reading from a sane country). Good thing it’s perfect grilled cheese weather.

Last year I discovered that not only is April 12 my dad’s birthday, but it is National Grilled Cheese Day, and April is National Grilled Cheese Month. This inspired a delightful series of posts and I’m back with four all-new flavors for this year – check back weekly for each new addition.

Apple Gouda Grilled Cheese {{Baking Bytes}}

Starting off the series is a traditional pairing, apple and gouda, with a twist – apple cider bread. Inspired by my beer bread recipe, I substituted hard cider in the bread with great success last fall. For this sandwich, I nixed the Brie and also the sugar since all I had around was a pretty sweet bottle of Angry Orchard. If you’re using a dry cider, as I recommend, feel free to leave that bit of sugar in there; it adds a touch of caramel flavor to the bread.

Apple Gouda Grilled Cheese {{Baking Bytes}}

There are many grilled cheeses on the internet that call for apple, but most of them do not suggest you roast the apples first. I think this is a mistake as apples take much longer to cook than bread or cheese, and it will result in a possibly cold but definitely crunchy apple in the middle. If that’s what you’re going for (like if it’s not twelve degrees at your house) by all means skip the apple roasting step. For a softer, cozier, and more cohesive apple and cheese experience, pop the apples in the oven for a bit while you slice your bread and cheese and get them warm and tender.

Apple Gouda Grilled Cheese {{Baking Bytes}}

Rich Gouda and sweet apples are a wonderful match as is, but the cider bread adds a brand new twist and a delicious savory dimension. The bread is a critical component of the Grilled Cheese Experience™ and not to be overlooked. However, if you don’t want to plan a day ahead to make a batch of bread, sourdough would be an acceptable substitution.

I always cook my grilled cheese open face and then sandwich them at the end – this allows the fillings to melt more evenly and more quickly but it does take up more space. If you’re cooking for a crowd, layer all the fillings on one slice of bread and cook those with the lid on until mostly warmed and the bread is golden, then top with your second slice and flip to finish them out.

Apple Gouda Grilled Cheese {{Baking Bytes}}

Get out your frying pans and prepare yourselves for some new adventures in grilled cheese. Be sure to let me know how yours turn out!

Apple Gouda Grilled Cheese
Makes one sandwich

Ingredients

2 slices apple cider bread (I recommend using a dry cider and no Brie)
2-3 thin slices Gouda
1 small Granny Smith apple

olive oil or butter

Directions

  1. Preheat oven to 400 degrees1. Line a baking sheet with silicon mat or parchment paper.
  2. Peel (optional), core, and thinly slice apple.
  3. Arrange apple slices in a single layer on prepared baking sheet, and bake until fork tender, 10-20 minutes depending on thickness.
  4. In a medium frying pan (with lid!) over low-medium heat, warm the oil or butter.
  5. Arrange both slices of bread in the pan, and top each with half the Gouda.
  6. Place the lid on the pan and gently cook until cheese is warm (Gouda does not always get as melty in appearance as other cheeses) and bread is golden brown.
  7. Layer warm apple2 on one of the bread slices (if your apple isn’t just out of the oven, you can add it at the same time as the cheese to warm.)
  8. Flip the slice without apples on top of the other (cheese sides together) and cook for 30-60 seconds more.
  9. Serve immediately; goes great with a hard cider!

Notes

You can also use the broiler, but lower the oven rack below center and pay close attention so they don’t get crisp.

You will have leftover apple but it makes a great snack with a sprinkle of cinnamon, or is perfect for tomorrow’s oatmeal.