
Welcome to July! We are halfway through the year, can you believe it? June went by crazy fast; probably because I spent a third of it at home in Alaska, but I digress. We bring in the second half of the year with National Ice Cream Month. Didn’t know that’s a thing? That’s okay, I forgive you. You have all month to make up for it.
To celebrate I’m going to do something a little different with the blog. In addition to the regular bi-weekly Monday posts, I will be posting a weekly ice cream recipe. We’ll have something for everyone with both classic flavors and some less traditional ones. These posts will go live on Tuesday mornings, giving you plenty of time to make a batch for your weekend barbecues.

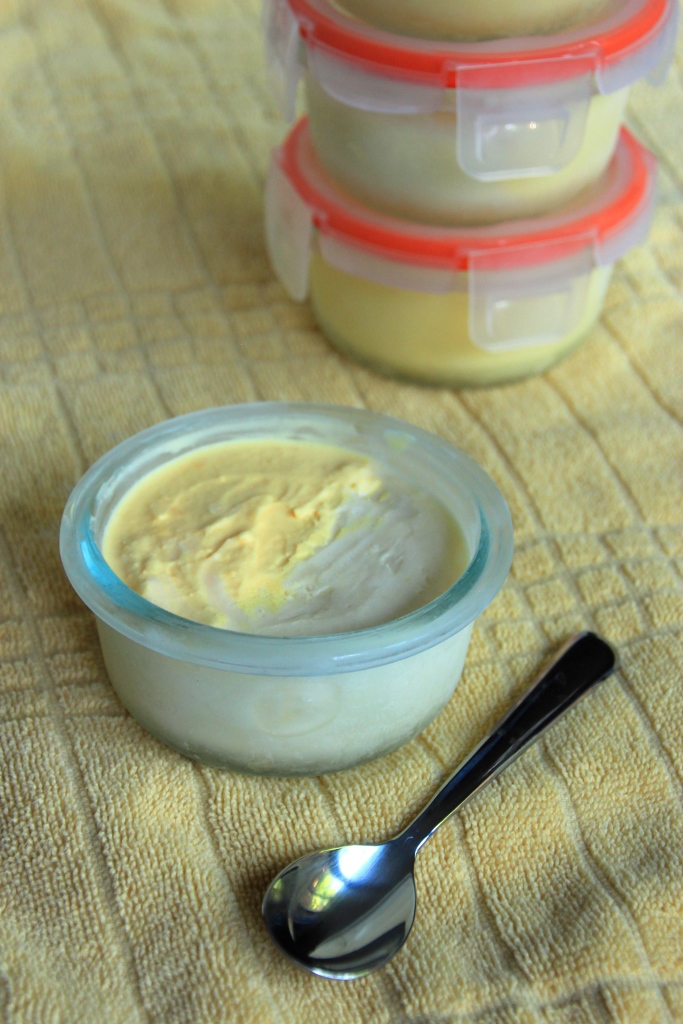
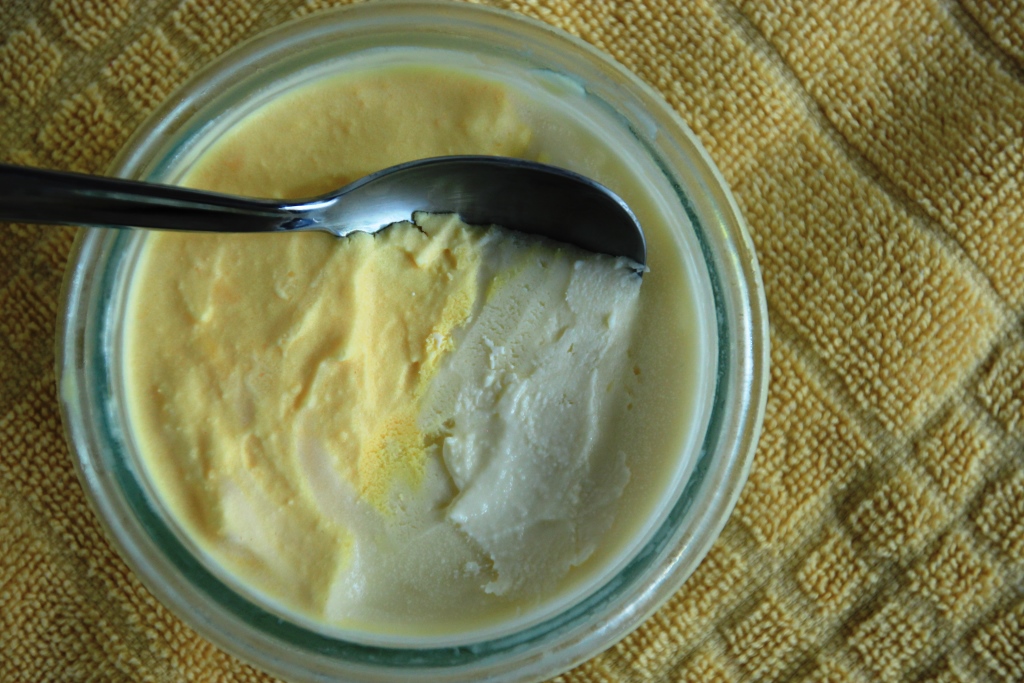
For this first week, I’m introducing orange creamsicle ice cream. Remember those tiny Dixie cups of half vanilla, half orange deliciousness that came with the silly wooden spoon? Here is a DIY version just for you. It’s a little bit more time-consuming than just making one flavor, of course, but they are super cute, super delicious, and super easy.
If you’re not interested in the combo, this orange ice cream can certainly hold its own. Reminiscent of a creamier Orange Julius, it bursts with orange flavor and a hint of vanilla. It’s very easy to adjust to how “orange-y” you want yours to be. The citrus flavor is delightfully summery, making it a wonderful treat on a hot day. Despite the extra water from the orange juice, it stayed scoopably (that’s a word, I promise) soft in my freezer, but if it freezes too hard in yours just let it sit on the counter for 5-10 minutes before dishing.
Below find my recipes for orange creamsicle and vanilla ice cream, as well as instructions for making your own Dixie cups. They would be a great addition to a 4th of July barbecue, sure to impress the whole crowd, adults and children alike. I did add food coloring to this batch of orange so it would stand out next to the vanilla, but you certainly don’t have to. The orange juice is a key flavor, so make sure you buy a quality brand of 100% juice (or juice your own oranges). I like to get the Simply Orange brand.
I used these Snapware, 1-cup glass containers, but anything of similar size should do. Small canning jars, waxed paper cups, whatever you can find. Depending on where you live, you may be able to find actual disposable ice cream cups to use, if you’re worried about glass breaking. It’s best to use a lidded container, but you can always cover the tops with parchment paper (so they’re stackable) if you’re not planning to keep them in the freezer more than a few days.
Orange Creamsicle Ice Cream
Makes 4-5 cups
Ingredients
1/2 cup sugar
1 cup heavy whipping cream
1/2 cup half and half
1/2 – 1 cup pulp-free orange juice (I used 3/4 cup)1
1/4 cup egg substitute
3/4 tsp orange extract
1/2 tsp vanilla extract
yellow and red food coloring (optional)
Directions
- Whisk together all ingredients until completely combined.
- If desired, add food coloring. I used 6 drops yellow and 2 drops red, but add more or less to suit your preferences. It does lighten fairly considerably after it’s frozen.
- Cover bowl and chill in the refrigerator at least 4 hours, or overnight.
- Freeze according to your ice cream maker’s directions, then place in a freezer-safe bowl to freeze for an extra three hours, or overnight.
Notes
1 If you have pulpy juice on hand, just use a mesh strainer to remove the pulp. For a subtler orange flavor, use 1/2 cup. For a strong flavor, use 1 cup. The larger end of the range will result in a more grainy texture, but it’s still creamy.
Vanilla Ice Cream1
Makes approx. 3.5 cups
Ingredients
1/2 cup sugar
1 cup heavy whipping cream
1/2 cup half and half
1/4 cup egg substitute
3/4 tsp vanilla extract
Directions
- Whisk together all ingredients until completely combined.
- Cover and chill in the refrigerator for at least 4 hours, or overnight.
- Freeze according to your ice cream maker’s directions, then place in a freezer-safe bowl to freeze for an extra three hours, or overnight.
Notes
1 This is the same recipe as my previously posted vanilla ice cream recipe, just halved and with less vanilla so as to not compete so strongly with the orange.
DIY Dixie Cups
Serves 8-10 (6-8oz each)
Ingredients
1 recipe orange creamsicle ice cream (above)
1 recipe vanilla ice cream (above)
Directions
- Make and freeze vanilla ice cream.
- Make orange ice cream, but stop once you’ve placed the mixture into the fridge. If using glass jars for your servings, place those in the freezer at this time. Chill everything for at least 4 hours.
- Scoop vanilla ice cream into your jars, using a spatula (or something else sturdy and flat) to hold the ice cream into half the container while you press it to fill the space. Smooth the tops and return to the freezer for at least 30 minutes, or until your orange ice cream is done.
- Freeze orange ice cream according to your ice cream maker’s directions.
- Retrieve the cups from the freezer, and fill the remaining half with orange ice cream. Smooth the tops, and return to the freeze for at least 2 hours, or until ready to eat.
- Serve directly from the freezer to adoring fans.
These sound a lot more complicated than they actually are. There is a lot of down time waiting for things to freeze/chill, but it’s not a difficult recipe. The most time-efficient method would be like this:
- Day 1 pm: Mix vanilla and put in the fridge. Mix the orange and put it in the fridge also. If you’re using glass containers, put them in the freezer now because it won’t hurt them to be in there a long time.
- Day 2 am (e.g. before work): Churn the vanilla and put it in the freezer. Wash and dry the ice cream maker bowl, and return it to the freezer. (This should take about half an hour total.)
- Day 2 pm (e.g. after work): Portion the vanilla to fill half of each cup, and put them back in the freezer. Churn the orange ice cream. Retrieve the half-filled cups, fill with orange, smooth the tops, and return to the freezer until ready to serve.
Obviously, depending on how much time you have you can spread this out a lot more, but this timeline will give you ready-to-eat desserts for Day 3, meaning you still have time to make them for the 4th of July, and actually enjoy the barbecue, even if you don’t start until Wednesday. If you are making these for more than 10 people, double the vanilla recipe, and make 1.5 of the orange (I don’t think double will fit in a standard ice cream maker.) You should have enough for closer to 20, or more if you make them smaller, of course.

Pingback: Mimosa Ice Cream (Floats!) {National Ice Cream Month} | Baking Bytes
Pingback: Chai Latte Ice Cream {National Ice Cream Month} | Baking Bytes
Pingback: {National Ice Cream Month} Cookies & Cream Ice Cream | Baking Bytes
Pingback: {National Ice Cream Month} Kahlúa Chocolate Ice Cream | Baking Bytes
Pingback: {National Ice Cream Month} Peanut Butter Fudge Ripple Ice Cream | Baking Bytes
Pingback: {National Ice Cream Month} Baileys Ice Cream | Baking Bytes
Pingback: Peanut Butter Chocolate Chip Cookies | Baking Bytes