Peanut Butter Chocolate Chip Cookies

Hope you’re having a delightful Monday! If you aren’t, maybe these cookies will help to improve it. This is probably the recipe I use most often as it’s one of M’s favorites. It’s also very consistent in baking and pops out lovely round cookies every time. Although we’ve been buying Skippy peanut butter ever since Costco stopped selling Jif (jerks), I still prefer my adaptation of the Jif recipe. It makes perfect and soft cookies every time and doesn’t require softened butter, making it a good go-to recipe for any time of the year. It also freezes well, so feel free to make a double batch and save half for later. Geared more toward a peanut butter fan than a chocolate lover, these cookies are the antithesis to the chocolate peanut butter chip cookies I’ve posted previously.

Peanut Butter Chocolate Chip Cookies {{Baking Bytes}}

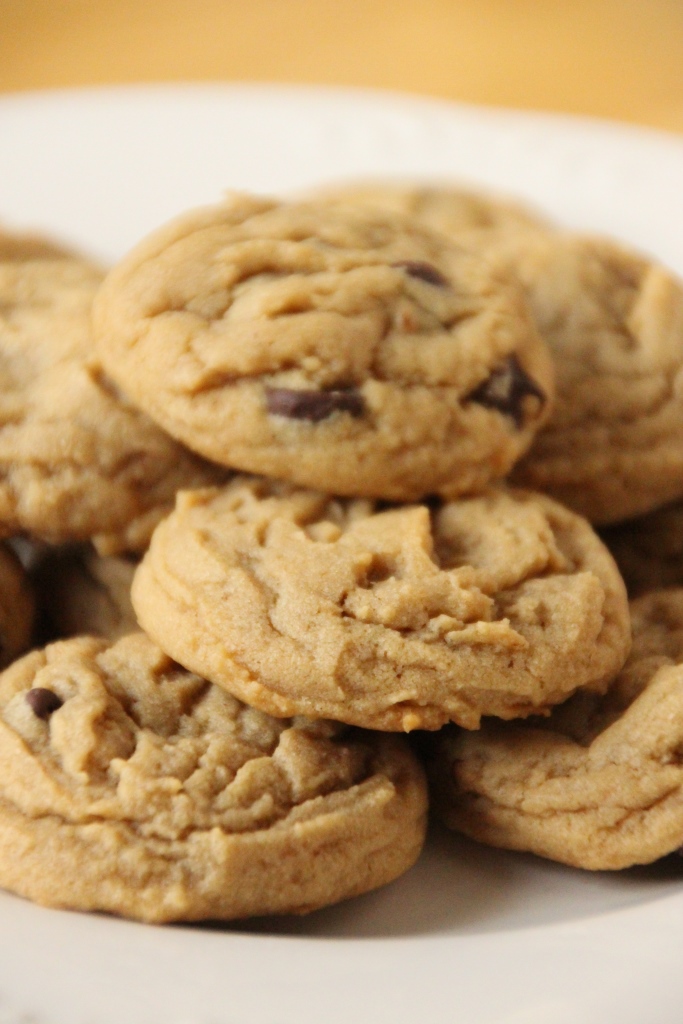
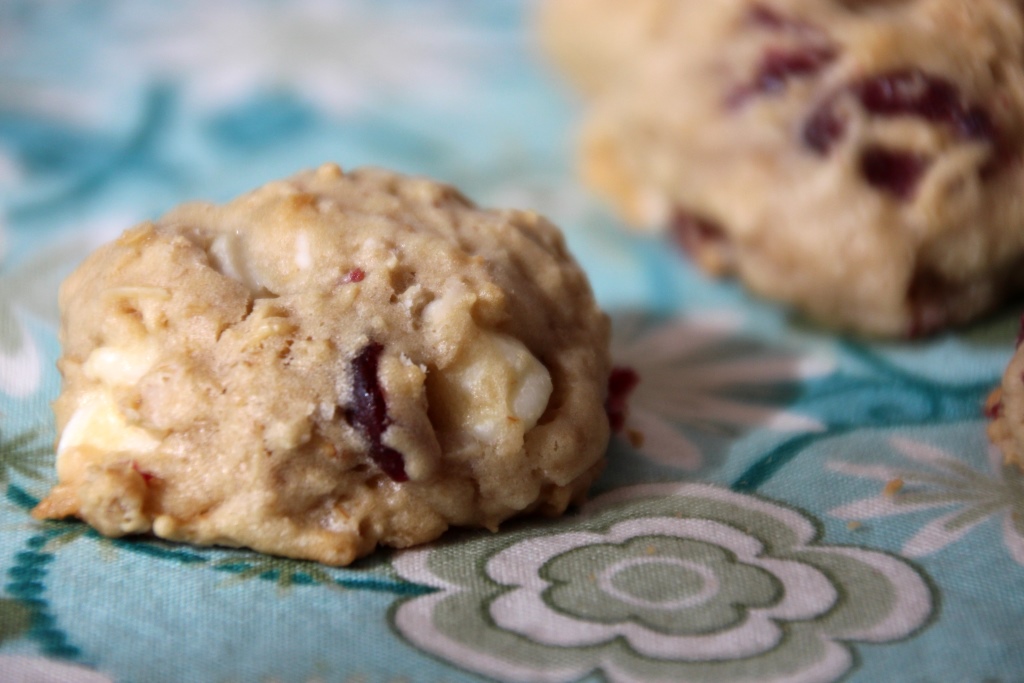
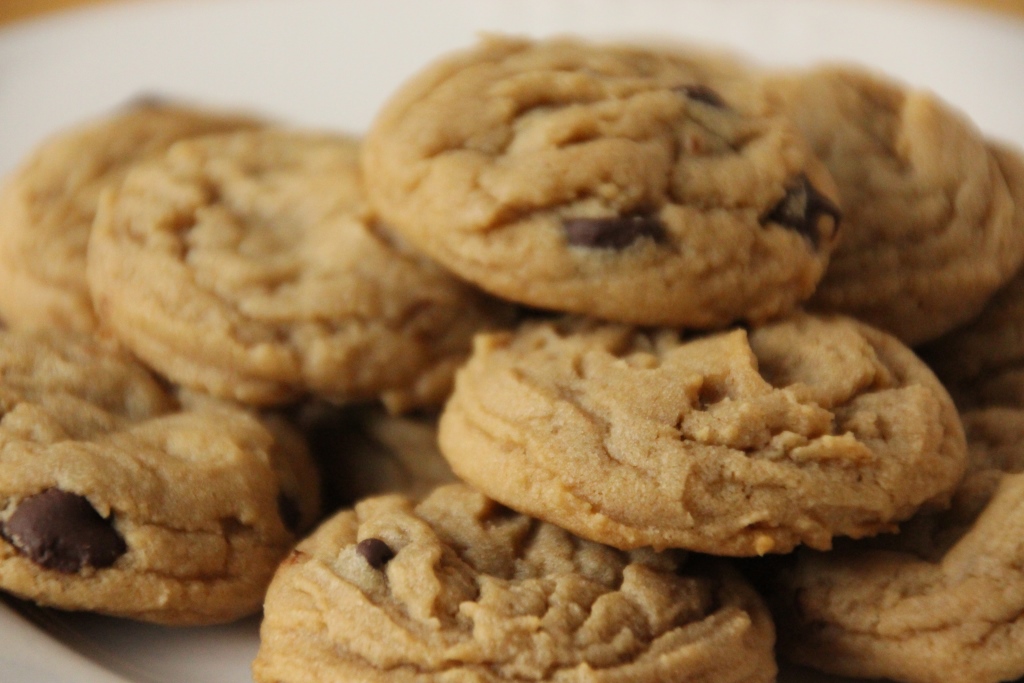
Spectacularly peanut buttery with a smattering of chocolate chips, I like to make these cookies small for a bite-sized treat. They are chewy and sweet and practically require an accompanying glass of milk, so I like to have the option of eating one or five, depending on how big of a sugar rush I’m looking for. If you prefer larger cookies, have no fear. Use two tablespoons of dough instead of one, flatten slightly, and bake for an extra two minutes or so. I like to bake a test cookie if I’m not using my usual method just to make sure I don’t ruin a whole tray.

Peanut Butter Chocolate Chip Cookies {{Baking Bytes}}

Personally, I think these cookies speak for themselves so I’ll stop here. If you’re in the mood for a peanut butter experience, whip up a batch and have a few warm from the oven; your Monday can only get better from here.

Peanut Butter Chocolate Chip Cookies {{Baking Bytes}}

Peanut Butter Chocolate Chip Cookies 

Adapted from Jif’s Irresistible Peanut Butter Cookies
Makes about 5 dozen small cookies

Ingredients

1 1/4 cups lightly packed brown sugar
3/4 cup peanut butter1
1/2 cup Crisco shortening
3 Tbsp milk
1 Tbsp vanilla extract

1 large egg

2 cups all-purpose flour
3/4 tsp baking soda
3/4 tsp salt

1 cup chocolate chips

Directions

  1. Preheat oven to 375 degrees Fahrenheit and line cookie sheet(s) with parchment paper or silicon baking mats.
  2. In the bowl of your stand mixer, beat sugar, peanut butter, shortening, milk, and vanilla on medium speed until completely blended and fluffy.
  3. Add egg, beating until just combined
  4. Add flour, baking soda, and salt, mixing on low until just incorporated. Dough should not stick to your finger. If it does, stir in extra flour in very small amounts until it’s no longer sticky.
  5. Stir in chocolate chips.
  6. Using a 1 Tbsp cookie scoop, place two inches apart on prepared cookie sheets and bake for 7-9 minutes.2 They will look slightly under done, but should be matte, not shiny.
  7. Cool briefly on cookie sheet, then place on a wire rack to cool completely.
  8. Store in an air-tight container on the counter for up to 1 week (or maybe longer, they are always gone by this time), or in the freezer for several months.

Notes

1 I always use creamy, but crunchy peanut butter will definitely work. Both Skippy and Jif work great, but I have not tried a natural peanut butter in this recipe, so use caution if you do. You may need to add a little extra flour at the end, so check the dough before you add chocolate chips.

2 If you’re using dark pans, they will likely be closer to the 7-minute time, if you’re using light pans (or a silicon mat) they will probably need closer to 9 minutes. I use light aluminum pans and silicon mats and 9 minutes is correct for me.

[Psst. Don’t forget to tune in tomorrow morning for a new ice cream recipe! Hint: alcohol ahead. If you missed last week’s ice cream recipe, it can be found here.]

Orange Creamsicle Ice Cream (& DIY Dixie Cups) {National Ice Cream Month}

Welcome to July! We are halfway through the year, can you believe it? June went by crazy fast; probably because I spent a third of it at home in Alaska, but I digress. We bring in the second half of the year with National Ice Cream Month. Didn’t know that’s a thing? That’s okay, I forgive you. You have all month to make up for it.

To celebrate I’m going to do something a little different with the blog. In addition to the regular bi-weekly Monday posts, I will be posting a weekly ice cream recipe. We’ll have something for everyone with both classic flavors and some less traditional ones. These posts will go live on Tuesday mornings, giving you plenty of time to make a batch for your weekend barbecues.

DIY Orange Vanilla Dixie Cups {{Baking Bytes}}

For this first week, I’m introducing orange creamsicle ice cream. Remember those tiny Dixie cups of half vanilla, half orange deliciousness that came with the silly wooden spoon? Here is a DIY version just for you. It’s a little bit more time-consuming than just making one flavor, of course, but they are super cute, super delicious, and super easy.

If you’re not interested in the combo, this orange ice cream can certainly hold its own. Reminiscent of a creamier Orange Julius, it bursts with orange flavor and a hint of vanilla. It’s very easy to adjust to how “orange-y” you want yours to be. The citrus flavor is delightfully summery, making it a wonderful treat on a hot day. Despite the extra water from the orange juice, it stayed scoopably (that’s a word, I promise) soft in my freezer, but if it freezes too hard in yours just let it sit on the counter for 5-10 minutes before dishing.

DIY Orange Vanilla Dixie Cups {{Baking Bytes}}

Below find my recipes for orange creamsicle and vanilla ice cream, as well as instructions for making your own Dixie cups. They would be a great addition to a 4th of July barbecue, sure to impress the whole crowd, adults and children alike. I did add food coloring to this batch of orange so it would stand out next to the vanilla, but you certainly don’t have to. The orange juice is a key flavor, so make sure you buy a quality brand of 100% juice (or juice your own oranges). I like to get the Simply Orange brand.

I used these Snapware, 1-cup glass containers, but anything of similar size should do. Small canning jars, waxed paper cups, whatever you can find. Depending on where you live, you may be able to find actual disposable ice cream cups to use, if you’re worried about glass breaking. It’s best to use a lidded container, but you can always cover the tops with parchment paper (so they’re stackable) if you’re not planning to keep them in the freezer more than a few days.

DIY Orange Vanilla Dixie Cups {{Baking Bytes}}

Orange Creamsicle Ice Cream

Makes 4-5 cups

Ingredients

1/2 cup sugar
1 cup heavy whipping cream
1/2 cup half and half
1/2 – 1 cup pulp-free orange juice (I used 3/4 cup)
1/4 cup egg substitute
3/4 tsp orange extract
1/2 tsp vanilla extract

yellow and red food coloring (optional)

Directions

  1. Whisk together all ingredients until completely combined.
  2. If desired, add food coloring. I used 6 drops yellow and 2 drops red, but add more or less to suit your preferences. It does lighten fairly considerably after it’s frozen.
  3. Cover bowl and chill in the refrigerator at least 4 hours, or overnight.
  4. Freeze according to your ice cream maker’s directions, then place in a freezer-safe bowl to freeze for an extra three hours, or overnight.

Notes

1 If you have pulpy juice on hand, just use a mesh strainer to remove the pulp. For a subtler orange flavor, use 1/2 cup. For a strong flavor, use 1 cup. The larger end of the range will result in a more grainy texture, but it’s still creamy.

Vanilla Ice Cream 

Makes approx. 3.5 cups

Ingredients

1/2 cup sugar
1 cup heavy whipping cream
1/2 cup half and half
1/4 cup egg substitute
3/4 tsp vanilla extract

Directions

  1. Whisk together all ingredients until completely combined.
  2. Cover and chill in the refrigerator for at least 4 hours, or overnight.
  3. Freeze according to your ice cream maker’s directions, then place in a freezer-safe bowl to freeze for an extra three hours, or overnight.

Notes

1 This is the same recipe as my previously posted vanilla ice cream recipe, just halved and with less vanilla so as to not compete so strongly with the orange.

DIY Dixie Cups 

Serves 8-10 (6-8oz each)

Ingredients

1 recipe orange creamsicle ice cream (above)
1 recipe vanilla ice cream (above)

Directions

  1. Make and freeze vanilla ice cream.
  2. Make orange ice cream, but stop once you’ve placed the mixture into the fridge. If using glass jars for your servings, place those in the freezer at this time. Chill everything for at least 4 hours.
  3. Scoop vanilla ice cream into your jars, using a spatula (or something else sturdy and flat) to hold the ice cream into half the container while you press it to fill the space. Smooth the tops and return to the freezer for at least 30 minutes, or until your orange ice cream is done.
  4. Freeze orange ice cream according to your ice cream maker’s directions.
  5. Retrieve the cups from the freezer, and fill the remaining half with orange ice cream. Smooth the tops, and return to the freeze for at least 2 hours, or until ready to eat.
  6. Serve directly from the freezer to adoring fans.

These sound a lot more complicated than they actually are. There is a lot of down time waiting for things to freeze/chill, but it’s not a difficult recipe. The most time-efficient method would be like this:

  • Day 1 pm: Mix vanilla and put in the fridge. Mix the orange and put it in the fridge also. If you’re using glass containers, put them in the freezer now because it won’t hurt them to be in there a long time.
  • Day 2 am (e.g. before work): Churn the vanilla and put it in the freezer. Wash and dry the ice cream maker bowl, and return it to the freezer. (This should take about half an hour total.)
  • Day 2 pm (e.g. after work): Portion the vanilla to fill half of each cup, and put them back in the freezer. Churn the orange ice cream. Retrieve the half-filled cups, fill with orange, smooth the tops, and return to the freezer until ready to serve.

Obviously, depending on how much time you have you can spread this out a lot more, but this timeline will give you ready-to-eat desserts for Day 3, meaning you still have time to make them for the 4th of July, and actually enjoy the barbecue, even if you don’t start until Wednesday. If you are making these for more than 10 people, double the vanilla recipe, and make 1.5 of the orange (I don’t think double will fit in a standard ice cream maker.) You should have enough for closer to 20, or more if you make them smaller, of course.

Vanilla Bean Cupcakes and Buttercream Frosting

Vanilla Bean Cupcakes {{Baking Bytes}}

Happy belated Mother’s Day to all the moms out there, but especially to mine for being my proofreader (and just generally awesome). Thanks Mom!

Treadwell Ditch Trail 2013

This month my best friend finished her Master’s degree in Computer Science, which is super exciting! To celebrate the occasion I offered to make cupcakes for the party. The first time I made these cupcakes, a year ago, they turned out delightful so I decided to revisit the recipe.

Vanilla Bean Cupcakes {{Baking Bytes}}

Some of you may be thinking, “Vanilla? How boring.” but I assure you these cupcakes are amazing. Unless you are just completely anti-vanilla, in which case I think you might want to get that checked out. These cupcakes are light and summery with a full vanilla flavor and pretty specks of vanilla bean throughout. They are quite delicious on their own, but of course make a great base for almost any frosting. For this occasion I used the vanilla buttercream from the original recipe, as well as a blackberry buttercream I sort of made up as I went. Although it was delicious, it’s not quite ready to share. But don’t worry, it’ll definitely be up here soon.

Vanilla Bean Cupcakes {{Baking Bytes}}

This is a very beginner friendly recipe as well as an excellent staple for the experienced baker. The original recipe calls for a vanilla bean, but I substituted vanilla bean powder which you can buy off Amazon. I love vanilla bean powder because it’s far less hassle (and cheaper!) than whole beans but has a much stronger flavor and the lovely specs that extract doesn’t. You can also use it in place of vanilla extract (or in addition to) in pretty much any baked recipe. I hear it’s also great to add a little to your coffee grounds before you brew it, but I haven’t personally tried this (yet).

Vanilla Bean Cupcakes {{Baking Bytes}}

These cupcakes are great for any occasion, but they are best for decently large parties as the recipe makes over three dozen. You could try shrinking the recipe, of course, but I suspect your friends would prefer you had extras to give away.

Pair with the vanilla bean buttercream frosting below, or your favorite frosting recipe. It would go great with a whipped cream frosting if you want to keep the whole concoction extra light. Maybe even Bailey’s whipped cream.

Vanilla Bean Cupcakes

Adapted from Bella’s Bistro
Makes so many cupcakes (~40)

Ingredients

3 cups cake flour (or all-purpose)
1 Tbsp baking powder
1/2 tsp salt

1 cup unsalted butter, room temp
2 tsp vanilla bean powder

2 cups sugar
4 large eggs, room temp

1 1/4 cup buttermilk
1 tsp vanilla extract

Directions

  1. Preheat oven to 350 degrees Fahrenheit and line muffin tins with cupcakes liners.
  2. In a small bowl, whisk together flour, baking powder, and salt; set aside. Use an electric mixer on medium speed to beat butter and vanilla powder together until light and fluffy, 3-4 minutes.
  3. Add sugar and beat until completely combined.
  4. Add eggs one at a time, mixing until just combined after each one. You may need to scrape down the sides of the bowl.
  5. In a small cup, mix together buttermilk and vanilla extract; set aside.
  6. Beginning and ending with the flour mixture, add in alternating additions with the buttermilk, mixing on low speed just until incorporated between each addition.
  7. Scrape the sides of the bowl if necessary, and mix an additional 15 seconds.
  8. Using a 3 Tbsp scoop, fill the cupcake liners and bake for 18-20 minutes (a toothpick should come out clean).
  9. Let rest at least 5 minutes in the pan, then remove cupcakes to a wire rack to cool completely.
  10. Frost and decorate as desired.

Vanilla Bean Cupcakes {{Baking Bytes}}

Vanilla Bean Buttercream Frosting

Adapted from Bella’s Bistro
Makes enough for ~20 cupcakes

Ingredients

1 1/4 cups unsalted butter, room temp

2 1/2 cups powdered sugar

2 Tbsp heavy cream
2 tsp vanilla extract

Directions

  1. Using an electric mixer, beat butter on medium-high speed until smooth.
  2. Add sugar and beat on low speed until incorporated completely.
  3. Stir in vanilla and cream, then beat on medium-high speed for a few minutes until light and fluffy.
  4. Pipe or spread on completely cooled cupcakes as desired.

Oatmeal Craisin White Chocolate Chip Cookies

Welcome, friends, I hope you’ve had a lovely April. Montana is still struggling to fully commit to spring but right now it’s delightfully sunny and almost 60, which makes for a smiley Lindsey instead of the frowny Lindsey of last weekend’s flurries.

Oatmeal Craisin White Chocolate Chip Cookies {{Baking Bytes}}

This weekend I decided to cover one of our household cookie staples. These are personally one of my favorites, although M is a bit more indifferent towards them. Regardless, if you like Craisins and white chocolate, you’ll likely enjoy today’s recipe. A bit less sweet than your average cookie, these are a light and summery cookie great for lunches and snacks (or dinner, I don’t judge). They freeze exceptionally well in case you want to make a double batch and store the extras. (As if you can have extra cookies, ha!)

Oatmeal Craisin White Chocolate Chip Cookies {{Baking Bytes}}

I love these cookies for their light texture and cranberry white chocolate combo, but also because they feel just a bit healthier than the usual peanut butter and chocolate combos you find ’round these parts. Obviously they’re still cookies, but I feel slightly less guilty having a few of these. (Psyche! I never feel guilty eating cookies.) And cranberries are fruit, and fruit is healthy, so basically these are healthy, right?

My favorite part about these cookies is that even though they taste summery to me, they have no seasonal ingredients, which means you can make them all year round. Especially in late January after the Christmas fun has worn off and spring isn’t quite on the horizon. They are also super easy and take minimal measuring cups, which are always extra points in my book.

Oatmeal Craisin White Chocolate Chip Cookies {{Baking Bytes}}

For this recipe I like to use my small 1 Tbsp cookie scoop that results in bite-sized delights. If you prefer a large cookie, you’ll need to bake them an extra minute or two, so bake a test cookie to figure out the timing.

Oatmeal Craisin White Chocolate Chip Cookies

Adapted from Ocean Spray
Makes ~4 dozen small cookies

Ingredients

2/3 cup butter, softened
2/3 cup light brown sugar

2 eggs

1 1/2 cups oats (not quick oats)
1 1/2 cups all-purpose flour
1 tsp baking soda
1/2 tsp salt

2/3 cup Craisins dried cranberries
2/3 cup white chocolate chips

Directions

  1. Preheat oven to 375 degrees Fahrenheit and line two cookie sheets with silicon mats.
  2. Beat butter and sugar on medium speed until fluffy.
  3. Thoroughly beat in eggs.
  4. Whisk together oats, flour, baking soda, and salt in a separate bowl.
  5. Beat in flour mixture in three or four additions, mixing well between each addition.
  6. Gently stir in Craisins and white chocolate chips until well distributed.
  7. Using a 1 Tbsp cookie scoop, drop onto cookie sheets and bake for 8-10 minutes, (I usually do 9) or until lightly browned.
  8. Let cool on cookie sheet for a couple minutes before transferring to a wire rack to cool completely.
  9. Store in an airtight container on the counter for several days, or in the freezer for several weeks.

Lemon Bundt Cake

Hello my friends,  I’ve been busy attempting to find a lemon cake to share with you guys. As mentioned last post, attempt #1 was rather a fiasco, resulting in an overflowing, collapsed mess that was somehow over-baked and under-baked at the same time. And to top it off, it failed to cleanly come out of the pan.

Failure

Disaster.

The following week I tried again, using a new recipe. This recipe baked beautifully but was not quite as lemony as I prefer. I like lemon desserts to smack you in the face with lemon rather than leaving you wondering if that was really lemon flavored after all.

And so this weekend, attempt #3 was meant to boost the lemon flavor from the previous week, which was successful, finally.

Lemon Bundt Cake {{Baking Bytes}}

I finally present to you a fully lemony bundt cake for your springtime pleasure. If, like me, you’re ignoring the attempts at snow outside and the chilly wind, and looking longingly towards the blue patch of sky, bake this cake. This morning was a rather gray day, with flurries of now, but as I type up this post it’s now sunny and nearing 50 degrees.

Lemon Bundt Cake {{Baking Bytes}}

Obviously the weather gods approve of lemon.

Fairly dense but not sickeningly sweet, the lemon scent permeates the air even before you have a taste. The color of sunshine guarantees a smile even on a cloudy day, and the burst of flavor leaves no questions about its contents. Although I love a strong lemon flavor, I realize it’s not for everyone. If you prefer it a bit more subtle, leave out the syrup step entirely. If you want the experience to have a bit more ka-pow (definitely a technical term), the syrup will give you that. Add as much or as little of it as you like, but make sure you poke deep holes into the cake to allow the syrup to permeate all the way through, or you’ll be left with a soggy bottom/middle that sticks to your wire rack. Don’t be afraid of the holes, they won’t show once the cake is inverted.

Lemon Bundt Cake {{Baking Bytes}}

This is an easy cake, and although a teensy bit time-consuming, it’s very beginner friendly. It would make a delightful addition to any table, sure to please any lemon fan. If you do decide to forego the syrup step, I recommend using a thinner glaze than shown here so you can cover the entire cake. The glaze is a necessary complement to the plainer cake and this will ensure you have some with every bite.

Lemon Bundt Cake {{Baking Bytes}}

Lemon Bundt Cake

Adapted from Baking Bites
Serves 8-12

Ingredients

Cake

3 cups all-purpose flour
1 tsp baking powder
1/2 tsp baking soda
1/2 tsp salt

3/4 cup butter, room temp
1 1/2 cups sugar

3 large eggs
2 Tbsp fresh lemon zest

1/2 cup fresh lemon juice
1/2 cup buttermilk

Syrup

1/4 cup fresh lemon juice
1/2 cup sugar

Glaze

1 1/4 cup powdered sugar
1-3 Tbsp fresh lemon juice

Directions

  1. Preheat oven to 350 degrees Fahrenheit. Butter and flour a 10+ cup bundt pan.
  2. Whisk together flour, baking powder, baking soda, and salt. Set aside.
  3. In a large bowl, beat butter and cream on medium speed until lightly colored and fluffy.
  4. Add eggs one at a time, beating until just combined between each one.
  5. Stir in lemon zest.
  6. Add one third of the flour mixture and beat until just incorporated.
  7. Repeat with lemon juice, one third of flour mixture, buttermilk, and remaining flour mixture (in that order), stirring just until incorporated with each addition.
  8. Scoop into prepared pan, gently smoothing out the top.
  9. Bake for 40-45 minutes, or until a toothpick comes out mostly clean.
  10. During the last 10 minutes of baking, heat 1/4 cup lemon juice and 1/2 sugar to boiling, then remove from the heat.
  11. Immediately after removing from the oven, poke deep holes in the bottom of the cake, and slowly pour the lemon syrup evenly over it, letting it soak into the cake.
  12. Cool in pan for 15 minutes, then carefully invert onto a wire rack to cool completely.
  13. After the cake is cooled, vigorously stir together powdered sugar and lemon juice, adding more or less of each to desired consistency, and drizzle over the cake.
  14. Let the glaze set 20-30 minutes, then serve on its own or with a scoop of vanilla ice cream.

Notes

  • You’ll need 5-6 lemons for the whole recipe
  • A skewer or a meat thermometer is ideal for poking holes