Peanut Butter Banana Ice Cream {National Ice Cream Month}

Hi friends! I hope you are surviving the massive heatwaves or at least not giggling too hard at those of us struggling through them. Can you believe we are halfway through the year already? Crazy. Although I can definitely say that if this 100-degree (F) weather keeps up I will be ready for winter really soon.

In any case, I have a month of frozen deliciousness for you! If you were around last year, you might remember that July is National Ice Cream Month and to celebrate I posted a new ice cream recipe each week. This year I’m intending to follow the same pattern so I’ll be posting a total of five new recipes on Wednesdays in July. Are you pumped? You should be. (I am.)

Peanut Butter Banana Ice Cream {{Baking Bytes}}

To start us off I thought I’d use a classic flavor: peanut butter. Well maybe you think peanut butter isn’t classic, but it’s a very common flavor in my house and I’d eat it probably five times per day if I didn’t specifically try not to. Whoops. Last year I posted peanut butter fudge ripple and this year I’m bringing you peanut butter banana.

Peanut Butter Banana Ice Cream {{Baking Bytes}}

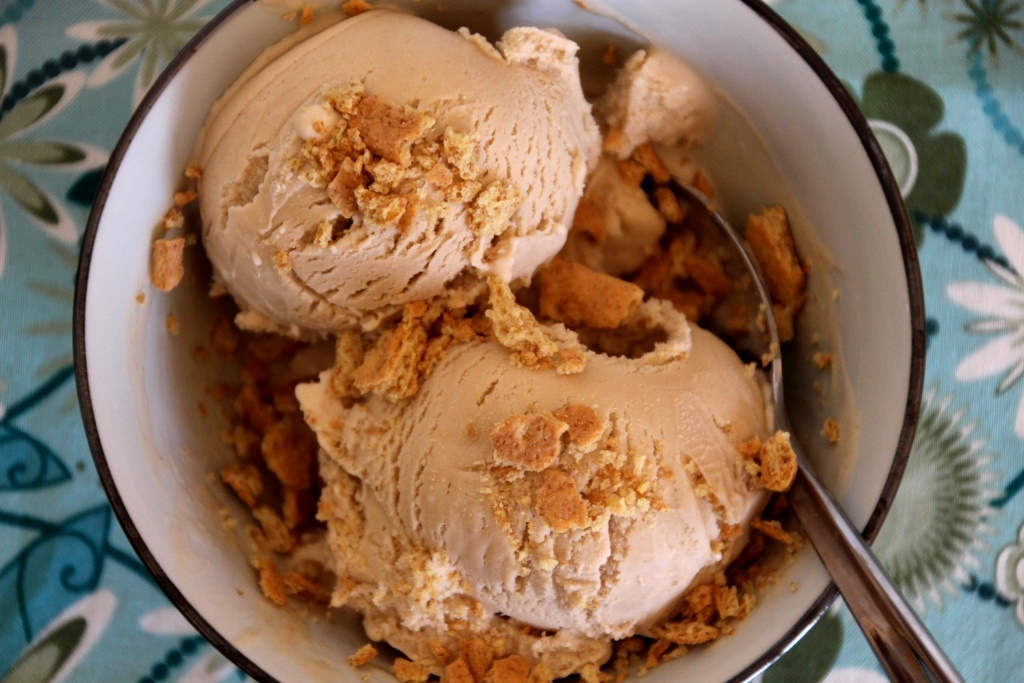
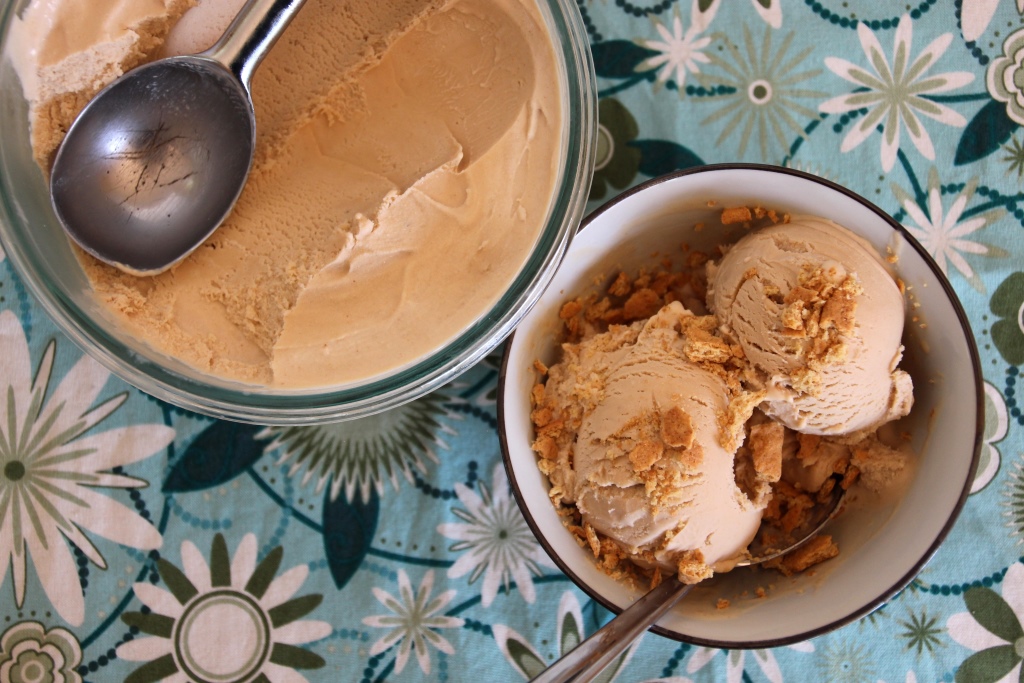
When I was on exchange in Scotland (several years ago now, boy time flies) I discovered a place called the Marble Slab Creamery. Much like Coldstone here in the states, they add your mix-ins right in front of you and then hand over a perfectly balanced treat made directly to your specifications. I’m sure they had like ten thousand calories per cup but I went there several times during my stay when I needed a pick-me-up or I was celebrating or I happened to be near the mall. My favorite combination was peanut butter banana with Graham cracker and I probably ordered one at least half of the times I went. Sprinkled with crushed Graham crackers, this recipe beautifully recreates that memory in a delicious treat I can make from 4000 miles away.

Peanut Butter Banana Ice Cream {{Baking Bytes}}

Smooth and peanut buttery with the lovely addition of banana, this ice cream tastes like summer to me. It’s a fabulous combination you have probably noticed crops up in a ton of my recipes and I doubt I’ll ever get bored with it. If you think no dessert is complete without chocolate, it would also be great with that fudge ripple from last year or topped with some mini chocolate chips.

Peanut Butter Banana Ice Cream {{Baking Bytes}}

Hope you enjoy the kickoff recipe and be sure to check back next week for a less traditional flavor.

Peanut Butter Banana Ice Cream 

Makes ~6 cups

Ingredients

3/4 cup sugar
2 cups heavy whipping cream
1 cup half and half (or milk)
1/2 creamy peanut butter1
1/2 cup egg substitute
2-3 medium ripe bananas2

Directions

  1. Mix all ingredients in a blender until smooth and completely combined; mixture will be somewhat thick.
  2. Cover bowl and chill in the refrigerator at least 4 hours, or overnight.
  3. Freeze according to your ice cream maker’s directions, then place in a freezer-safe bowl to freeze for an additional three hours, or overnight.
  4. Serve topped with crushed Graham crackers and/or your choice of toppings.

Notes

1 You could use chunky if you want, although likely the texture will still be pretty smooth after blending.

For best flavor, bananas should be very ripe or slightly override. I like to use three so the banana flavor is more pronounced, but if you’re more a peanut butter person use fewer of them.

Chocolate Peanut Butter No-Bake Cookies

Hello friends, hope you are having a lovely June. If you’re in one of the places having massive heatwaves, I hope you’re staying cool with smoothies and ice cream and other frozen treats. Shameless self-promotion aside, we’ve had the usual gauntlet of rain and hail and sunshine here that typically befalls June. On Saturday I ran my 10th half marathon in West Yellowstone, which also happened to be my first trail race, and it was as warm as it was beautiful.

2015 Yellowstone Half Marathon

You might think the lack of baked goods the last several posts is due to the weather, but it’s actually because my oven is broken. It’s not holding temperature correctly which doesn’t work well for delicate items like cookies and quickbreads. Due to this, M has been making no-bake cookies, which is one of his standbys for when I don’t get around to baking. (The other is brownies, but that also requires an oven, obviously.) Since they’ll probably be a staple until the oven situation is resolved, I thought I’d share them here.

No-Bake Cookies {{Baking Bytes}}

These cookies are quite rich but they have a great peanut butter chocolate flavor, and are super quick to put together. They stay soft and delicious for about a week and are extra yummy with a tall glass of milk. I’ll admit they are really sweet (2 cups of sugar will do that) but they’re an excellent go-to treat when you need something fast to satiate that chocolate craving.

Whip up a batch for the week (or the day) and give your oven a break.

No-Bake Cookies {{Baking Bytes}}

Chocolate Peanut Butter No-Bake Cookies

Borrowed from M
Makes 4+ dozen one-tablespoon cookies

Ingredients

2 cups sugar
1/2 cup butter
1/2 cup milk
1/4 cup cocoa powder

1 tsp vanilla
1/4 cup peanut butter
3.5 – 4 cups Quick Oats (I always use Quaker)1

Directions

  1. Spread wax paper or aluminum foil on the counter (or a cookie sheet if you want to be able to move them).
  2. Combine sugar, butter, milk, and cocoa powder in a medium saucepan and heat over medium until melted.
  3. Increase heat to medium-high and bring to a boil; continue boiling for about 90 seconds.
  4. Stir in remaining ingredients until completely combined.
  5. Using a cookie scoop (or two spoons), scoop cookies onto prepared surface. I usually make them bite-sized (about 1 tablespoon) whereas M prefers a more hefty size (about 3 tablespoons), so feel free to do whatever size you like best.
  6. Allow cookies to cool completely, then store in an airtight container on the counter.

Notes

The fewer oats you use the more gooey the cookies will be. The pictures are using the full amount but we typically use about 3.75 cups.

Makes just under 5 dozen if you do my size, or about 2 dozen if you do his size.

Frozen Peanut Butter Banana Treats

Hi friends. It’s been somewhat rainy and gray here but I’m sharing a summer treat anyway. This is one of my favorite easy snacks and childhood memories all rolled into one. I’m not sure how often we actually had these as kids, but I remember it being a lot and them being awesome. I still make them semi regularly since they keep in the freezer pretty well.

Frozen Peanut Butter Banana Treats {{Baking Bytes}}

Peanut butter mixed with honey makes for a sweet flavor without being terribly unhealthy. Plus bananas! Bananas are healthy. Graham crackers aren’t terrible for you, probably, so all in all it’s a pretty solid choice. Protein and fruit, can’t go wrong. The freezer makes these into a fabulous summer snack for a hot day when you don’t want ice cream. Or your parents won’t let you have ice cream, whatever the case may be.

Even though I set my own dessert rules now, I still like these as a healthier alternative without feeling like I’m depriving myself of deliciousness. Nice and cold on a hot day and perfect for satiating a sweet tooth. Yum.

Frozen Peanut Butter Banana Treats {{Baking Bytes}}

This is a super simple recipe so really there’s not much more to say…other than I suppose if you’re not a peanut butter fan (weirdo) you could use some other kind of nut butter, or I guess Nutella (gross) if you’re into that sort of thing. I typically use roughly a 1-to-1 ratio of peanut butter and honey but it doesn’t really matter that much so long as you end up with about a half cup total, otherwise you won’t have enough for all your crackers. My mom, for example, uses more like a 4-to-1 ratio, so really just go with whatever suits you.

Prepare for hot, lazy days and stick some of these in the freezer now, then later applaud yourself for being so forward-thinking.

Frozen Peanut Butter Banana Treats {{Baking Bytes}}

PS – If you think of a better name for these, let me know. I was not feeling creative.

Frozen Peanut Butter Banana Treats

Adapted from childhood
Makes about 8 treats

Ingredients

1 package (8-9 sheets) Graham crackers

1/4 cup honey
1/4 cup peanut butter

2 small (narrow) ripe bananas

Directions

  1. Carefully break Graham crackers into squares. I like to gently press a knife along the perforation to do this cleanly.
  2. Mix honey and peanut butter together until smooth. Feel free to adjust the proportions!
  3. Spread honey mixture on one side of all crackers.
  4. Slice bananas into approximately 1/4″ pieces.
  5. Top half of the crackers with banana slices and place another cracker on top (peanut butter side down, of course.)
  6. Carefully wrap each sandwich in aluminum foiland place in the freezer several hours, or overnight.2
  7. Enjoy straight out of the freezer on a hot day.

Notes

For my British friends, Digestives work great also. Since they are a little thicker, you may want to use more of the honey mixture per cracker biscuit.

Or use plastic wrap and put them all in a freezer Ziploc.

Blueberry Boy Bait (two ways)

Spring has definitely sprung over here with a high of 72 yesterday (followed by a couple inches of snow this morning), and the warm weather has gotten me thinking about the berry pies and lemony goodness that become more popular in the coming season. I decided something blueberry was definitely in order and perused my bookmarks and Pinterest boards in hopes of seeing something that piqued my interest.

Blueberry Boy Bait {{Baking Bytes}}

It didn’t work (ha) but I did ultimately remember a fabulous blueberry dish I made at home several years ago called Blueberry Boy Bait. The name has always made me giggle and the dish is amazing. A quick Google search brought me right to the lovely post from Smitten Kitchen I so fondly recalled.

Before we get much further, please bear in mind there is absolutely nothing healthy about this. It’s cake. I know there’s no frosting, but it’s like 90% butter (slight exaggeration) and 100% delicious and you should definitely make some. Just know that this is not a health food, and if you’re looking for one of those you should bake some Blueberry Oatmeal Muffins instead.

Blueberry Boy Bait {{Baking Bytes}}

Still here? Excellent. Rich and buttery, fluffy and moist, brimming with blueberries, and topped with a cinnamon & sugar coating I always adore, it’s hard to have just one piece. After making it again, I’m honestly not sure why I waited so long and it will definitely be put in a more regular baking rotation. It pairs equally well with a cup of coffee for breakfast or snack, and a glass of milk for dessert. Or a handful straight from the cooling rack to your mouth because you “accidentally” didn’t grease the pan well enough and had to hide the evidence.

Blueberry Boy Bait {{Baking Bytes}}

The blueberries do always sink to the bottom for me, but I consider this a feature rather than a problem, as it results in a perfectly proportioned cake-to-blueberry ratio with every bite. The cake is somewhat fragile, so be careful removing it from the pan. If you’re concerned about presentation, you could bake them in a muffin tin with paper liners instead, but I have not personally tried this.

Blueberry Boy Bait - Lemon {{Baking Bytes}}

Since spring was in the air, I tried a lemony version as well. I definitely prefer the original, but this is a nice alternative if you’re in the mood for it.

Blueberry Boy Bait

Adapted from Smitten Kitchen
Makes 8×8″ dish

Ingredients

1/2 cup unsalted butter, room temp
1/4 cup packed brown sugar
1/4 cup white sugar

1 cup flour
1 1/2 tsp baking powder
1/2 tsp salt

1 egg

1 cup whole milk (2% worked great)

1/4 cup blueberries, fresh or frozen (do not thaw)
1 Tbsp flour

1/4 cup sugar
1/2 tsp ground cinnamon
1/4 cup blueberries, fresh or frozen (do not thaw)

Directions

  1. Preheat oven to 350 degrees Fahrenheit. Grease an 8×8″ baking dish and line the bottom with parchment paper. Grease the paper too.
  2. Add butter and sugars to the bowl of an electric mixer and beat for about two minutes on medium-high speed until light and fluffy.
  3. Meanwhile, whisk together flour, baking powder, and salt in a small bowl. Set aside.
  4. Add eggs to butter mixture one at a time, mixing until just incorporated and scraping the bowl between each one.
  5. Alternate adding flour (1/3 at a time) and milk, starting and ending with flour.
  6. Toss 1/4 cup blueberries with remaining one tablespoon flour and fold into batter. (It won’t look like enough, but I promise it doesn’t need more.)
  7. Spread into prepared pan and sprinkle additional 1/4 cup blueberries onto the batter. Mix together sugar and cinnamon and sprinkle about half over the top.
  8. Bake about 35 minutes or until a toothpick comes out clean and the top doesn’t look super wet.
  9. Immediately sprinkle with additional cinnamon & sugar topping (optional but recommended). Cool at least 20 minutes in the pan before serving.
  10. Attempt to not eat the entire pan in one sitting, but fail deliciously.

Blueberry Boy Bait - Lemon {{Baking Bytes}}

Lemon Blueberry Boy Bait

Make as above except substitute 3 tablespoons of milk with lemon juice. Omit cinnamon sugar topping. Whisk 3/4 cup powdered sugar with 1-2 tablespoons lemon juice and use to lightly glaze cooled cake.

Mint Grasshopper Brownies

For my first two years of college I lived on campus, which meant living off dining hall food. For the most part this was just fine because we had unlimited eating and entries, and a pretty wide variety of things to eat. I’ll admit some things were less edible than others and the menu got very repetitive after a while, but overall it was great. There are definitely days where I wish someone else was in charge of what I eat for dinner. (Excepting dessert I am a pretty lazy cook, if you’re new here.)

Grasshopper Brownies {{Baking Bytes}}In any case, one thing they did great was dessert. In particular, mint brownies. These were hands down the favorite of M and he used to watch the menu for Mint Brownie Day (as he called it) so he could be sure to have as many as possible. I will admit they were quite delicious even though I’m not normally a fan of frosted brownies.

I have since tried several recipes in an attempt to recreate them, and while I’ve not been 100% successful, this recipe is pretty dang good. Chocolatey brownie, creamy mint, shiny ganache, and best of all: no melting anything on the stove. I’m very lazy when it comes to brownies because there’s really nothing that beats the Ghirardelli box mixes in taste, texture, or convenience. But I decided to do the from-scratch thing on a whim because it’s good to remind myself I can actually make brownies for real.

Grasshopper Brownies {{Baking Bytes}}The first recipe I tried was kind of a pain in the butt. All three pieces required melting chocolate and/or butter on the stove and, well, ain’t nobody got time for that. The mint filling was also a bit less dense than I was looking for so I decided to try a new recipe. (The brownie portion was, however, extremely delicious when frozen so if you’re in a mood for melting chocolate, head on over to Love and Olive Oil.)

Grasshopper Brownies {{Baking Bytes}}
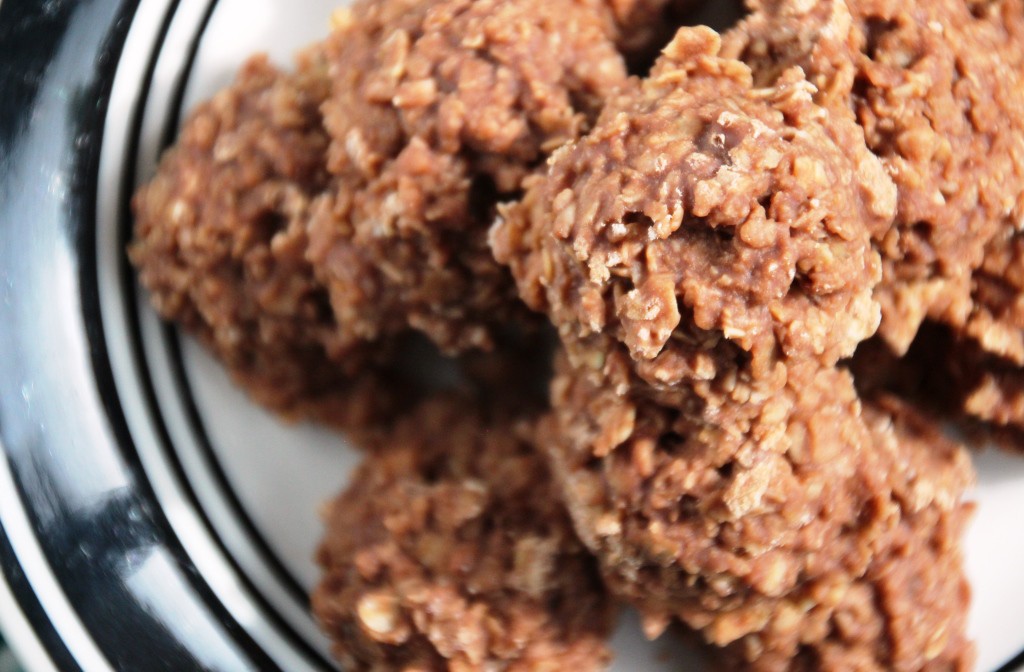
Two weeks later, after searching Pinterest high and low, I Frankensteined together my own recipe from three separate ones. Dense chocolatey brownie, creamy mint frosting, and that same shiny ganache come together in a delightful combination with no stove required. The lazy baker in me is thrilled about that last bit.

Below find the recipes for each layer with my adaptations. These freeze great so make a batch, pop in the freezer, and enjoy at your leisure. They are pretty rich so likely they’ll last you awhile, but I certainly won’t judge you if they don’t.

Grasshopper Brownies {{Baking Bytes}}Grasshopper Brownies

Adapted from Your Cup of Cake (brownie), How Sweet Eats (mint filling), and Love and Olive Oil (ganache)
Makes 16 brownies (8×8 pan)

Ingredients

Brownies
1/2 cup unsalted butter, melted
3/4 cup sugar
1/4 cup cocoa powder
1 tsp vanilla

2 eggs

3/4 cup flour
1/4 tsp salt

1/4 cup mini chocolate chips (optional)

Mint Filling
1 cup powdered sugar
1/4 cup unsalted butter, melted
1 tsp vanilla
1-2 Tbsp Crème de menthe

Chocolate Ganache
1/3 cup chocolate chips
1/4 cup unsalted butter

Directions

  1. For the brownies: Preheat the oven to 350 degrees Fahrenheit. Line an 8×8″ pan with parchment paper and spray with cooking spray. Set aside.
  2. Combine butter, sugar, cocoa, and vanilla in the bowl of a stand mixer. Stir together on low until well combined.
  3. Add eggs one at a time and mix well after each one. Mixture should be pretty smooth.
  4. Add flour and salt and mix until just incorporated. Stir in chocolate chips, if desired.
  5. Spread evenly into prepared pan and bake for 25 minutes, checking a few minutes early to make sure they don’t over bake. A toothpick should come out a teensy bit wet.
  6. Let brownies cool completely before frosting.
  7. For the mint filling: In the bowl of your stand mixer, combine powdered sugar, butter, and vanilla. Mix until completely combined and fluffy.
  8. Add desired amount of Creme de menthe, mixing well on high speed each time. Filling should be fluffy and somewhat lightened in color when it’s ready (this will take a minute or two).
  9. Spread on top of cooled brownies and place in the freezer while you make the chocolate ganache.
  10. For the ganache: Put chocolate chips and butter in a microwave-safe bowl, heat for 30 seconds, stir, and repeat 3x or until mixture is completely smooth.
  11. Pour chocolate topping over the mint frosting and gently tilt the dish to coat entirely. Let sit on the counter (or in the freezer) until chocolate has set. Cut and serve immediately or cover and return to the freezer for storage.
  12. For pretty slices: Gently cut forward and back until you are through the ganache, then press firmly down, wiping off the knife if anything sticks to it. This will prevent the chocolate from cracking. Photography tip: Pick up from the sides to avoid fingerprints.