Grandma’s Chocolate Fudge

Grandma's Chocolate Fudge {{Baking Bytes}}

As we carry on through December, I imagine many people are working on finding holiday gifts. Food is a great gift, especially for people you don’t know very well or just want to give a small token of appreciation (teachers, coworkers, etc). My mom and I often prepared small bags of almond roca or other goodies for my teachers all through middle school, and she still prepares platters of almond roca, spritz, clothespin cookies, or other treats for family friends and business associates.

Grandma's Chocolate Fudge {{Baking Bytes}}

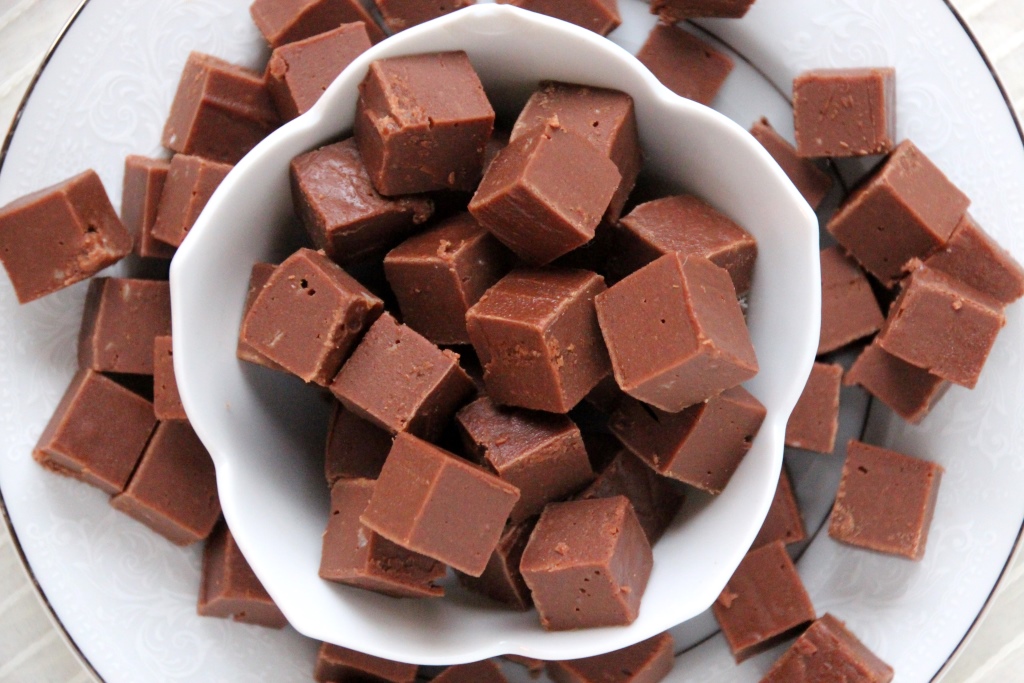
My grandma always made this fudge every Christmas, although she also always put walnuts in it. Delicious chocolatey fudge surrounding silly crunchy walnuts. Clearly I don’t care for nuts in fudge (or really much of anything besides almond roca) and so I have omitted them from this recipe. Feel free to add them back in if that’s your style.

Grandma's Chocolate Fudge {{Baking Bytes}}

Fudge seems to go over well with most people and so is routinely included in our line-up. This recipe is based off my grandmother’s recipe, as is probably obvious by the name. It has taken a little bit of research to get it right as the her recipe specified two packages of this and a package of that, and the size of “packages” have changed quite drastically over the last few decades. Nonetheless, we prevailed and have come up with the one below.

Grandma's Chocolate Fudge {{Baking Bytes}}

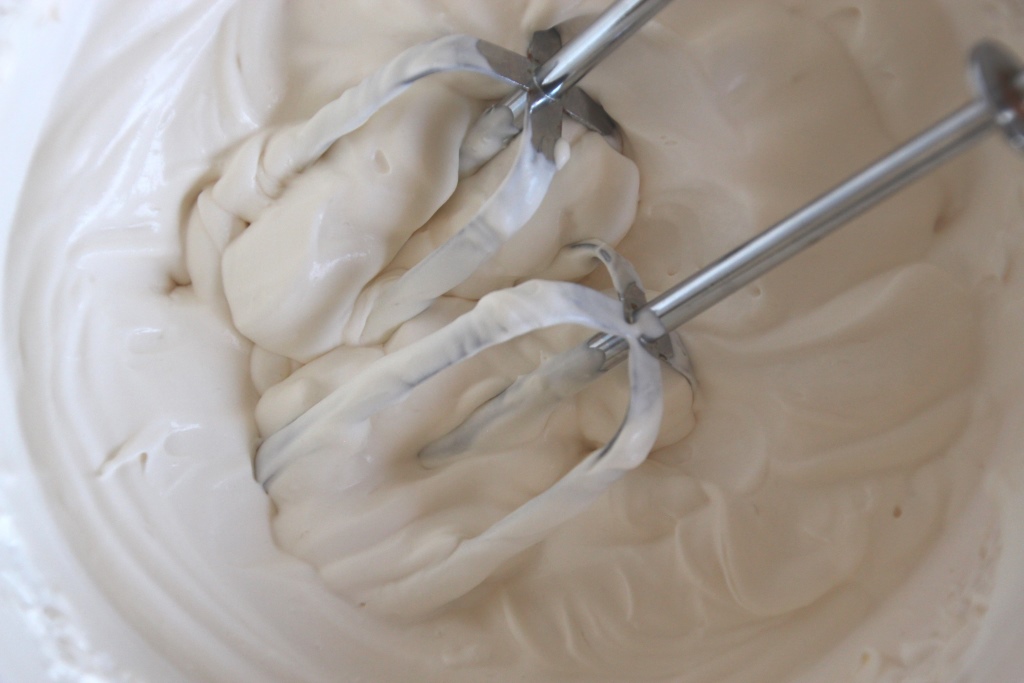
Last year we hand-stirred the recipe, as is tradition, and not only was it an immense amount of work but we had to enlist my dad to finish the job. We have changed the proportions a bit so it might be manageable for one of less than Herculean arm strength, but in spite of that I still opted to use my stand mixer. It worked beautifully and is much, much less effort to get that velvety chocolate experience you’re looking for. But if you’re looking for a workout while you make piles of decadent treats this season, feel free to stir by hand.

Grandma's Chocolate Fudge {{Baking Bytes}}

Grandma also used margarine instead of butter, I imagine largely because it was cheaper. I’ve made it both ways and honestly I can’t much tell the difference with regards to flavor, but the batch made with margarine turned out a decent amount softer. I imagine this is mostly because margarine has a lower melting temperature, but beating in an extra couple minutes could help too. I personally don’t like a sticky fudge so I put that batch in the freezer, which makes it perfect in my mind. Choose your own adventure here, or just use whatever you have on hand – it’ll be delicious regardless.

Grandma’s Chocolate Fudge

Adapted from my grandmother’s recipe
Makes a lot

Ingredients

2 cups chocolate chips
2 sticks (1 cup total) salted butter, each cut into fourths
20 large marshmallows
2 T vanilla

4 cups sugar
12 oz can evaporated milk

Directions

  1. Line a baking dish or lipped cookie sheet with aluminum foil. Set aside.2
  2. In the bowl of a stand mixer, add chocolate chips, margarine or butter, marshmallows, and vanilla1. Set aside. You must do this before boiling the milk otherwise it’ll cool down too much and won’t mix completely.
  3. In a medium-large saucepan, whisk together sugar and evaporated milk (make sure you have a fair amount of extra space, it’ll grow).
  4. Over medium-high heat, bring milk mixture to full rolling boil, stirring often.
  5. Continue to boil for 6 minutes (I recommend setting a timer), stirring constantly.
  6. Add hot milk mixture to remaining ingredients (don’t scrape the pot too vigorously or you will end up with sugar crystals in your fudge), and beat on low with the normal beater attachment (or by hand) for at least 5 minutes (again, set a timer), until marshmallows are completely dissolved. Scrape sides every minute or two during this time to ensure an even mix.
  7. Pour into foil-lined pan, smooth out the top, and let cool completely. An unheated garage or porch if you don’t have fridge space is great for speeding up this process.
  8. Remove from foil and cut into cubes. I suggest moving it to a cutting board or you will have many small squares of foil to peel off later.
  9. Package as desired and give as much of it away as possible so you don’t eat it all.

Notes

If you like, you can add up to two cups chopped nuts or hard candy. Personally I do not like uneven texture in fudge or baked goods, but it’s certainly an option if you’re into it.

I like to use a cookie sheet so the fudge is a little thinner, but either will work. It may not fill a whole sheet so line it with foil and make a new edge about halfway, making sure you have extra foil sticking up. After you pour it in and start to spread it, you can adjust the edge to hold more or less fudge as necessary to keep it the right thickness.

Coffee Fudge Ripple Ice Cream {National Ice Cream Month}

[Welcome! In case you missed it, this month is National Ice Cream month. Each Wednesday I am sharing a new ice cream recipe for the entire month of July. If you missed the first three recipes, they can be found herehere, and here.]

If you’re not a coffee drinker, you probably just want to skip this one. But if you do like coffee, then boy do I have the recipe for you.

Coffee ice cream is actually something I’ve been ruminating on for quite a while, but wasn’t quite ready to take the plunge. I am not fond of the way instant coffee tastes and I wasn’t thrilled at the idea of buying yet another extract. Obviously the ground coffee I already buy was the answer, but it seemed like a more intimidating adventure than I was prepared for so I put it off for several months. However, the heat wave we had in June reminded me of iced coffee, which reminded me of coffee ice cream, which inspired me to peruse Pinterest for methods.

Coffee Fudge Ripple Ice Cream {{Baking Bytes}}

While instant coffee was by far the most common, I immediately wrote off any recipes that employed it. I saw several that brewed coffee milk as the first step, which seemed promising, so I decided to give it ago. Since I typically use half and half in my recipes, that’s what I tried first. Unfortunately it was too thick for the coffee to brew well, and was nearly impossible to squeeze out of the grounds without breaking the coffee filters.

Coffee Fudge Ripple Ice Cream {{Baking Bytes}}

Take 2: Whole milk. This worked fabulously and was surprisingly easy. One of my batches I accidentally left brewing closer to an hour. This made it incredibly strong but since I like strong flavors, I was thrilled with this outcome. Feel free to taste test yours at the 30-minute mark and maybe leave it in a little longer if it tastes too weak to you. Bear in mind, however, that it’ll taste somewhat stronger once it’s in ice cream form. This seems counter-intuitive but it’s the experience I had so I thought I would pass on the knowledge.

Coffee Fudge Ripple Ice Cream {{Baking Bytes}}

By itself, this recipe tastes like an extra creamy, rather sweeter latte. Very smooth and absolutely fabulous on its own, but for visual interest and to go a bit more the mocha route, I added a small chocolate ripple to my batches. This is absolutely not necessary but it is extremely delicious, so I included the recipe and method for this below. Long-time readers will recognize it from last year’s Peanut Butter Fudge Ripple recipe. Add more or less chocolate to suit your preferences, or just make the recipe to use as a topping on the fly.

Coffee Fudge Ripple Ice Cream {{Baking Bytes}}

As a note, I found this recipe froze harder due to its lower fat and sugar than my usual concoction. To combat this, I added a little Kahlúa to my recipe. This is 100% optional but makes the ice cream much easier to dish straight out of the freezer as well as kicking up the coffee flavor a notch. You could also use vodka if you don’t want any added flavor, or basically any alcohol or liqueur of your choice. Baileys or vanilla would be a great addition if you want to switch up the experience a bit.

Chocolate-covered espresso beans make for a lovely, crunchy topping, as well as giving people a hint to the flavor they’re about to enjoy.

Coffee Fudge Ripple Ice Cream {{Baking Bytes}}

If for some reason you’re not a coffee fan but have still made it this far into the post, make sure you check back next week for a totally different taste experience.

Coffee Ice Cream 

Makes ~6 cups

Ingredients

1 cup whole milk (not half and half; 2% is okay if you must)
1/2 cup ground coffee

3/4 cup sugar
2 cups heavy whipping cream
1/2 cup egg substitute
1-2 Tbsp alcohol, optional

Directions

  1. Place coffee in a sealed coffee filter, cheesecloth, etc. so the grounds don’t get in your ice cream. I used a clip to keep a regular coffee filter closed around the grounds, using one filter per 1/4 cup of coffee.
  2. In a small saucepan, heat milk on medium until it just starts to boil, then remove from heat. Place coffee (in filter!) in the milk and allow to steep for about at least 30 minutes. Remove coffee (and any escaped grounds), squeezing grounds gently to release the most flavorful milk.
  3. In a large bowl, whisk together remaining ingredients with coffee milk until completely combined.
  4. Cover bowl and chill in the refrigerator at least 8 hours, or overnight.
  5. Freeze according to your ice cream maker’s directions, then place in a freezer-safe bowl to freeze for an additional three hours, or overnight. Or follow fudge ripple ice cream recipe below.
  6. Top with chocolate-covered espresso beans for some extra flair and a little crunch.

Notes

1 You could use decaf if you’re concerned about the caffeine at night, I used it in my second batch and it was just great. Regardless of caffeine content, pick a coffee you like to drink since the flavor is very prominent.

I found that with the reduced fat and sugar from my usual recipe the ice cream froze a lot harder. The easiest way to fix this is to add alcohol, so that’s what I did. I used 2 Tbsp of Kahlúa which not only kicked up the coffee flavor an extra notch, but made it possible to dish the ice cream straight out of the freezer. If you’re using straight alcohol (e.g. vodka) 1 Tbsp is probably enough, if you’re using a liqueur (e.g. Kahlúa, Baileys) then the full two is probably better. Or, add up to 1/4 cup if you want the added flavoring to shine through.

Fudge Ripple

Borrowed from Brown Eyed Baker
Makes 1+ cups1

Ingredients

½ cup sugar
1/3 cup light corn syrup
½ cup water
6 tablespoons unsweetened cocoa powder2

½ teaspoon vanilla extract

Directions

  1. In a medium saucepan, whisk together all ingredients except vanilla. Cook over medium heat, whisking often, until the sauce comes to a low boil.
  2. Continue cooking for another minute, whisking almost continuously.
  3. Remove sauce from the heat, stir in the vanilla, and let cool in the pot for several minutes.
  4. Chill in the fridge for at least 30 minutes before using in ice cream.

Notes

The quantity varies depending on cooking time, in my experience. I used about 1/2 cup in my ice cream and put the rest in the fridge to use later. You can also freeze it but you may need to take it out for a bit before it becomes pourable.

The original recipe calls for Dutch-processed cocoa powder but I just used Hershey’s because that’s what I always have on hand. I used one tablespoon dark cocoa powder and the rest regular.

Fudge Ripple Ice Cream

Ingredients

1 recipe ice cream of choice, chilled but not churned
1 recipe of fudge ripple (above), chilled

Directions

  1. If you haven’t already, place a freezer-safe bowl in the freezer.
  2. Freeze ice cream according to your ice cream maker’s directions.
  3. Remove bowl from freezer, and drizzle some chocolate sauce on the bottom.
  4. Gently spread about one cup of ice cream into the bowl, and top with another drizzle of chocolate sauce. Avoid stirring or the ice cream will look muddy. Repeat with remaining ice cream (you may have sauce leftover), finishing with a sauce drizzle on top. Pro tip: end with just a small drizzle on top or it could mix together once the lid is on.
  5. Return bowl to freezer for about 3 hours, or until ice cream is firm.

Chocolate Peanut Butter No-Bake Cookies

Hello friends, hope you are having a lovely June. If you’re in one of the places having massive heatwaves, I hope you’re staying cool with smoothies and ice cream and other frozen treats. Shameless self-promotion aside, we’ve had the usual gauntlet of rain and hail and sunshine here that typically befalls June. On Saturday I ran my 10th half marathon in West Yellowstone, which also happened to be my first trail race, and it was as warm as it was beautiful.

2015 Yellowstone Half Marathon

You might think the lack of baked goods the last several posts is due to the weather, but it’s actually because my oven is broken. It’s not holding temperature correctly which doesn’t work well for delicate items like cookies and quickbreads. Due to this, M has been making no-bake cookies, which is one of his standbys for when I don’t get around to baking. (The other is brownies, but that also requires an oven, obviously.) Since they’ll probably be a staple until the oven situation is resolved, I thought I’d share them here.

No-Bake Cookies {{Baking Bytes}}

These cookies are quite rich but they have a great peanut butter chocolate flavor, and are super quick to put together. They stay soft and delicious for about a week and are extra yummy with a tall glass of milk. I’ll admit they are really sweet (2 cups of sugar will do that) but they’re an excellent go-to treat when you need something fast to satiate that chocolate craving.

Whip up a batch for the week (or the day) and give your oven a break.

No-Bake Cookies {{Baking Bytes}}

Chocolate Peanut Butter No-Bake Cookies

Borrowed from M
Makes 4+ dozen one-tablespoon cookies

Ingredients

2 cups sugar
1/2 cup butter
1/2 cup milk
1/4 cup cocoa powder

1 tsp vanilla
1/4 cup peanut butter
3.5 – 4 cups Quick Oats (I always use Quaker)1

Directions

  1. Spread wax paper or aluminum foil on the counter (or a cookie sheet if you want to be able to move them).
  2. Combine sugar, butter, milk, and cocoa powder in a medium saucepan and heat over medium until melted.
  3. Increase heat to medium-high and bring to a boil; continue boiling for about 90 seconds.
  4. Stir in remaining ingredients until completely combined.
  5. Using a cookie scoop (or two spoons), scoop cookies onto prepared surface. I usually make them bite-sized (about 1 tablespoon) whereas M prefers a more hefty size (about 3 tablespoons), so feel free to do whatever size you like best.
  6. Allow cookies to cool completely, then store in an airtight container on the counter.

Notes

The fewer oats you use the more gooey the cookies will be. The pictures are using the full amount but we typically use about 3.75 cups.

Makes just under 5 dozen if you do my size, or about 2 dozen if you do his size.

Mint Grasshopper Brownies

For my first two years of college I lived on campus, which meant living off dining hall food. For the most part this was just fine because we had unlimited eating and entries, and a pretty wide variety of things to eat. I’ll admit some things were less edible than others and the menu got very repetitive after a while, but overall it was great. There are definitely days where I wish someone else was in charge of what I eat for dinner. (Excepting dessert I am a pretty lazy cook, if you’re new here.)

Grasshopper Brownies {{Baking Bytes}}In any case, one thing they did great was dessert. In particular, mint brownies. These were hands down the favorite of M and he used to watch the menu for Mint Brownie Day (as he called it) so he could be sure to have as many as possible. I will admit they were quite delicious even though I’m not normally a fan of frosted brownies.

I have since tried several recipes in an attempt to recreate them, and while I’ve not been 100% successful, this recipe is pretty dang good. Chocolatey brownie, creamy mint, shiny ganache, and best of all: no melting anything on the stove. I’m very lazy when it comes to brownies because there’s really nothing that beats the Ghirardelli box mixes in taste, texture, or convenience. But I decided to do the from-scratch thing on a whim because it’s good to remind myself I can actually make brownies for real.

Grasshopper Brownies {{Baking Bytes}}The first recipe I tried was kind of a pain in the butt. All three pieces required melting chocolate and/or butter on the stove and, well, ain’t nobody got time for that. The mint filling was also a bit less dense than I was looking for so I decided to try a new recipe. (The brownie portion was, however, extremely delicious when frozen so if you’re in a mood for melting chocolate, head on over to Love and Olive Oil.)

Grasshopper Brownies {{Baking Bytes}}Two weeks later, after searching Pinterest high and low, I Frankensteined together my own recipe from three separate ones. Dense chocolatey brownie, creamy mint frosting, and that same shiny ganache come together in a delightful combination with no stove required. The lazy baker in me is thrilled about that last bit.

Below find the recipes for each layer with my adaptations. These freeze great so make a batch, pop in the freezer, and enjoy at your leisure. They are pretty rich so likely they’ll last you awhile, but I certainly won’t judge you if they don’t.

Grasshopper Brownies {{Baking Bytes}}Grasshopper Brownies

Adapted from Your Cup of Cake (brownie), How Sweet Eats (mint filling), and Love and Olive Oil (ganache)
Makes 16 brownies (8×8 pan)

Ingredients

Brownies
1/2 cup unsalted butter, melted
3/4 cup sugar
1/4 cup cocoa powder
1 tsp vanilla

2 eggs

3/4 cup flour
1/4 tsp salt

1/4 cup mini chocolate chips (optional)

Mint Filling
1 cup powdered sugar
1/4 cup unsalted butter, melted
1 tsp vanilla
1-2 Tbsp Crème de menthe

Chocolate Ganache
1/3 cup chocolate chips
1/4 cup unsalted butter

Directions

  1. For the brownies: Preheat the oven to 350 degrees Fahrenheit. Line an 8×8″ pan with parchment paper and spray with cooking spray. Set aside.
  2. Combine butter, sugar, cocoa, and vanilla in the bowl of a stand mixer. Stir together on low until well combined.
  3. Add eggs one at a time and mix well after each one. Mixture should be pretty smooth.
  4. Add flour and salt and mix until just incorporated. Stir in chocolate chips, if desired.
  5. Spread evenly into prepared pan and bake for 25 minutes, checking a few minutes early to make sure they don’t over bake. A toothpick should come out a teensy bit wet.
  6. Let brownies cool completely before frosting.
  7. For the mint filling: In the bowl of your stand mixer, combine powdered sugar, butter, and vanilla. Mix until completely combined and fluffy.
  8. Add desired amount of Creme de menthe, mixing well on high speed each time. Filling should be fluffy and somewhat lightened in color when it’s ready (this will take a minute or two).
  9. Spread on top of cooled brownies and place in the freezer while you make the chocolate ganache.
  10. For the ganache: Put chocolate chips and butter in a microwave-safe bowl, heat for 30 seconds, stir, and repeat 3x or until mixture is completely smooth.
  11. Pour chocolate topping over the mint frosting and gently tilt the dish to coat entirely. Let sit on the counter (or in the freezer) until chocolate has set. Cut and serve immediately or cover and return to the freezer for storage.
  12. For pretty slices: Gently cut forward and back until you are through the ganache, then press firmly down, wiping off the knife if anything sticks to it. This will prevent the chocolate from cracking. Photography tip: Pick up from the sides to avoid fingerprints.

Chocolate Irish Car Bomb Sundae

Oh yeah, you read that title right. Irish Car Bomb Sundae. Mixing alcohol and ice cream like a pro. If you’ve been reading awhile, you know that alcoholic ice cream isn’t a new thing here (Baileys and chocolate ‎Kahlúa have both made appearances) but this, this takes it to a whole new level. Note: if you don’t want the whole back story, skip the next four paragraphs.

Whilst planning my baking adventures Sunday morning, I realized we were getting quite close to St. Patrick’s Day. And due to this planning fail, I also realized yesterday was my last usual posting day before the holiday. The mint brownies I had planned would work, true, but I wanted something a bit more festive, a bit less overdone. In my head, Guinness is the most quintessential St. Patty’s Day beverage, making the Irish Car Bomb the most quintessential (although not very politically correct) cocktail of the day. Personally I’m not a fan of Guinness, and anything that curdles while you’re drinking just sounds like a terrible idea, but I’d seen ICB-inspired desserts before that sounded awesome, like cake and donuts. That’s when it hit me: ice cream!

Guinness Chocolate Ice Cream {{Baking Bytes}}

Two years ago a delightful coworker and friend made the team Guinness chocolate milkshakes. (At work. Before 11am. It was awesome.) Even as someone who doesn’t care for Guinness, I found them delicious. And so, the chocolate ICB sundae began to take shape. Guinness chocolate ice cream, of course, Baileys whipped cream, of course, but how to work in the whiskey? It was a terrible dilemma to be sure. Coincidentally, an entirely different friend posted recently about making whiskey dulce de leche. Whiskey caramel it is!

Whiskey Caramel Sauce {{Baking Bytes}}

Unfortunately, it was after 11am on Sunday when I had this revelation and so there was not enough time to create this concoction before my usual Monday post schedule. Be that as it may, I made the brownies, walked to the store for Guinness (twice, due to forgetting my ID the first time), and began the journey towards bliss.

Modifying my chocolate ice cream recipe was easy enough, so I got that into the freezer between brownie layers and cleaning and searching for whiskey caramel recipes. Having never actually made caramel before I was a bit nervous, but figured now was as good a time as any to give it a try. After finding a recipe and checking my cupboards for the ingredients (we only had Scottish whisky but…shhh. I’m sorry Colby.), I filed it away to make the next day. Normally I rarely do blog things after work, because I’m tired and hungry and just generally more of a mid-afternoon baker. However, my sheer excitement about this recipe resulted not only in making the remaining layers, but photographing everything and writing this post all in the same evening. Phew. But it’s worth it, oh so worth it.

Chocolate Irish Car Bomb Sundae {{Baking Bytes}}

Smooth and creamy chocolate ice cream accented by the unmistakable flavor of Guinness beer, topped with a relatively light Baileys whipped cream, and drizzled with a caramel brilliantly highlighted with whiskey. None of the flavors are individually overwhelming and they all combine together in sundae perfection. Not a dessert for the fainthearted, a small portion goes a long way. I wouldn’t personally eat the amount shown in my photos, for what it’s worth.

All three recipes are easy-peasy and come together quickly, minus chilling time. Very beginner friendly but fun for an experienced cook as well, and also extremely delicious. Which, let’s face it, that’s really the important aspect here. They are also easy to adjust to taste. Feel free to adjust the cocoa powder or Guinness a bit, and use more or less Baileys in the whipped cream. I can’t vouch for how adjusting the whiskey in the caramel would work, but I expect it would be just fine to add a little more or less. It is not super pronounced, which I felt was perfect. I made only a half batch of the original caramel recipe, so double mine if you want lots of leftovers or you’re feeding a crowd.

Chocolate Irish Car Bomb Sundae {{Baking Bytes}}

Need I say more? Really, the photos speak for themselves. I’m not even sure why you’re still reading instead of out shopping for ingredients.

Chocolate Irish Car Bomb Sundae {{Baking Bytes}}

If you’re looking to impress yourself (or I guess some other people) for a St. Patrick’s Day party this year, look no further. Below, find the recipes for Guinness chocolate ice cream, Baileys whipped cream, whiskey caramel sauce, and instructions for the Irish Car Bomb sundae. Make one, make them all. Anything here is a great addition to any evening, but the trifecta is sure to wow.

And if you’re curious, the mint brownies will be up here next Monday, March 16th.

Guinness Chocolate Ice Cream {{Baking Bytes}}

Guinness Chocolate Ice Cream

Makes about 5 cups

Ingredients

1 cup heavy cream
1 cup Guinness beer
1/2 cup half & half
1 cup sugar
1/4 – 1/3 cup cocoa powder
1 tsp vanilla

Directions

  1. Combine all ingredients in a blender and blend until well combined and smooth.
  2. Place mixture in the fridge until completely chilled (temp should be less than 40 degrees Fahrenheit.)
  3. Chill a glass or other freezer-safe, lidded bowl in the freezer while you churn the ice cream according to your ice cream maker’s directions.
  4. Transfer ice cream to bowl and return to the freezer for at least 4 hours before serving. (Freezer time is not optional with this recipe.)

Baileys Whipped Cream {{Baking Bytes}}

Baileys Whipped Cream

Adapted from The Cupcake Project
Makes about 3 cups

Ingredients

1 cup heavy whipping cream
1/4 cup sugar
2 Tbsp Baileys Irish cream liqueur

Directions

  1. Using an electric mixer (whisk attachment for a stand mixer) beat the cream and sugar until very soft peaks form.
  2. Gently stir in the Baileys until just incorporated.
  3. Continue beating the cream until soft-medium peaks form (or whatever consistency you like).
  4. Serve immediately, storing leftovers in an air-tight container in the fridge.

Whiskey Caramel Sauce {{Baking Bytes}}

Whiskey Caramel Sauce

Borrowed from Epicurious
Makes about 1/2 cup

Ingredients

1/2 cup granulated sugar
2 Tbsp water

3 Tbsp Irish whiskey
2 Tbsp heavy cream
1/8 tsp salt

Directions

  1. In a small or medium heavy saucepan, bring sugar and water to a boil over medium heat, stirring until sugar dissolves.
  2. Boil without stirring until syrup begins to look golden, about 5-7 minutes.
  3. Continue to boil, stirring occasionally, until color deepens to a rich caramel color. (It make crystallize somewhat during steps 2-3, that’s normal.)
  4. Remove from heat and stir in remaining ingredients. Mixture will splatter so be careful! If the caramel has hardened, return to heat briefly.
  5. Stir caramel until it is smooth and of even color, allowing to cool for a few minutes before serving. Store any leftovers in a sealed container in the fridge and reheat in the microwave in very small time increments – it is quick to boil over.

Chocolate Irish Car Bomb Sundae {{Baking Bytes}}

Chocolate Irish Car Bomb Sundae

Ingredients

Guinness Chocolate Ice Cream
Baileys Whipped Cream
Whiskey Caramel Sauce

Directions

  1. Swirl caramel sauce on the inside of a glass or bowl. (optional)
  2. Scoop in desired amount of ice cream, top with whipped cream, and swirl additional caramel sauce over the whole shebang.
  3. Enjoy immediately and try not to enter a sugar coma.